Learn how to make custom planner stickers with your Cricut Explore Air 2! This is a sponsored post written by me on behalf of Cricut. All opinions are 100% mine.
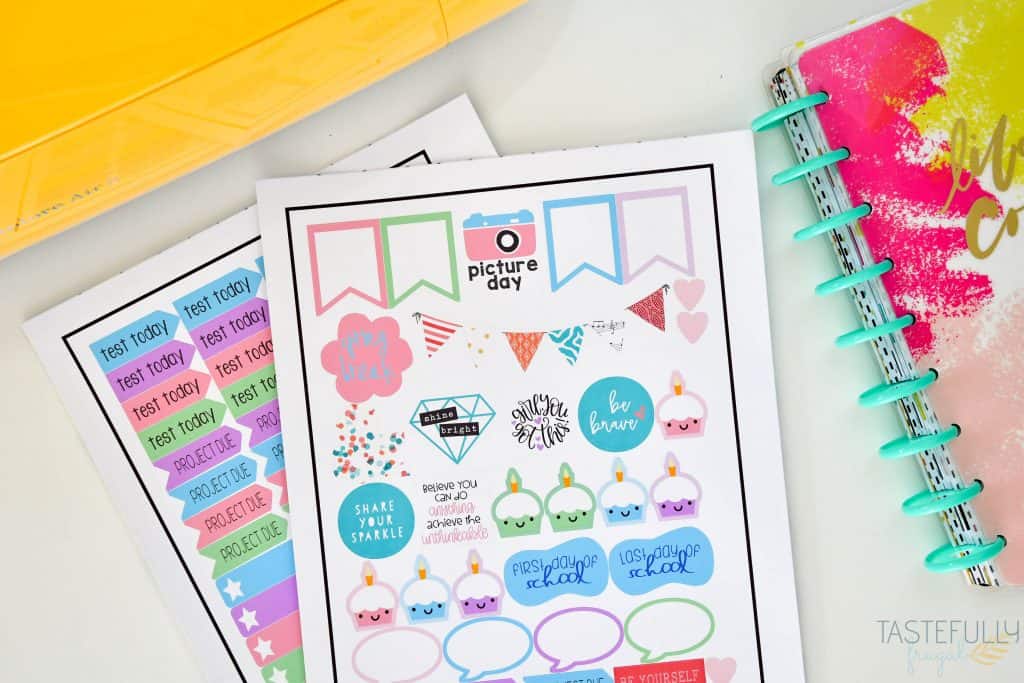
Whether you’re a parent or a student (or both!), this is sure to be a school year we won’t soon forget. However, with all the craziness of life even though we might not soon forget this year, it can be very easy to forget certain dates, deadlines and activities. Not only are we deciding to homeschool our three oldest this year, I am still working full time and going to school full time. To keep track of everything going, I put my Cricut to use and made custom planner stickers for both me and my kids!
The great thing about Cricut Design Space is the ability to truly personalize every project you make, including planner stickers! If you want to print the two sheets of planner stickers I made, you can find the Design Space file here. But I’ll be showing you how to create your own personalized stickers below.
What Cricut Machines Can I Make Stickers With?
The easiest way, in my opinion, to make planner stickers is by using the Print Then Cut feature (you can read more about it here). This allows you to easily add multiple layers of colors in design quickly and easily without layering. To do print then cut you need to have a printer to print your designs on and then you can use either the Explore Air 2 or the Maker to cut the designs.
These machines have a light sensor that read registration marks printed on your designs to make sure they are cut correctly. Cricut Joy doesn’t have this light sensor so you can’t do print then cut with it.
What Size Do I Make My Stickers?

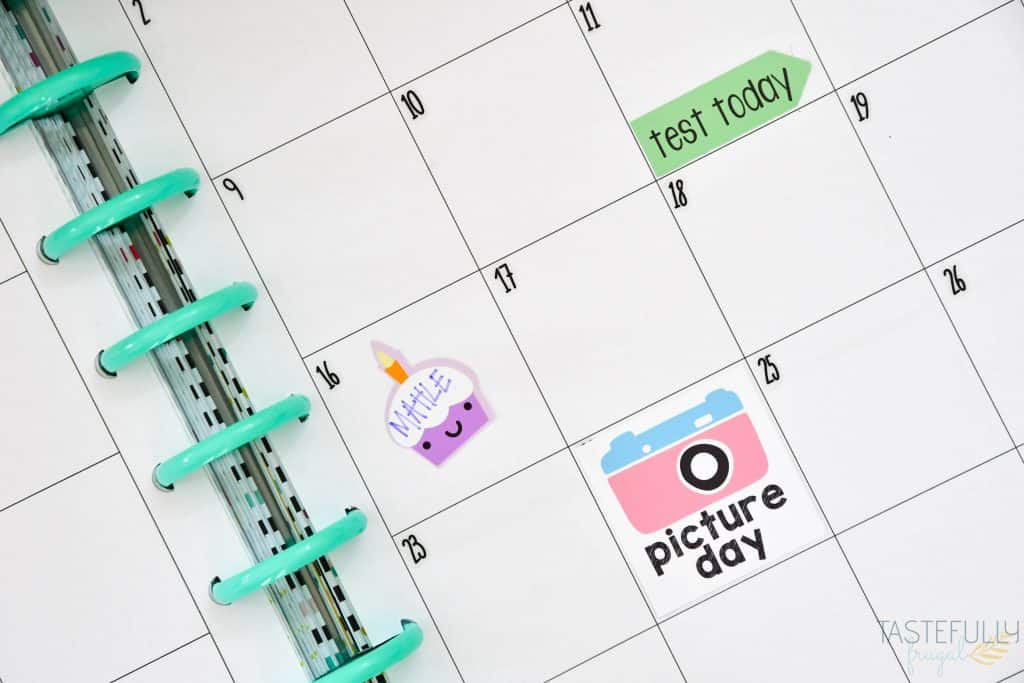
This is totally up to you and how big (or small) you want your stickers. I found that for the flags, a size of 1.5″W x 0.5″H fit my Happy Planner squares perfectly! Most of the other designs were between 1-1.5″ at the widest point as well.
What Do I Need To Make Planner Stickers?
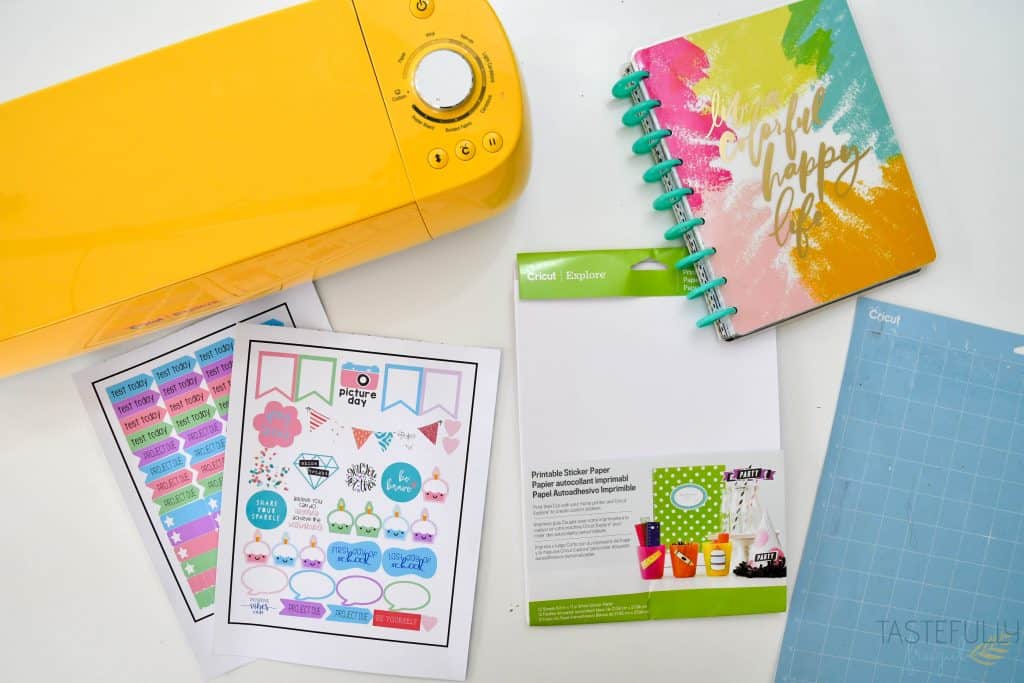
Planner stickers are one of the easiest projects you’ll make with your Cricut. All you need is:
If you want to order Cricut supplies and you’re shopping on Cricut.com, use code SAVE10 to save 10% and get FREE shipping on all $50+ orders. That’s on top of the 10% discount Cricut Access members get automatically! Learn more about Cricut Access here.
How Do I Make Planner Stickers in Cricut Design Space?
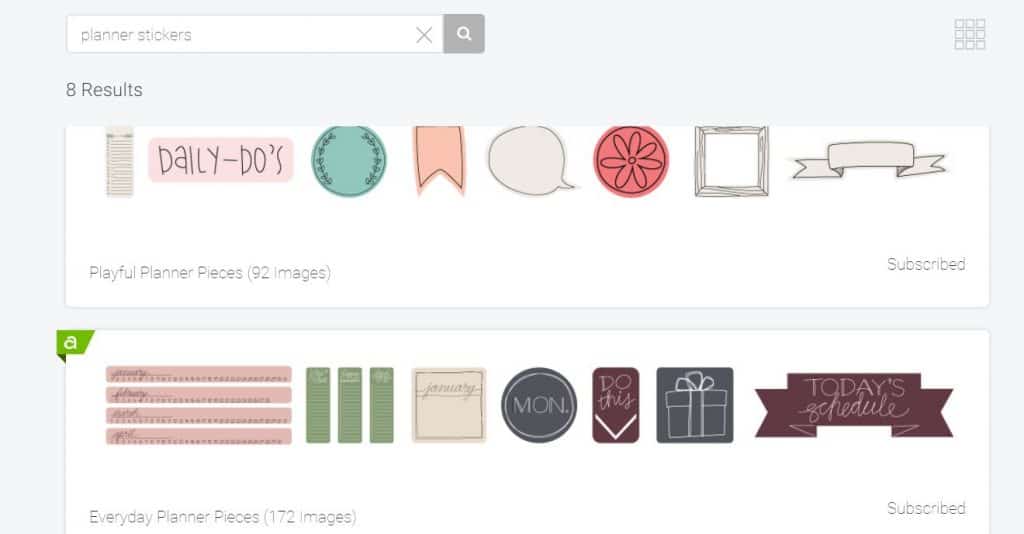
Like I said earlier, the design possibilities are endless when it comes to Design Space. If you want, there are a TON of premade planner stickers in Design Space already, just search PLANNER STICKERS in images.
If you want to personalize your own stickers, that’s super easy too! Let me show you how.

To make reminder flags you first need to start with a blank flag. I am going to use these two skinny flag images.
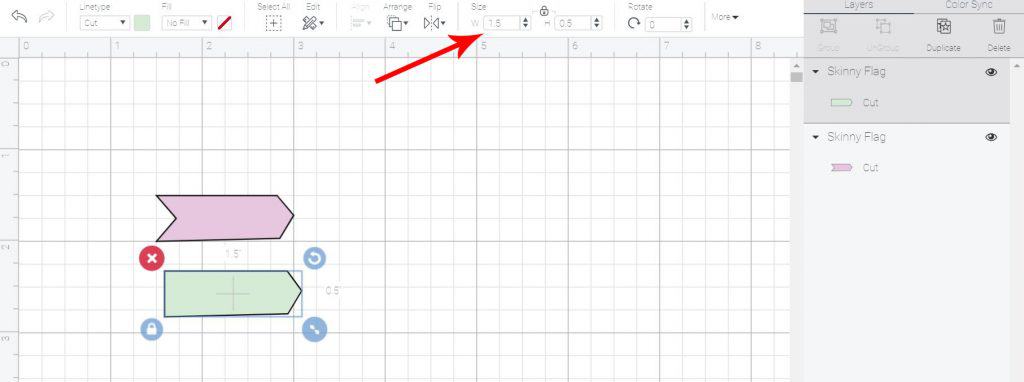
Next you’ll want to size your flags to the appropriate size. I found 1.5″x0.5″ was the perfect size for my planner.

After your flags are sized correctly you’ll want to add your text. To do this, click the TEXT button in the left toolbar and add your text. Move your text to the center of your flag and resize it so it fits within your flag.

Once everything is lined up how you want, select both the flag and the text and click the FLATTEN button in the bottom right toolbar.
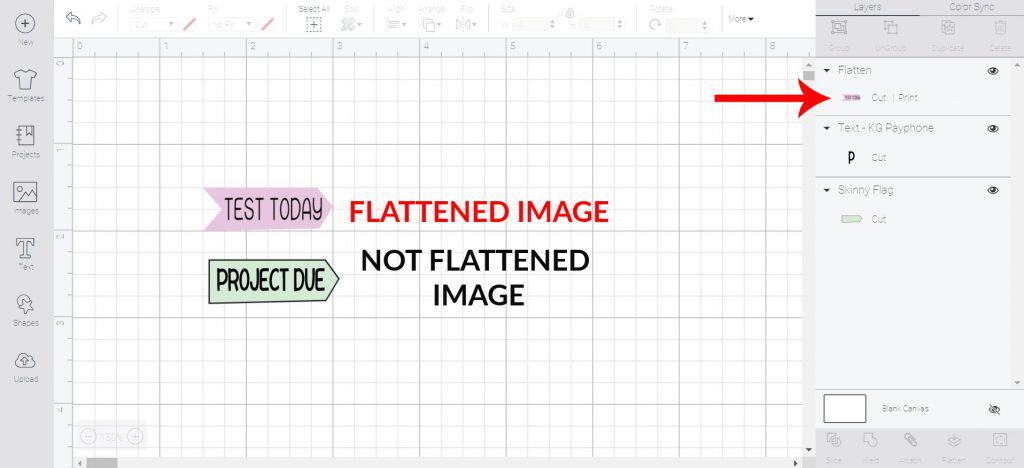
This automatically changes the design from a cut design to PRINT|CUT design. This also makes it so only the larger image, the arrow in this case, is cut out and the text will just be printed.
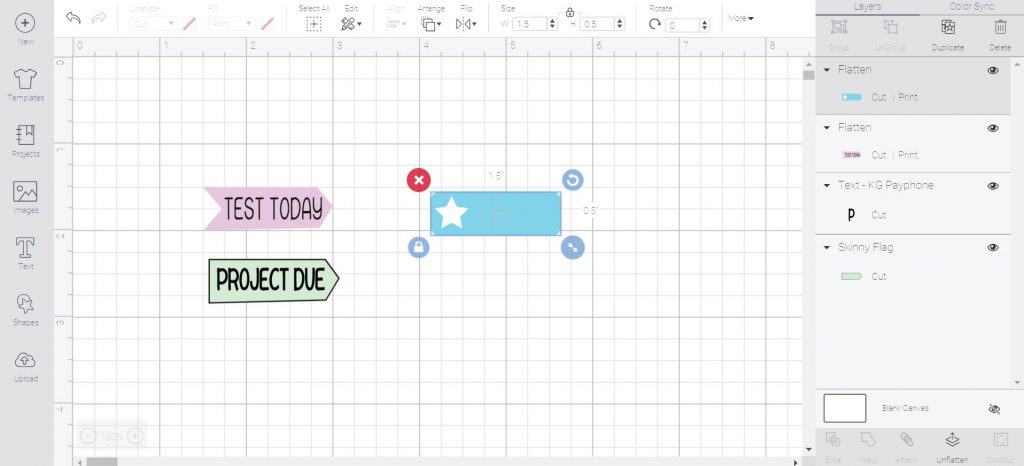
If you don’t want to add text, you can add a shape or just leave your skinny flag empty. Just make sure you resize it to the correct size and make sure to flatten your image.

You can also add your own fun sayings, pictures and designs. I really like the Photo Play Paper – Like A Girl image set in design space for whimsical sticker designs.
Once you are happy with your planner sticker designs, it’s time to print them!
Tips For Using Printable Vinyl in Your Home Printer
There are a few things you need to do with your home printer to get the best results with your planner stickers, or any print then cut project.
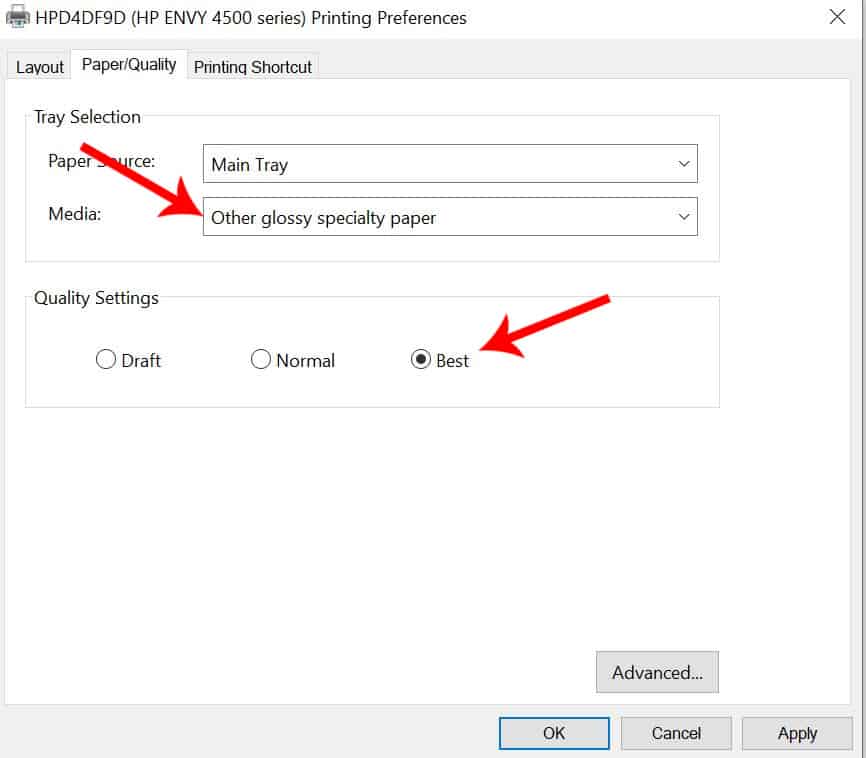
First, make sure you have the correct printer settings set. To do this, go to your computer’s toolbar and select your printer, then printer preferences. I selected my paper type as OTHER GLOSSY SPECIALTY PAPER, but I’ve heard PHOTO PAPER works good too! You’ll also want to change the print quality to BEST.
Also, make sure your roller wheels are dust free. I had a tough time at first getting my printable sticker paper to not jam, but we used some compressed air to clean the rollers and the paper went through with no trouble.
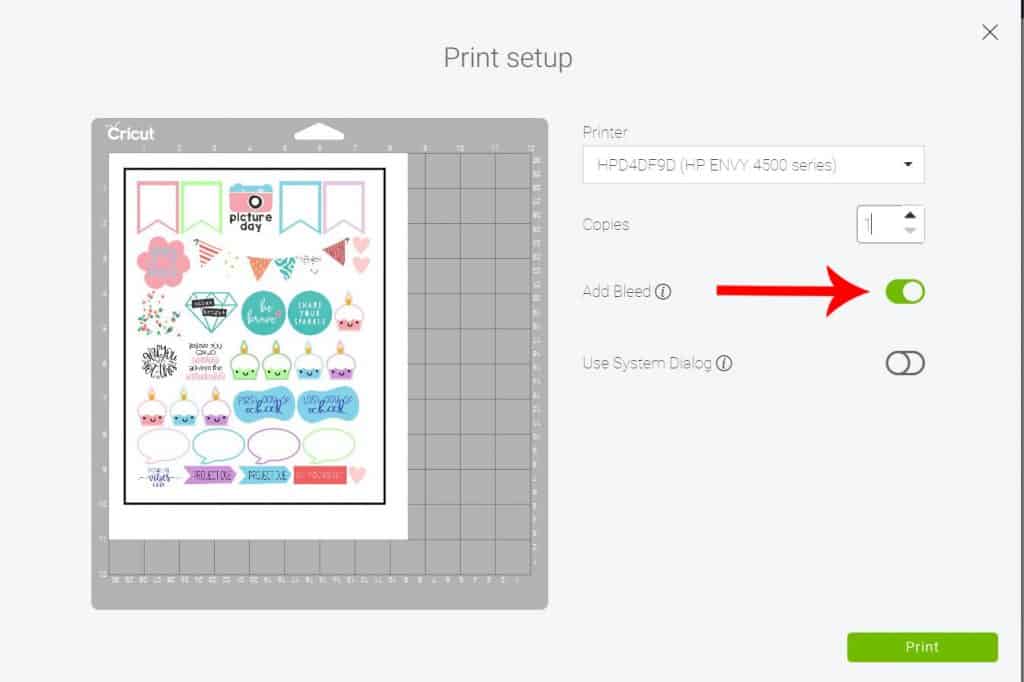
Lastly, make sure you have the BLEED button selected on in Cricut Design Space. What this does is makes the outside borders a little thicker so that when the Cricut is cutting your design you don’t have any white along the edges.
Once your printer has printed your stickers, you’ll want to load them on to a lightgrip mat. Select PRINTABLE VINYL under custom materials in Design Space and load your mat into your Cricut.
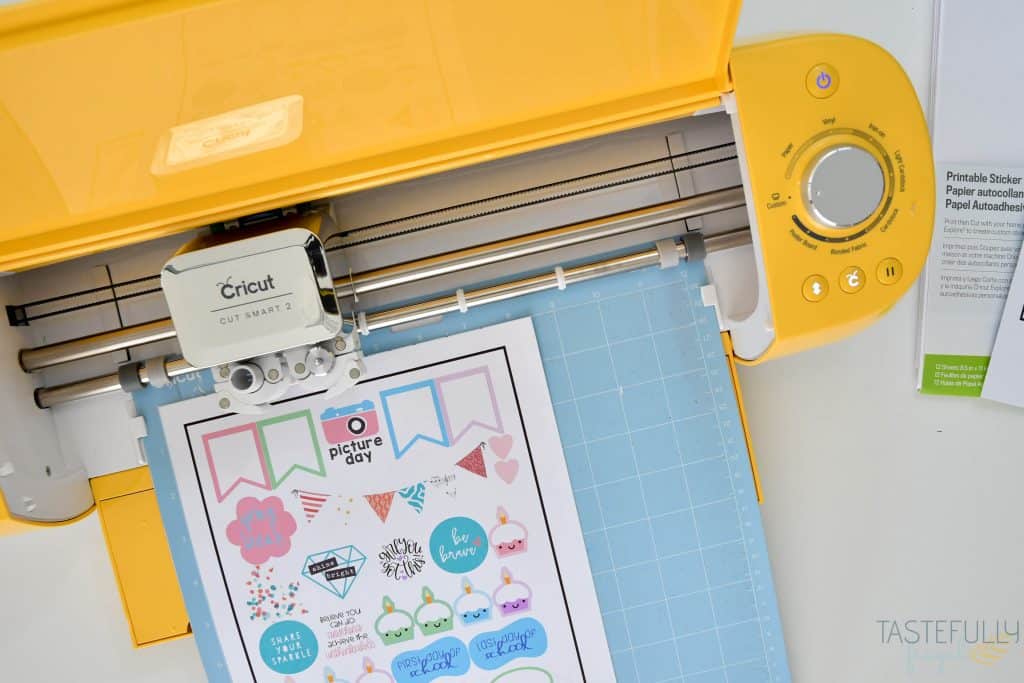
The machine will first check all the registration marks to make sure they are lined up and then it will begin cutting your design.

Now you (or your students) are ready to personalize their planners and never miss an important assignment or date again! I made some fun Paper Flower pencil toppers to go with my new planner too! You can check out that tutorial here.
Make sure to subscribe to my YouTube channel to check out all the video tutorials. For more Cricut projects and tutorials, check out these posts. For tips, tricks and immediate help, be sure to join our FREE Cricut Support Group.


April says
Thank you so much for this! Question for you — if I own some digital elements, can I upload those to Design Space? Like I have multiple digital scrapbooking sets with papers, elements, alphas… will those load into the Cricut space?
Sydney says
Yes you totally can! You can add them as layers afterwards so you can have them be the background for images if you want too 🙂
Heather says
Hello! Thanks for this amazing project, but I’m struggling with DS. When I click on your link and DS open your project, there’s no customize or make it option…
-Heather
Sydney says
Hey Heather! I am so sorry, this is a known problem with Design Space. If you turn off your wifi and then click the link it should give you the option to customize in Design Space. Let me know if that doesn’t work and I’ll see if we can find another work around for it.
Mark says
Hi my name is Mark. Those stickers are so Amazing. Thank you for sharing. Apart from adding color to homeschooling, this will definitely help in terms of organizing our schedules on a daily basis.