Learn how to upload your own image to print, cut or sketch in Cricut Design Space. 
As you know by now I love my Cricut and everything I can do with it. Since I switched to Cricut from Silhouette (you can read more about why here) at the beginning of this year I’ve been amazed at how much I can do with it and how easy it is to use. After receiving several emails and lots of questions on all things Cricut I decided to start a new series; Cricut 101. On the 2nd and 4th Thursday of every month I will be sharing a new tutorial, tip or DIY on how to use your Cricut machine to it’s fullest. Today I’ll show you how to upload your own image into the Design Space.
Before we start lets talk about the different file types you can upload into design space. There are two categories of files you can upload:
- Basic Images- .jpg, .bmp, .png and .gif files. These are uploaded as a single layer so what you see in the preview is what you can cut or print.
- Vector Images- .svg and .dxf files. These are uploaded into multiple layers so you can modify certain aspects in the design space. These are my favorite because they are more versatile.
So you’ve designed your own image (or bought one) now what? First thing you need to do is open a new project in Design Space and click UPLOAD IMAGE in the upper left corner.
Click BROWSE FILES and select the file from your computer.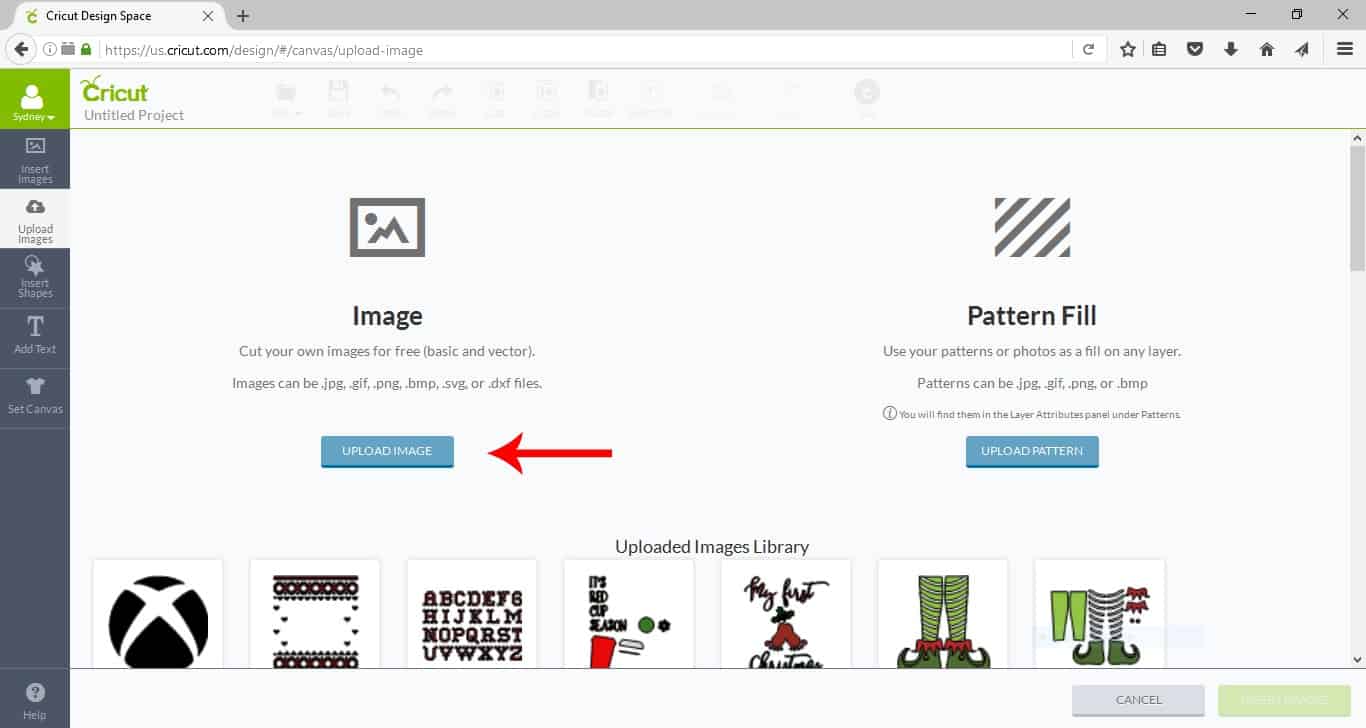
If you’re adding a vector image the preview will show up on the upload screen. You can name your image and save it right from this screen.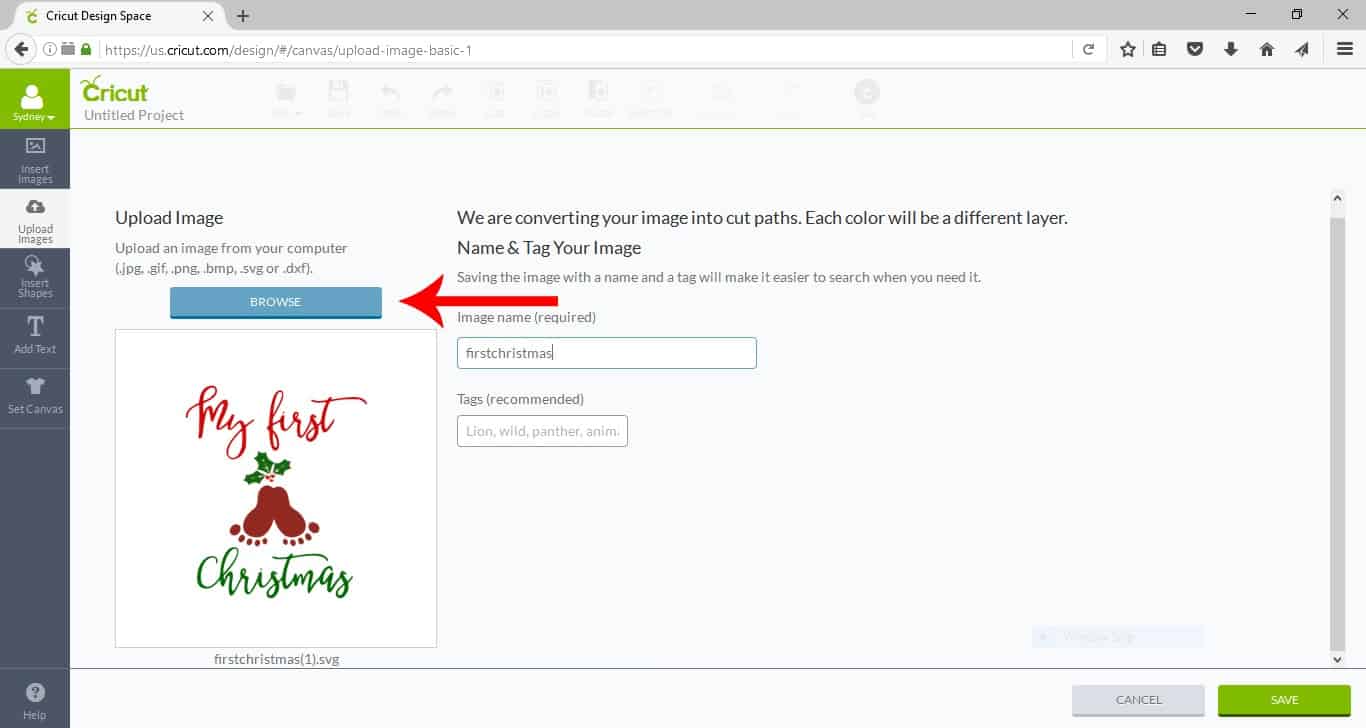
If you’re adding a basic images you’ll have a few more options:
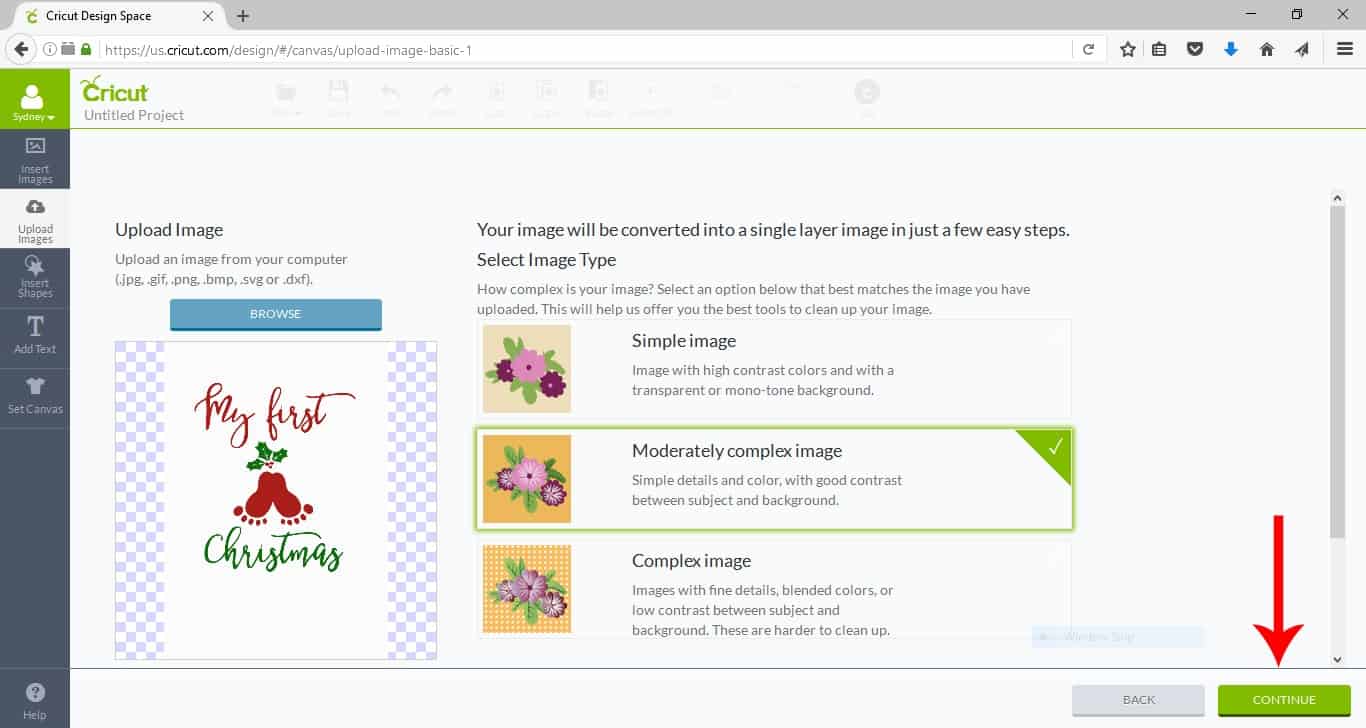
 Select Image Type: This is to determine how complex (or how detailed) an image is. If you are uploading a basic image with not a lot of detail you can select Simple Image. If there are more details to your image you can select either Moderately Complex Image or Complex Image. Click continue.
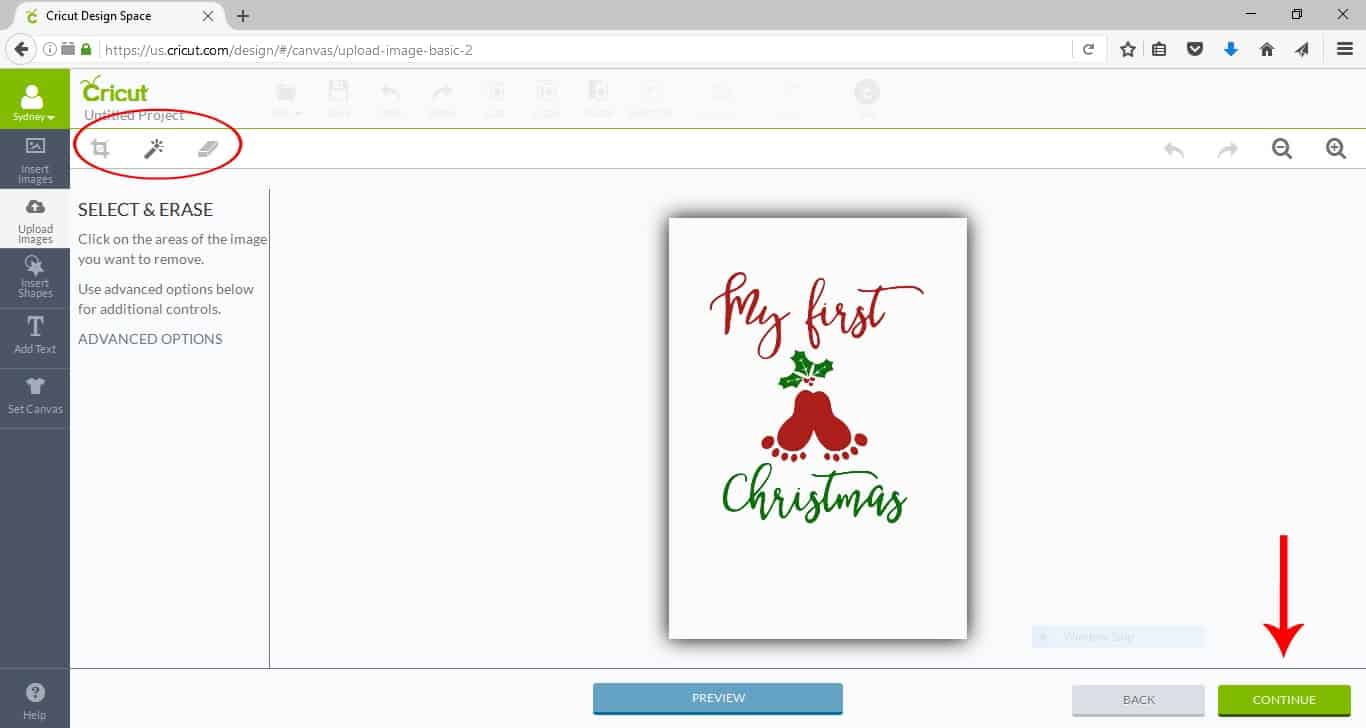
 Select & Erase: This is where you can edit your basic images by cropping or erasing certain parts of your image using the tools on the toolbar. When you’re done click preview and if you like the way it looks click continue.
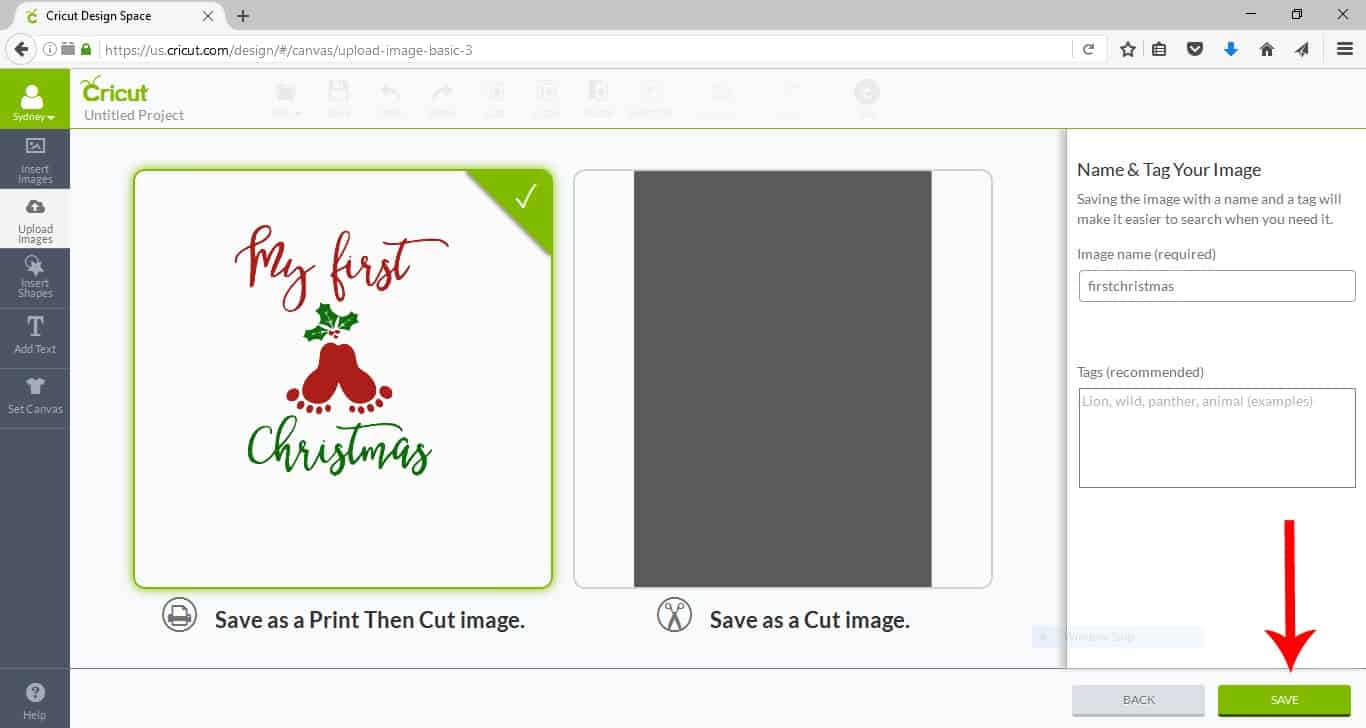
 Name & Tag: This is where you can name your image as well as decided if you want it to be a print and cut image or just a cut image (if it’s just a cut image all you will be able to cut is the basic outline).
- Hit Save.
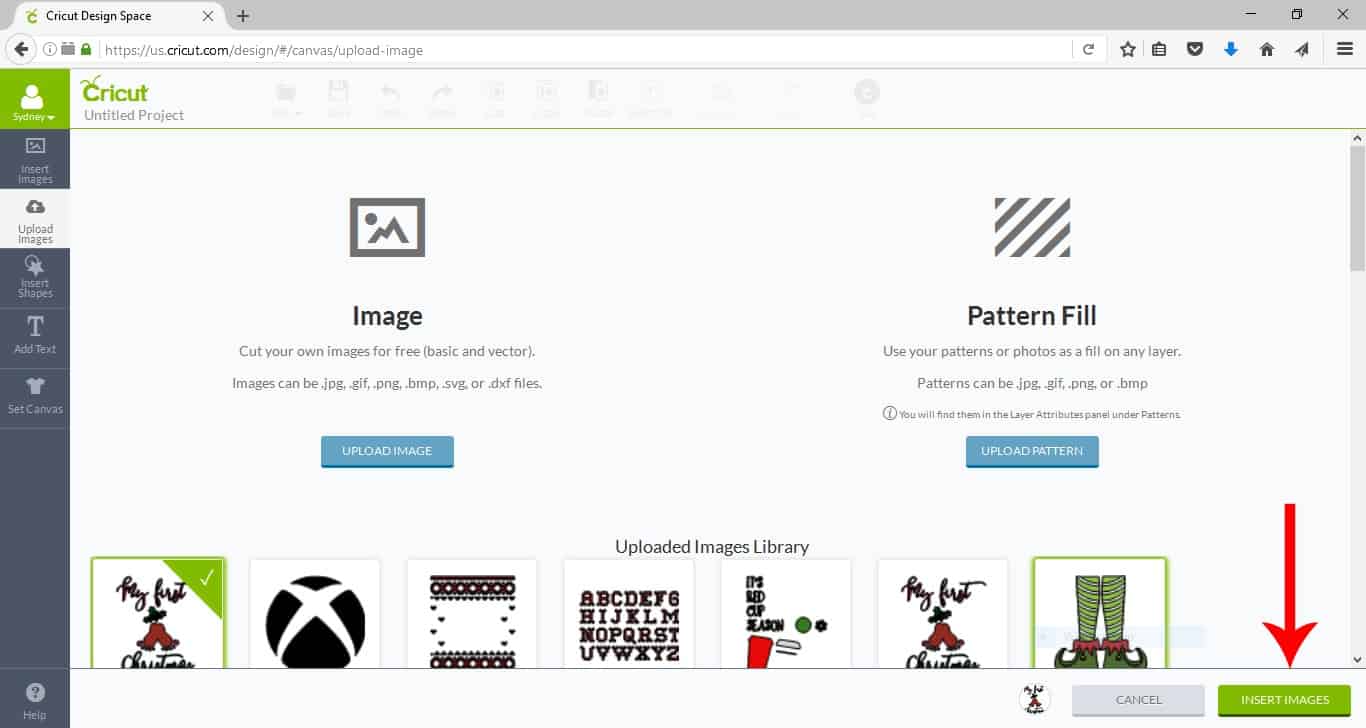 Now you’re back to the upload image screen. Select your image from and click the green INSERT IMAGES button in the lower right corner.
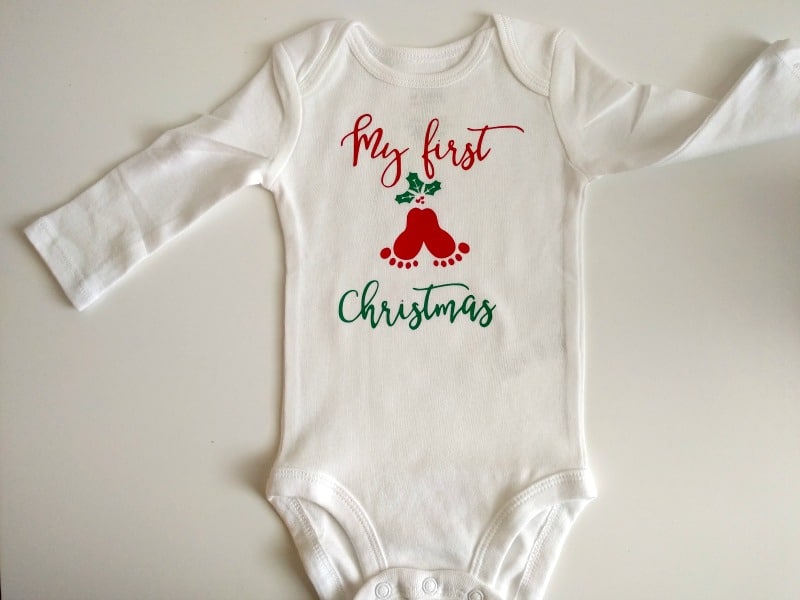
 Your image is now ready to edit and/or cut or print. You can get the My First Christmas Image here (you get both basic and vector files).
 What’s your favorite thing to use your Cricut for? Check back in two weeks for 25 Things You Can Use Your Cricut For (That’s Not Vinyl).
Click here to check out some of the other projects I’ve done with My Explore Air and Air 2.
This is a sponsored conversation written by me on behalf of Cricut. The opinions and text are all mine.




Kim says
I really enjoyed your tutorial and are looking forward to more. I just got my cricut explore air 2. I have a lot to learn!
Sydney says
Yay Kim! You are going to have so much fun! Let me know if you have any questions.
Dolores says
Sydney I am very new to this but I love it. I have a question I have uploaded SVG images have have not been able to get multiple layers. I have uploade SVG right from google and also have converted jpg images to svg and still no layers. I’m so confused can you please help me with this: what am I doing wrong.
Thanks
Sydney says
Hi Dolores! Hmm I’m wondering if it’s single layer svg… what did you use to convert it? Some online programs won’t convert svg to multiple layers. Also, it has to have .svg after the file name… maybe it’s a .png file you’re uplodading??? Let me know and I’ll see if I can help you troubleshoot more.
Dolores says
Thank you for your quick response I’ll check when I get home what kind of file and the online program I’m using.
Kym says
Hi I have just purchased my first ever Cricut Explore 2..I love doing crafts, I’m reading all I can on the tutorials or on Pinterest, which I have to say I love, I have got many ideas that I have even made from here.
Now I have to learn everything about the Cricut Explorer 2..I must say feel very nervous not knowing my way around it.
Will be looking out for more that I can practise with.
Thank you for your tutorial I enjoyed reading it, you make it look so easy.
Kind Regards.
Kym
Sydney says
Hi Kym! You are going to have so much fun with your Explore Air 2. Let me know if you ever have any questions.
Sydney