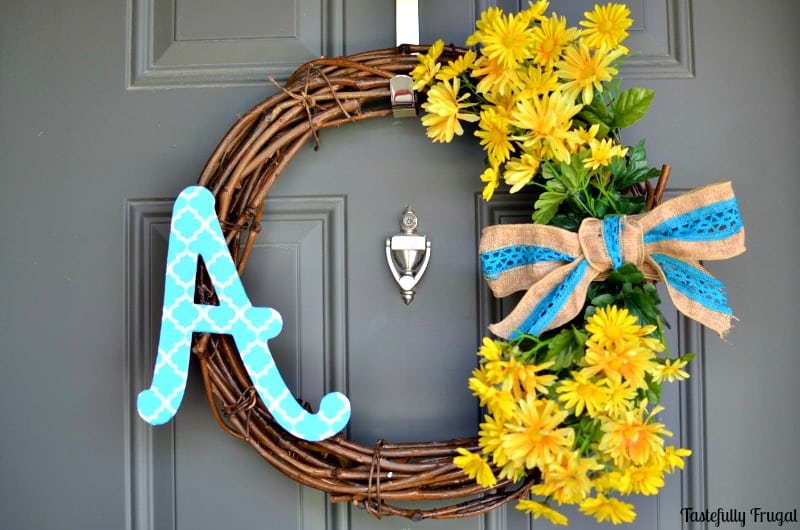
An easy DIY wreath that works all year long.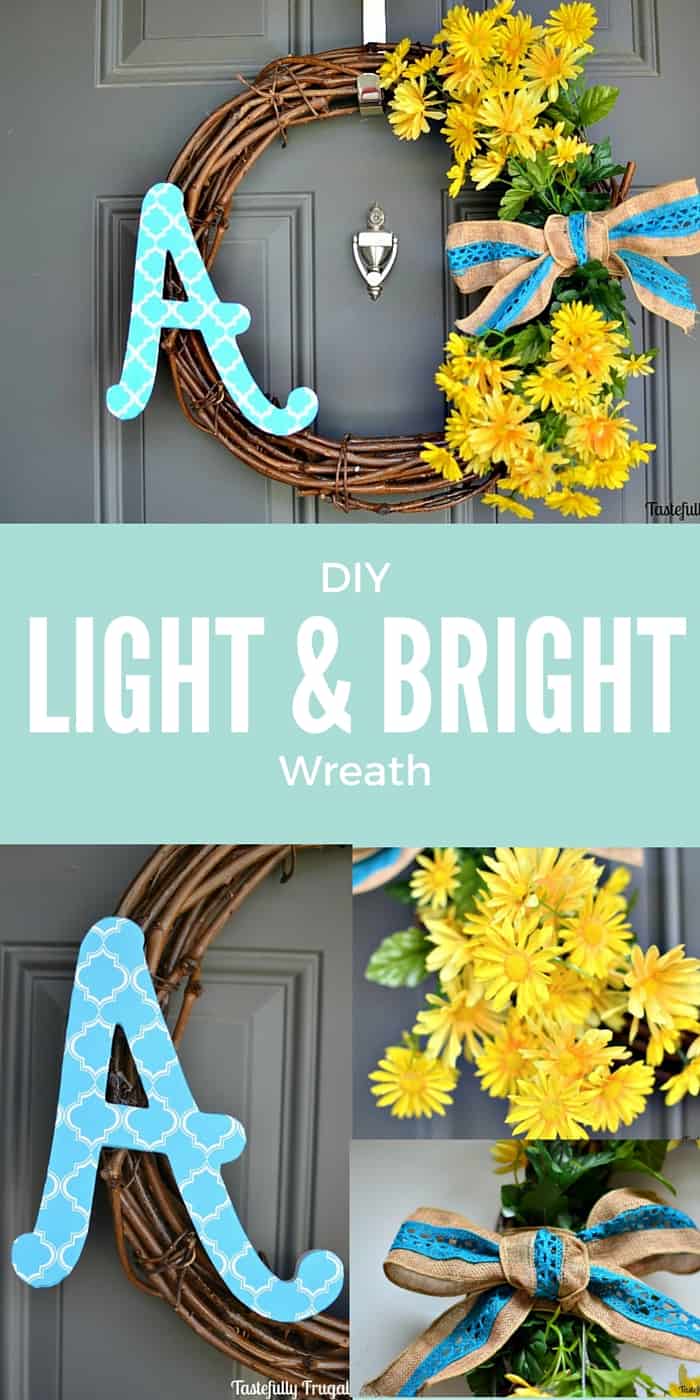
When we moved into the townhome we’re living in two years ago we were only planning on staying for 6 months. It was a place to stay while we looked for our new home after we sold our old one. But then we fell in love with the community. We’ve made some really great friends and it’s close to a lot of great activities for the boys. I haven’t really done much decorating since we weren’t planning on staying but now that we know we’ll be staying awhile I figured it’s time.
I decided to start with our front porch. It’s the first thing people see when they come to our home and where we spend most of our days and nights during the summer. I wanted to go with a theme that is bright, airy and happy and that wasn’t the same as any of our neighbors. We decided on teal, yellow and grey. And the first place we started was front door. Since we are renting we can’t change the paint colors so I settled for making a wreath instead.
 My dad had found 3 or 4 grapevine wreaths in his basement when he was going through things last year and gifted them to me; isn’t he awesome?! Then for my birthday he got me a gift card to Michael’s, where I picked up the rest of the supplies I needed. So I owe a big thank you to him for helping me with this one.
I got the inspiration for this from Mandy over at Sugar Bee Crafts and headed over to Michael’s to pick up supplies. When I first saw her Tulip Wreath I thought it was so cute and airy and a perfect wreath that can work for spring, summer and fall; just in case I don’t get around to making another before our little girl comes. And it was so easy to make too!
Supplies:
Plastic Flowers of your choice (I bought 2 bunches of Summer Bunches from Michael’s and had some leftover)
Burlap Ribbon (I had my boys’ with me and Rohrl picked out the blue and burlap ribbon because it matched the paper we had picked out. I think he’s got a pretty good eye for design!)
Scissors
Directions:
 Trace your initial on to the back of the scrapbook paper and cut it.
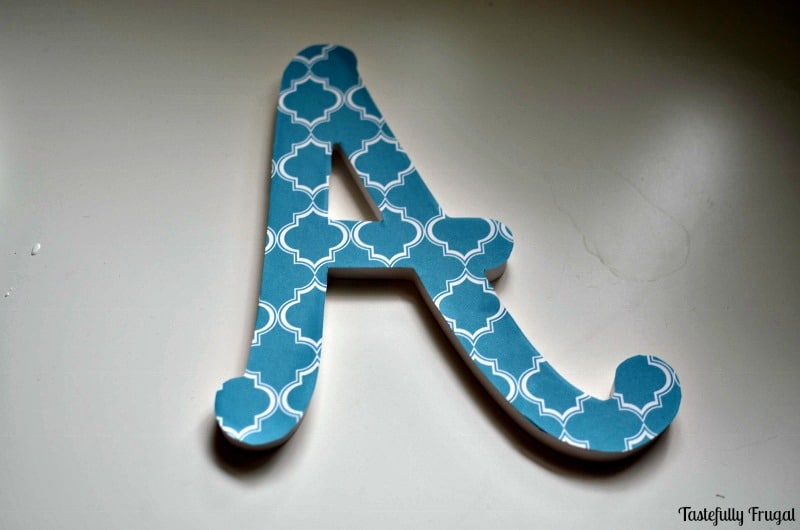 Use Mod Podge to attach the paper to the initial.
Using really strong scissors, or wire cutters, cut flowers about 3 inches down from the stems.
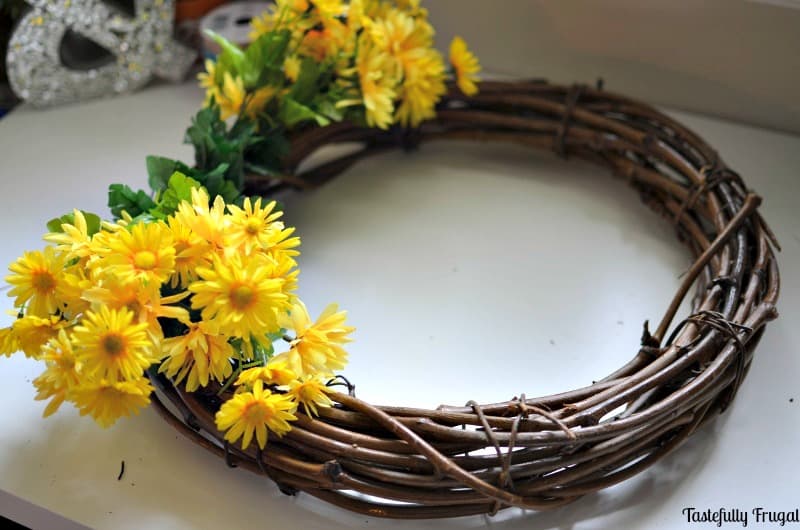 Weave flowers through the grapevine wreath on one side.
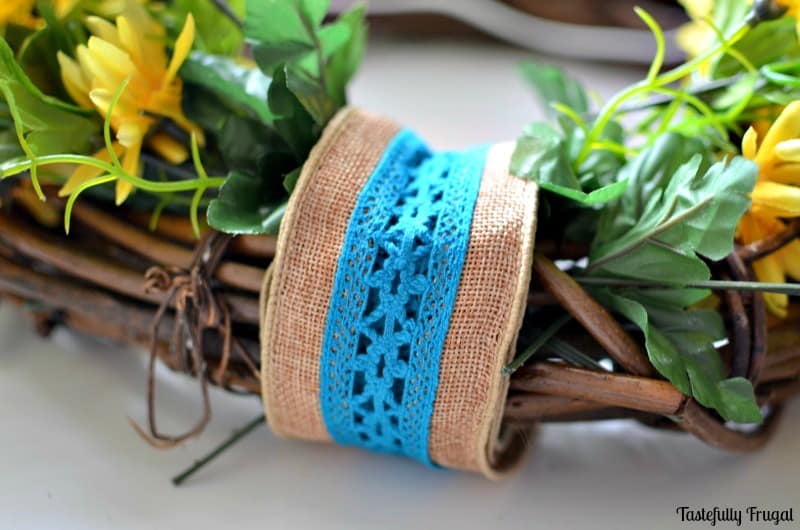 Wrap burlap around the center of the flowers.
 Tie a bow out of the burlap ribbon and attach to the burlap around the wreath with hot glue.
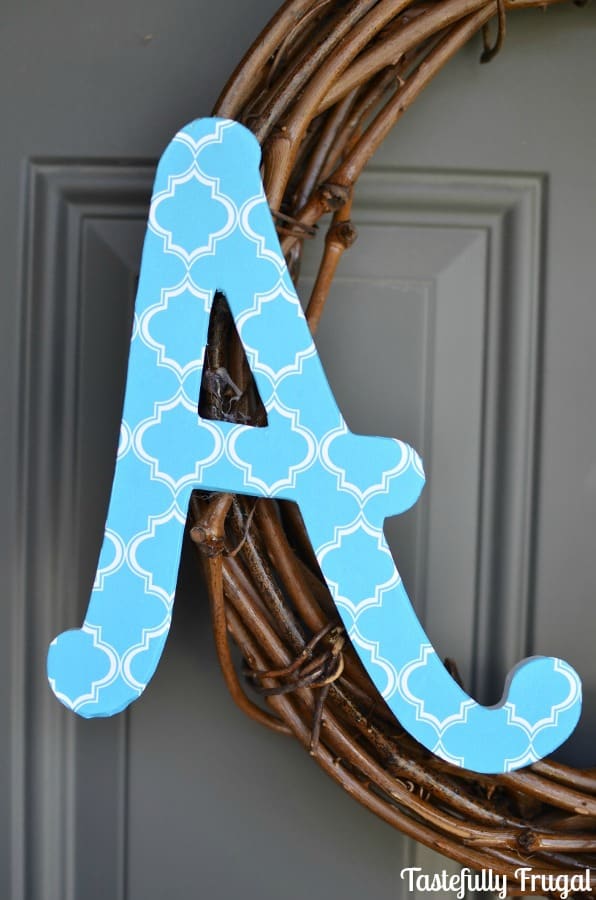 Using hot glue (and lots of it) attach the initial to the other side of the wreath. Place a heavy book (or two) on top of the initial and let it set for 30 minutes or so.
Hang on door and admire your work!
I’ve got more bright and fun outdoor projects coming your way soon but until then I want to know what your front porch looks like and what fun ways you spruce up your outdoor living spaces?


Mandy @ Sugar Bee Crafts says
turned out super cute!!!