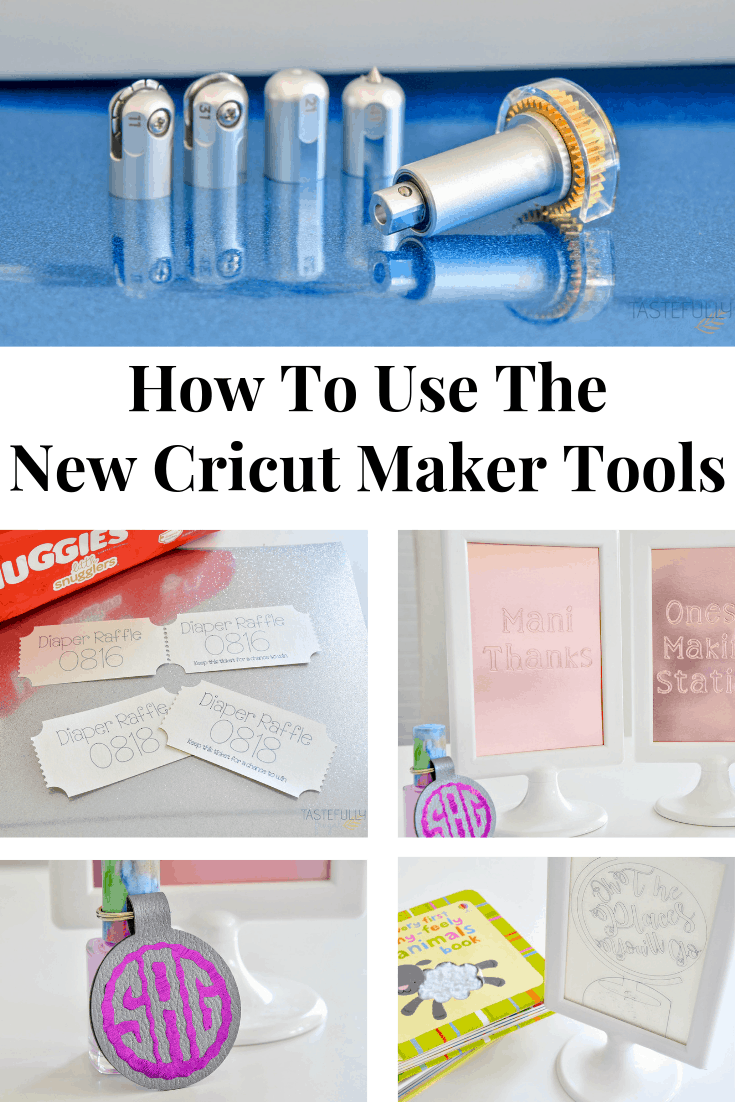
Learn how to use the four new Cricut Maker tools with these step by step tutorials.
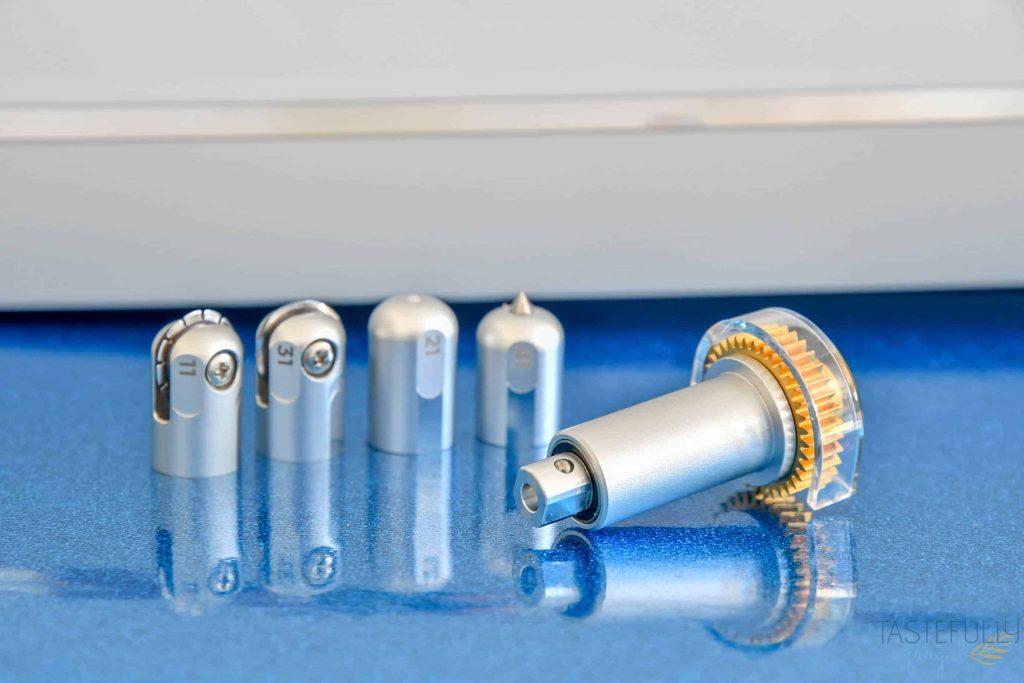
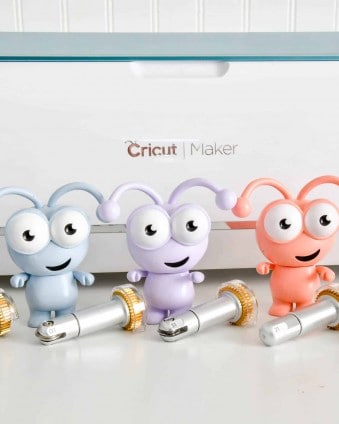
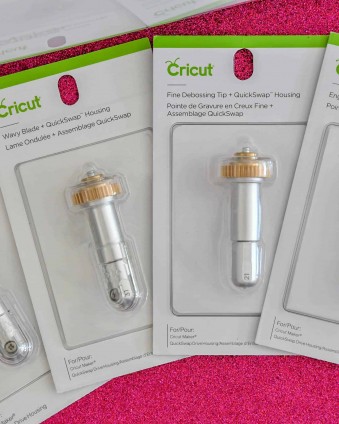
In case you missed the announcement earlier this month, Cricut announced four new tools being added to the Adaptive Tool System. The Perforation Blade, Wavy Blade, Debossing Tip and Engraving Tip join the scoring wheel and double scoring wheel as part of the Adaptive Tool System. These tools are compatible with the Cricut Maker and really up your crafting game. You can read more about each tool and the adaptive tool system here. Today I want to dive in to HOW to use each tool and what the creative possibilities are.
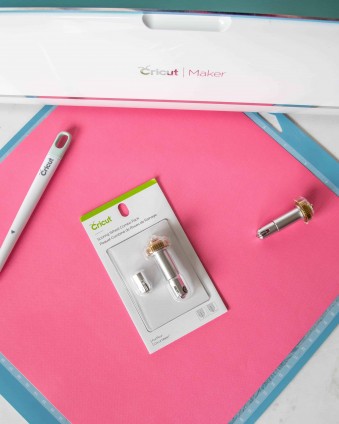
One of the things I love about these tools is how easy they are to use alone or together. To switch between blades or tips all you have to do is click the QuickSwap button on the top of the housing. I love that Cricut made the QuickSwap Housing System because it makes owning these tools a lot more affordable.
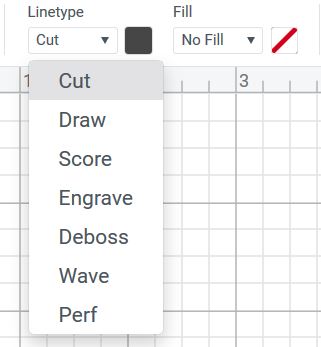
Cricut has also made Design Space super easy to use with the new tools. You just switch whatever you want your design to be (perforated, engraved, etc) in the LINE drop down menu.

Another addition to Design Space I love is when you are selecting your material to cut, it only allows you to pick materials that are compatible with each tool. This makes finding the right material super easy!
When I started brainstorming projects I could make with these tools I thought I would only use a few of the them. The project ideas for the debossing and engraving tips flooded my brain. But after using all four tools I can honestly say I can see me using all four on a regular basis! I made the following projects for a Baby Sprinkle we had earlier this month and I had lots of questions on how I made the party favors and signs. I’ll be sharing that post with you later this week but first let me show you how to use these fun tools.
How To Use The Perforation Blade
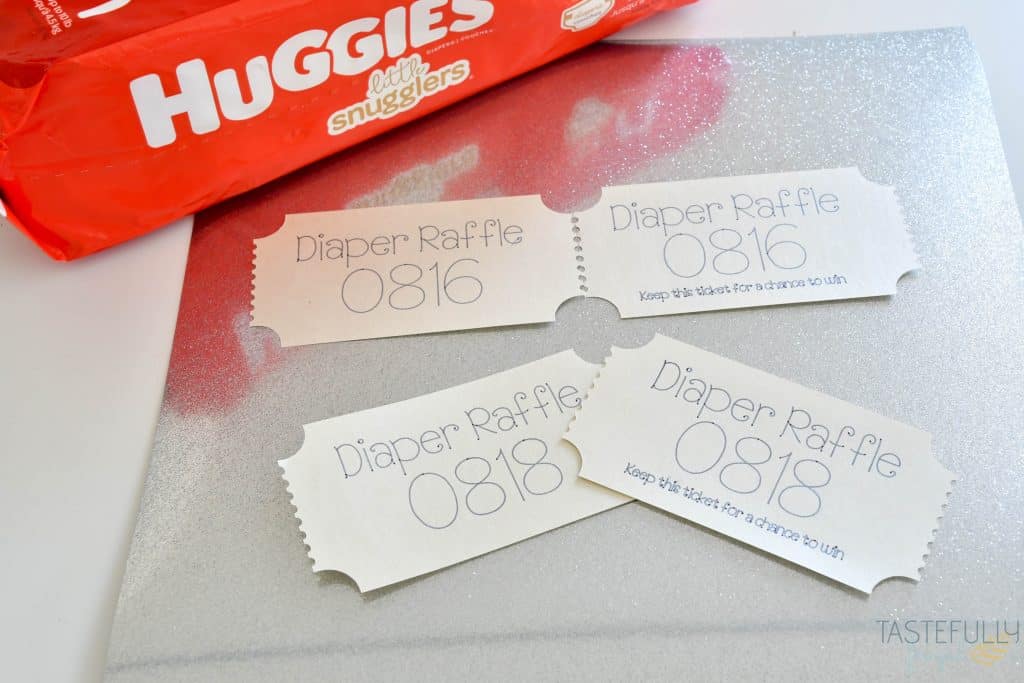
The Perforation Blade is used to make tear lines or cuts easy to separate. This was one of the blades I was not so sure I would use a lot but after seeing how EASY it was to tear these Diaper Raffle tickets apart I can’t wait to use it more!
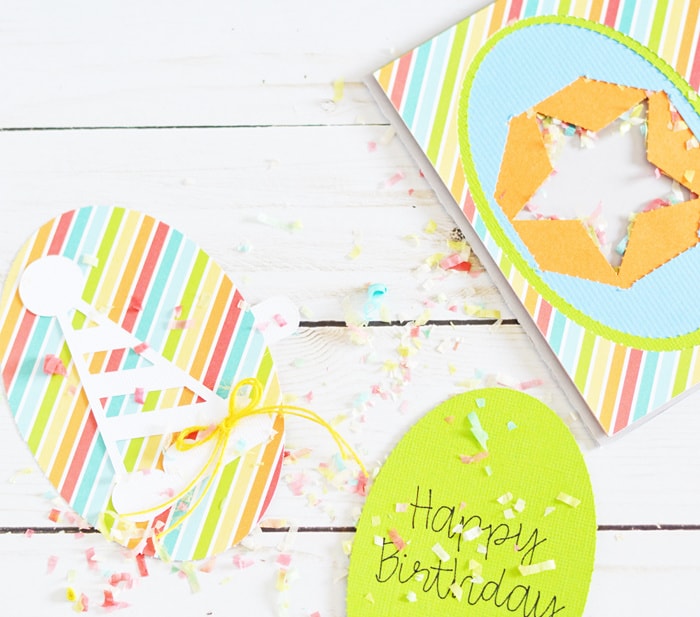
Photo Credit: The Happy Scraps
My friend Amy over at the Happy Scraps made this fun birthday card with the perforation blade too that I can’t wait to make for my nephew’s birthday at the end of the month!
The perforation blade, like the rest of the Adaptive Tool System is super easy to use. When you’re in Design Space, you’ll want to change your line type from a CUT line to PERF. You can do this for a straight line or the whole shape depending on what you’re wanting to have be torn off.
If you are doing a straight line, make sure to attach the line to your design or it will want to cut on it’s own mat when it’s time to make your project.
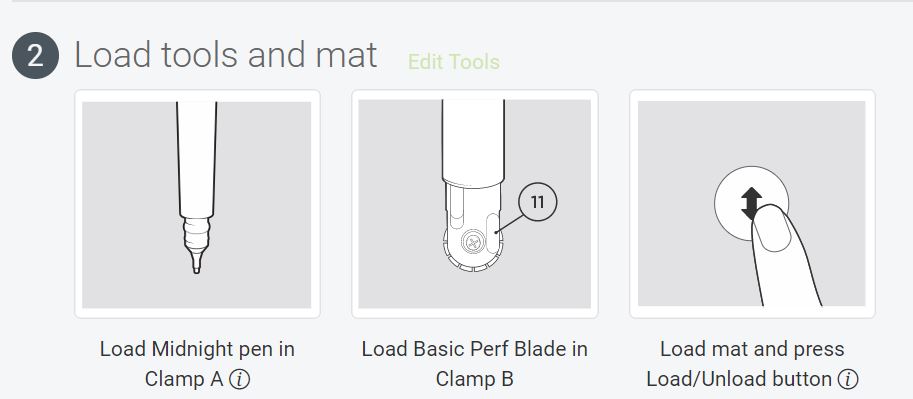
When it’s time to cut your project, you’ll want to follow the on screen prompts. I love that these include what number is on the blade or tip so you can easily make sure you have the right tool. You’ll be prompted to load the perforation tool first before you load whatever tool you’re using to cut your material (most likely the fine point blade).
Things to remember when using the Perforation Blade:
- This blade is like a rotary blade where small designs and tight turns are tough for it to cut. It’s best to make sure your cut is at least ¾”.
- The Maker doesn’t control where the perforation lines will cut and each cut will be different. So don’t cut your design twice, you will likely make a full cut instead of a perforated cut.
How To Use The Wavy Blade
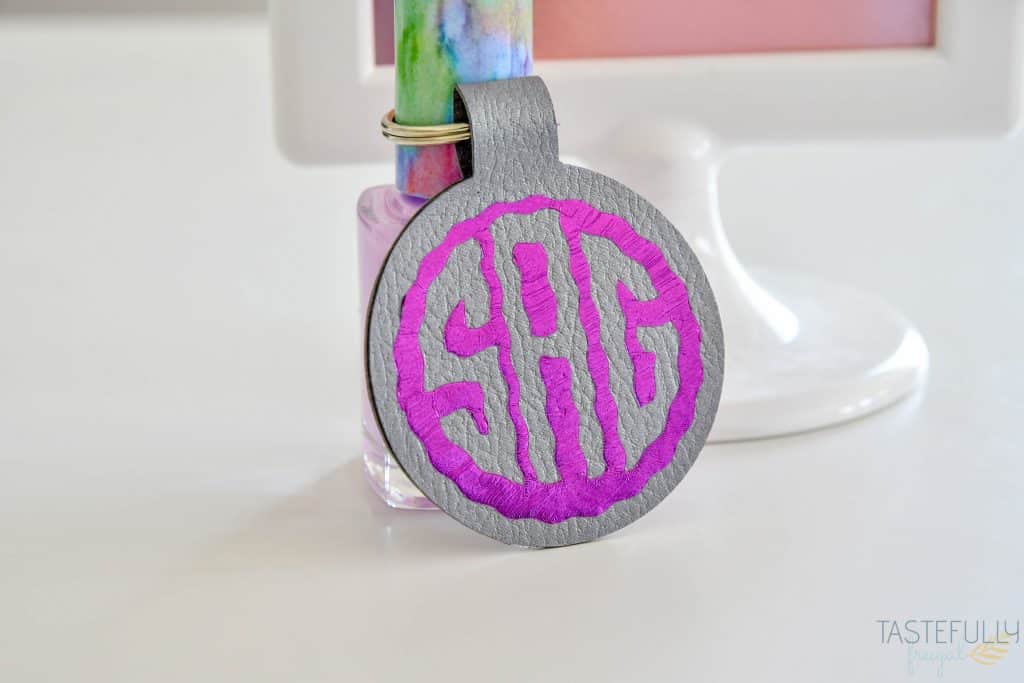
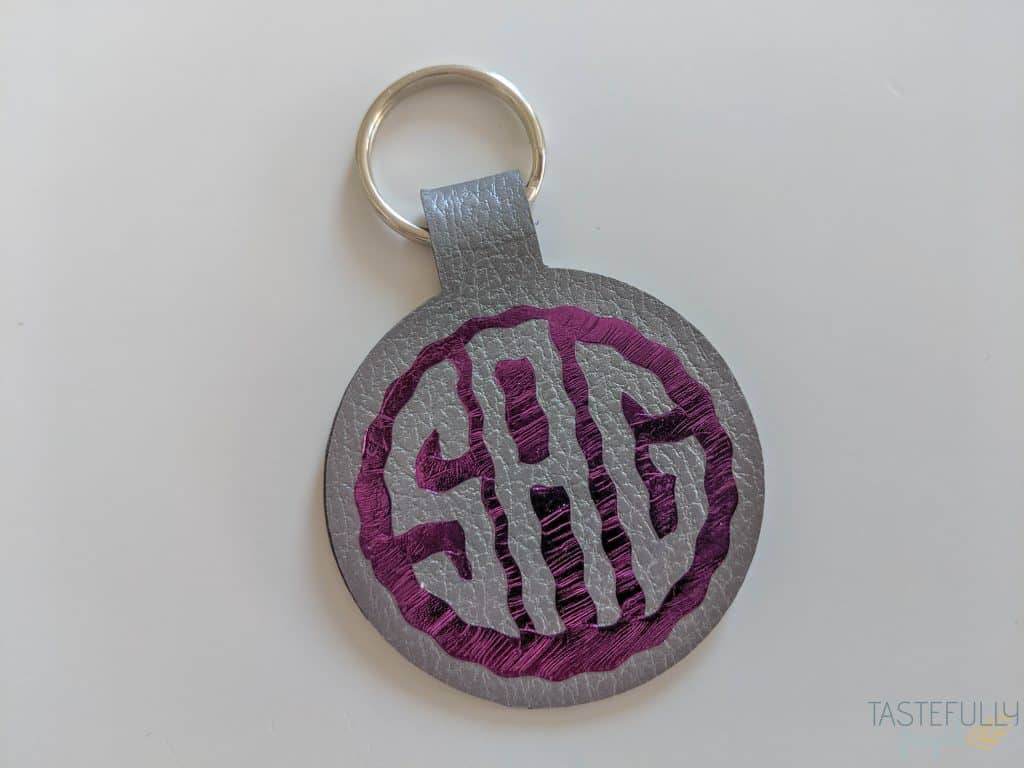
This has to be my favorite tool so far! I love the whimsical look the Wavy Blade gives to projects. I made the cutest little tassels I want to add to these keychains, I’m just trying to figure out how to get them attached. I’m sure you’ll see that tutorial here in the next few weeks.
Things to remember when using the Wavy Blade:
- This blade is like a rotary blade where small designs and tight turns are tough for it to cut. It’s best to make sure your cut is at least ¾”.
- The Maker doesn’t control where the waves will cut and each cut will be different.
I used the wavy blade to add a little extra to the monograms I put on the key chains for the sprinkle gifts. Since it was a small get together, I already knew, or was easily able to find out all the guests monograms and make these fun key chains. It was a super affordable favor as I was able to cut all the faux leather from one sheet and all the monograms from one sheet of iron-on foil. Let me show you how to make them!
SUPPLIES:
Key Rings (I got a variety pack at Walmart for less than $3)
Wavy Blade + Fine Point Blade
Cricut EasyPress 2 (the 6×7 was the perfect size for these)
DIRECTIONS:
Add your monogram to Design Space. Tune in tomorrow for a video tutorial for the EASIEST way to make monograms in Design Space.
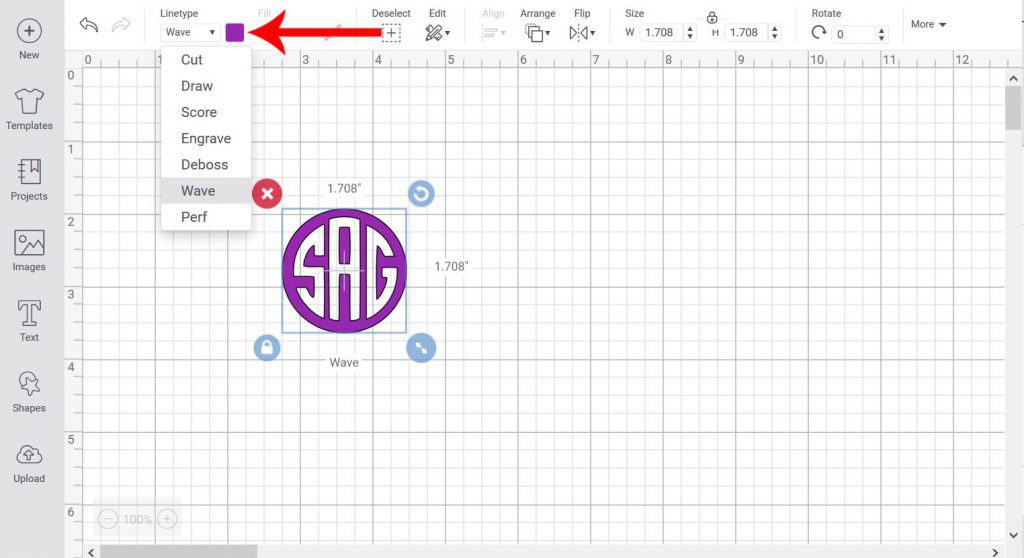
Once your monogram is done you’ll want to change the LINE from CUT to WAVE.
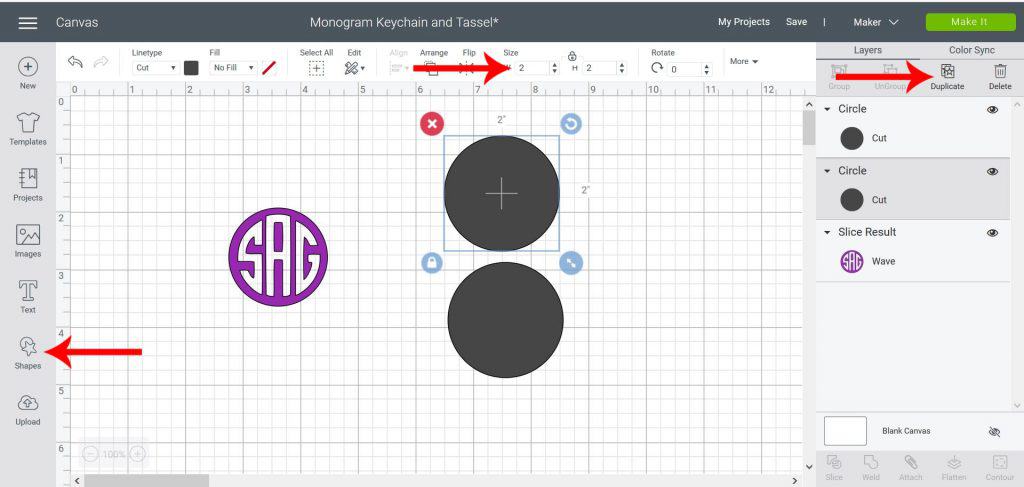
To make the key chain, you’ll want to add a 2″ circle to Design Space and duplicate it.
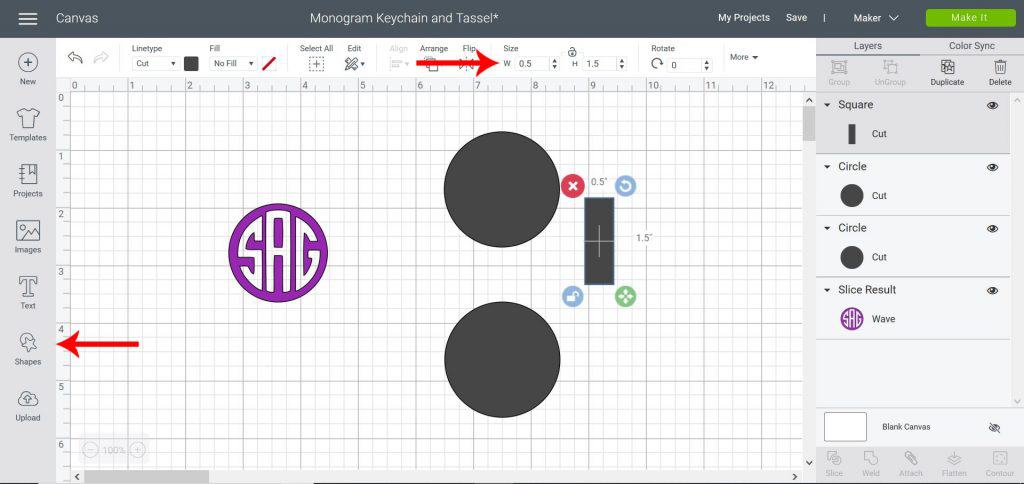
Then add a square and change the size to ½” W x 1.5″ H.
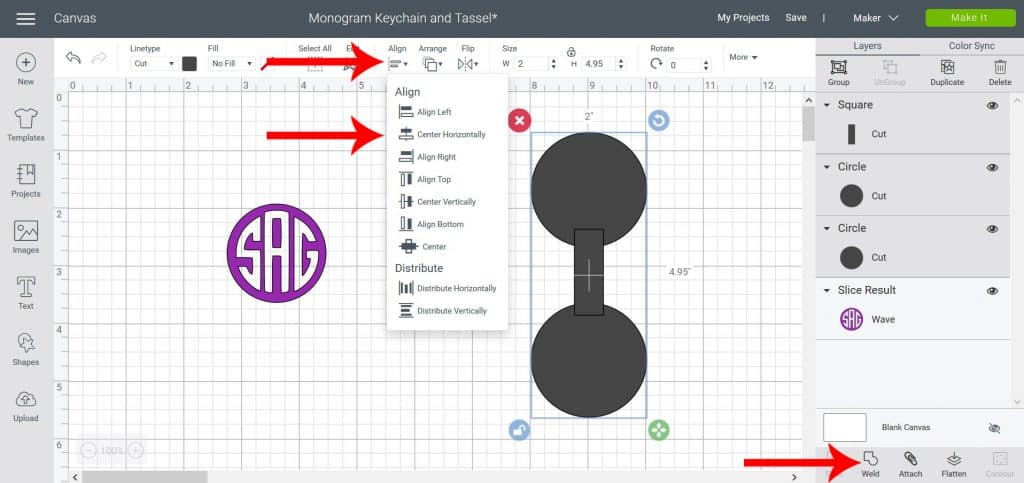
Line up the rectangle with the two circles and choose ALIGN CENTER.
Weld circles and rectangle together.
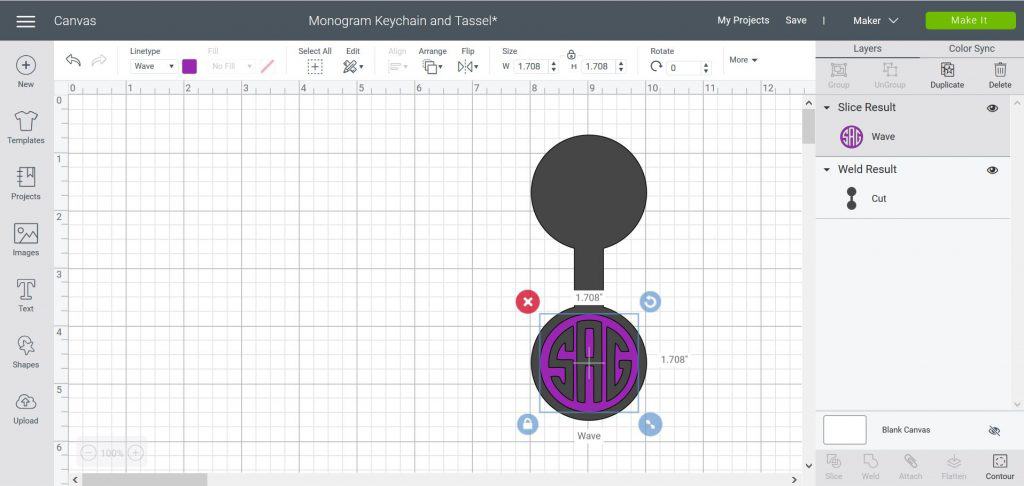
Size monogram to fit inside one of the circles. My monogram is 1.7″.
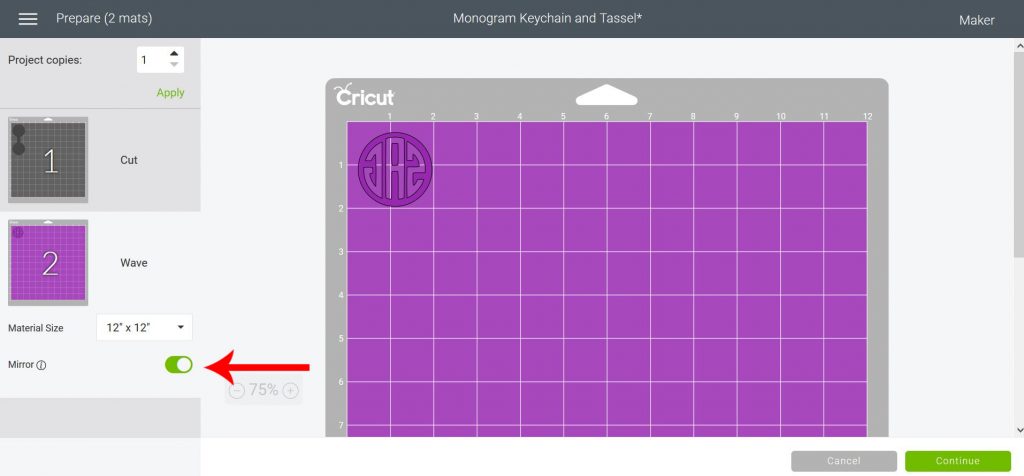
Send to Mat. ***MAKE SURE TO MIRROR BOTH MATS***
Select your machine from the drop down menu on the next page.

Select your material from the next menu. The circles will be Faux Leather and the Monogram will be Foil Iron-On.
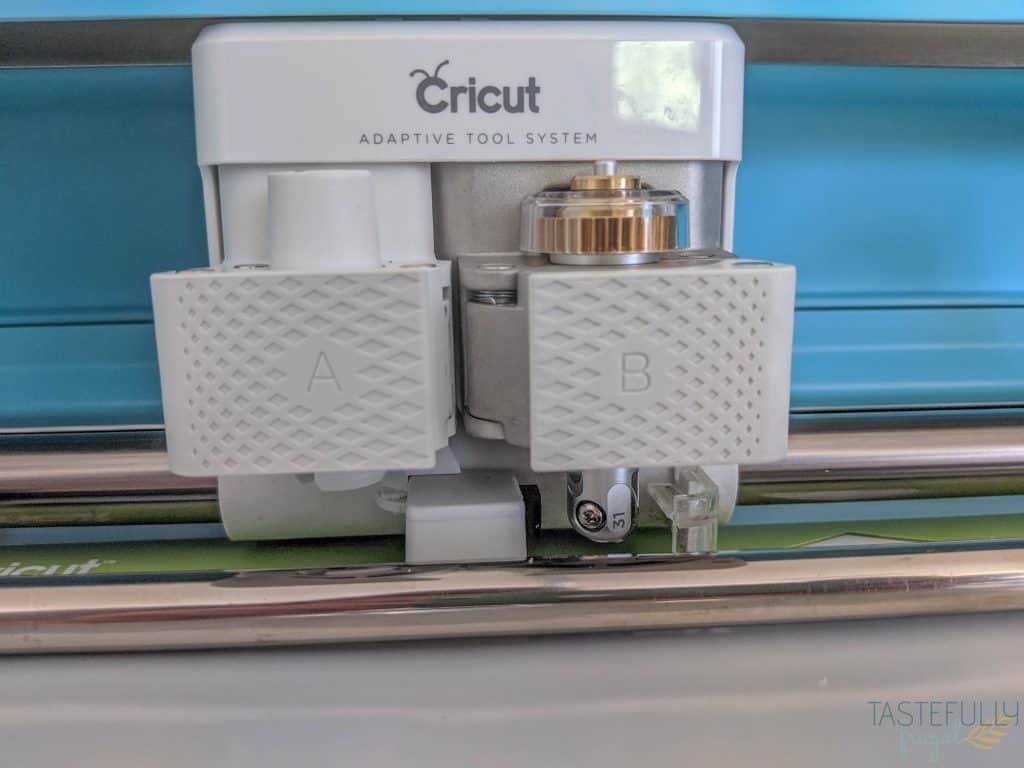
Load your material on to your mat and cut it. ***NOTE when you cut your monogram you will be prompted to load the wavy blade into the B clamp.***
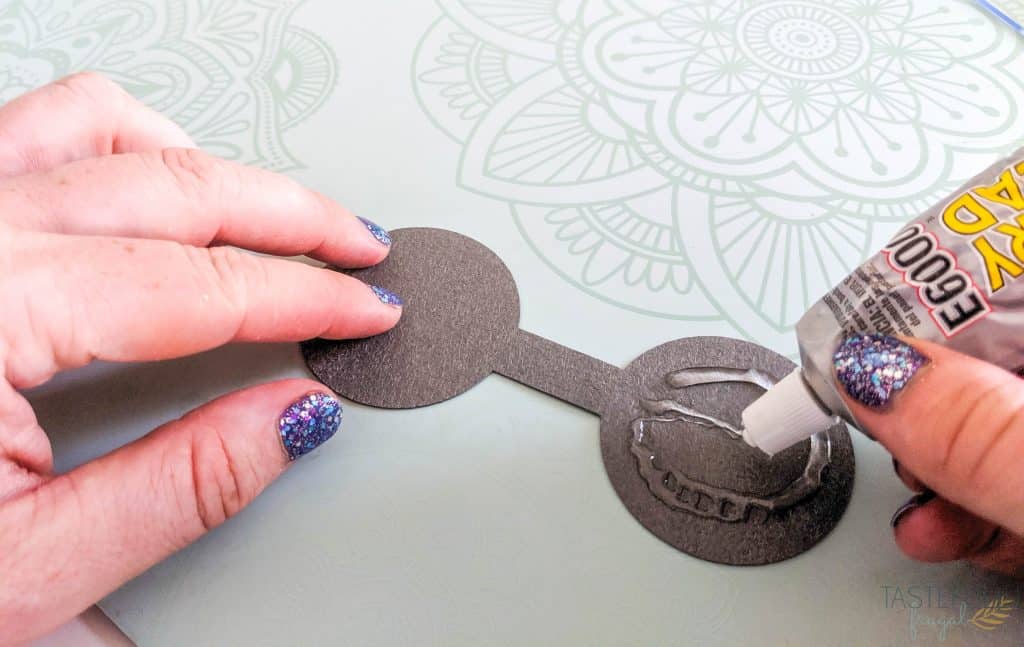
Remove leather from mat and apply E6000 glue on the rough side of the faux leather and attach the other side.
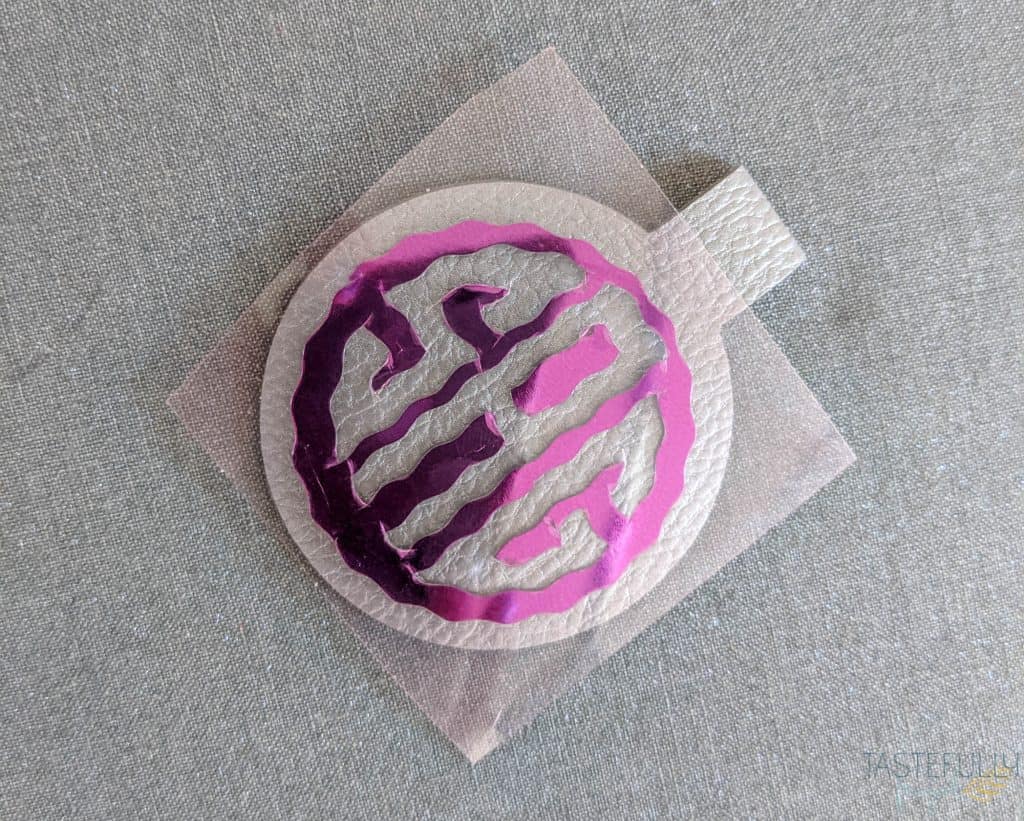
Weed excess foil from monogram and preheat EasyPress to 255°F for 30 seconds.
Preheat faux leather for 5 seconds and line up monogram in the center.
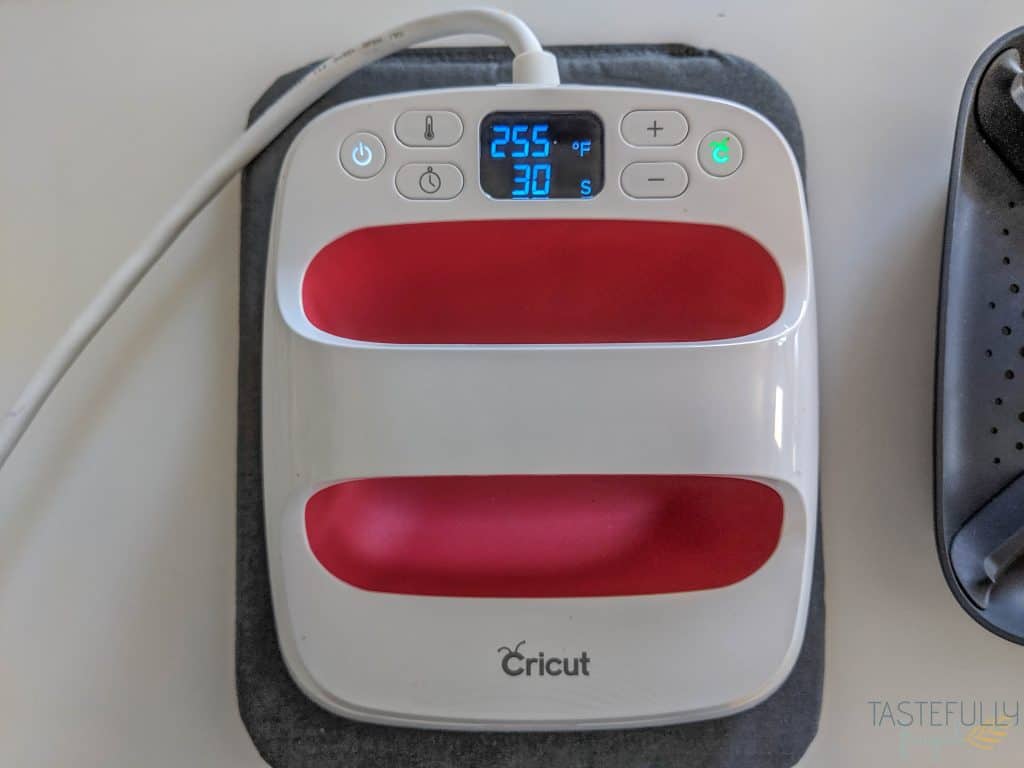
Press for 30 seconds and let plastic backing cool before removing (1-2 minutes).
Once liner is cool slowly peel away. Turn key chain over and press for 15 seconds.
Attach key ring to keychain.
How To Use The Debossing Tip
This is another one of my favorite tools! It really adds a whole new dimension to projects. You can use it on SO many materials too! My next project is going to be a pair of moccasins for our new baby girl coming in August, and I’m going to use the Debossing Tip to add a unicorn horn to them! Check back in August for the tutorial.
Things to remember when using the Debossing Tip:
- If you are doing a larger project, you may notice that every few minutes the debossing tip may pick up and spin. This is totally normal and is done to prevent the tip from going dull.
- If you are using tooling leather, make sure to wet it with a damp towel first and allow to dry before you use the debossing tip.
- You may notice black wear marks on the side of the tip overtime. These are normal and will not affect how the tip works.
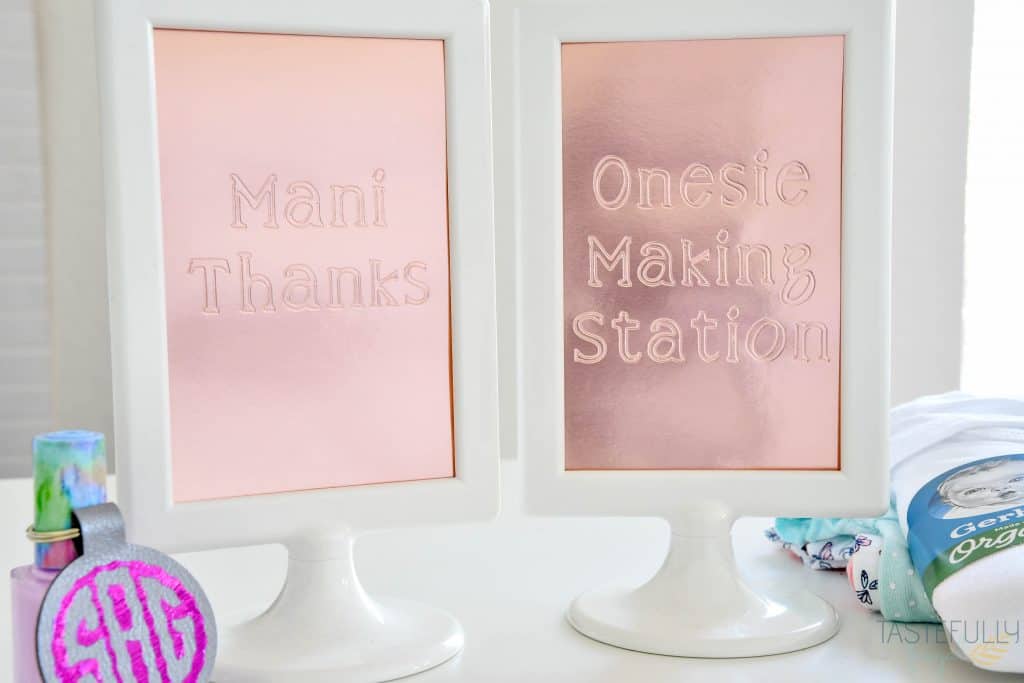
I used the Debossing Tip here to make signs for our party favors and for the Onesie Making Station. It was SO easy to do and really made the signs stand out. Let me show you how it’s done!
SUPPLIES:
IKEA TOLSBY frame, or any standing picture frame.
Debossing Tip + Fine Point Blade
DIRECTIONS:
Open up this design in Design Space. You’ll notice I sized the cards to be 4″x6″, the size of the pictures for the picture frames.
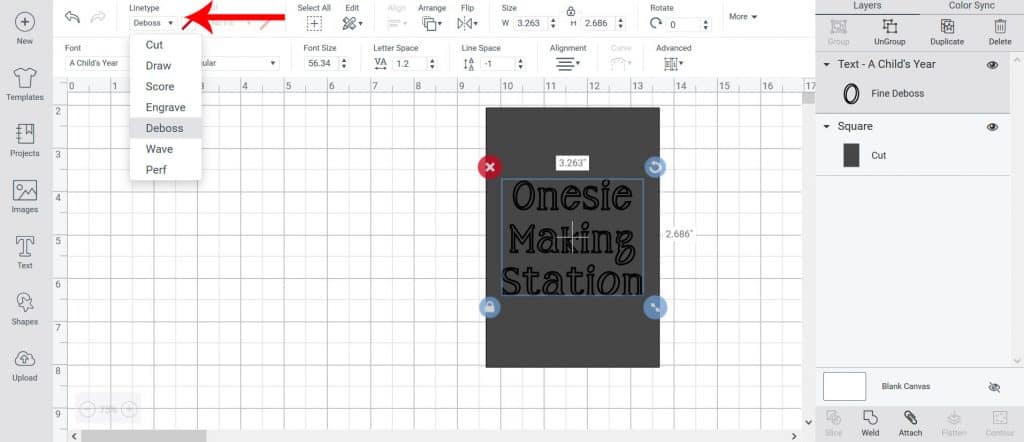
If you want to change the wording, or make more signs, you’ll want to make sure to change the LINE from CUT to DEBOSS.
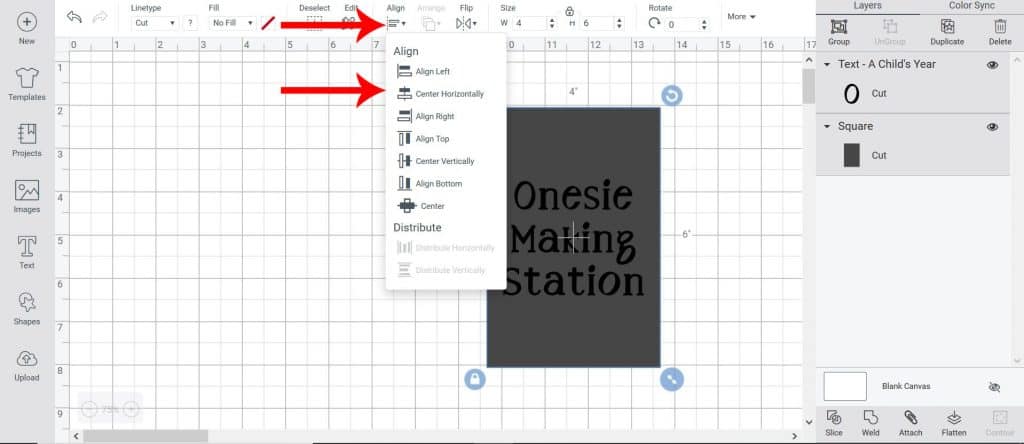
Make sure once you’ve added or changed text, you center it on your card AND attach it so it will be debossed on the card.
Send design to mat.
Select your machine from the drop down menu on the second page.
Choose your material on the next drop down menu. You’ll want to select FOIL POSTER BOARD
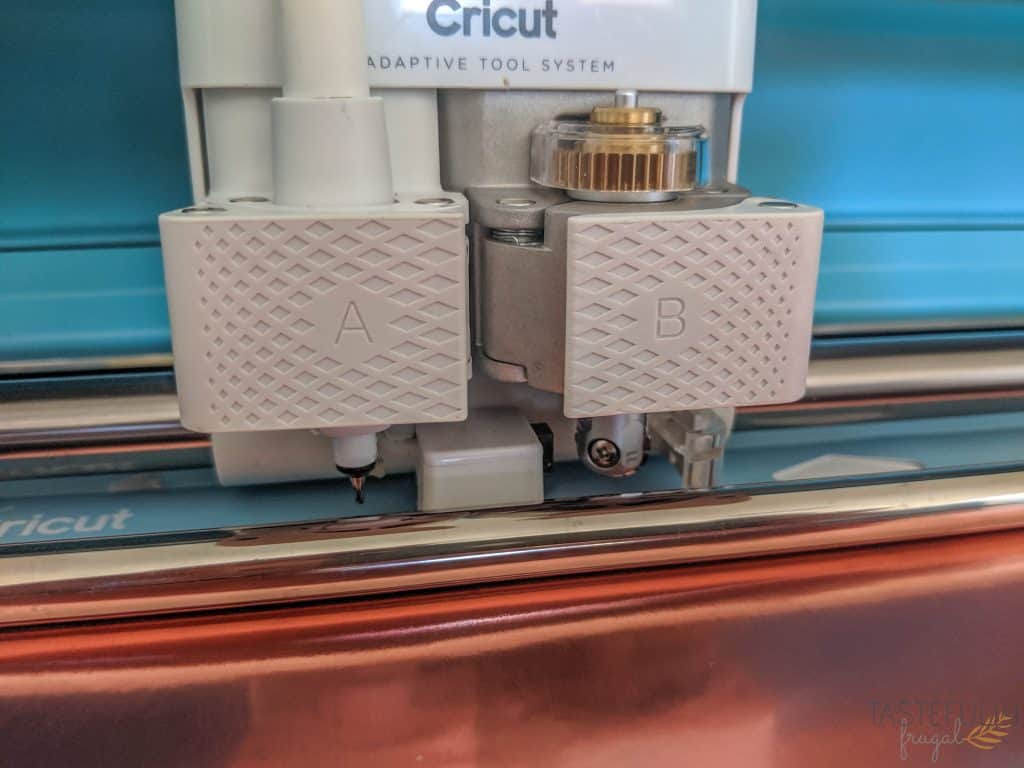
Load your poster board on your mat and put the Debossing Tip in the B clamp.
Once the words have been debossed, you’ll swap the Debossing Tip for the fine point blade to cut the frame of the card.
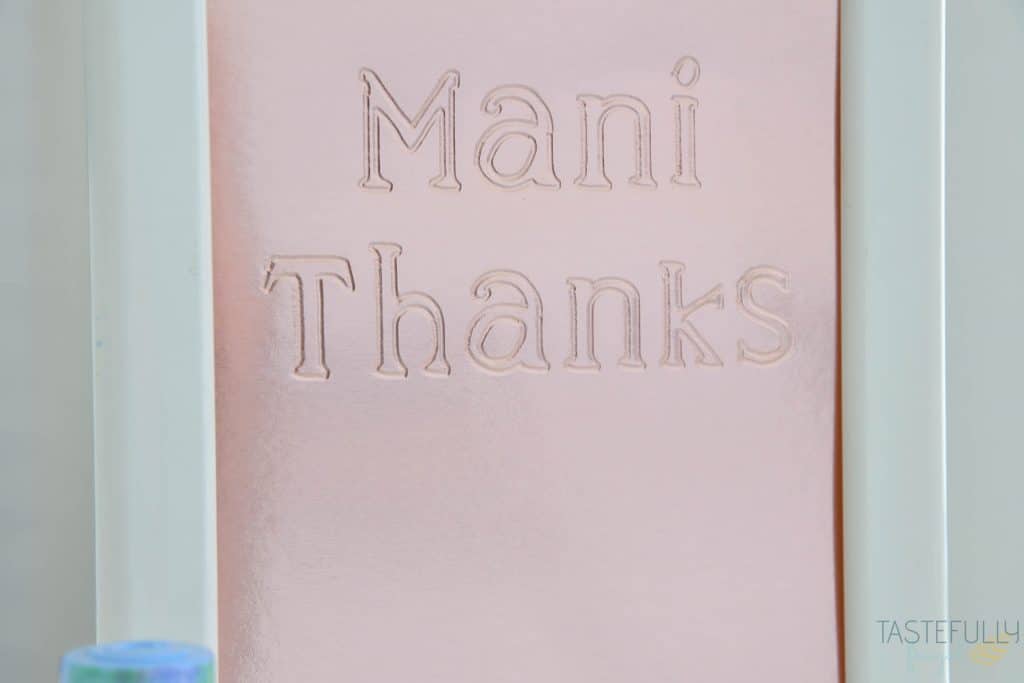
Remove card from mat and insert in picture frame.
How To Use The Engraving Tip
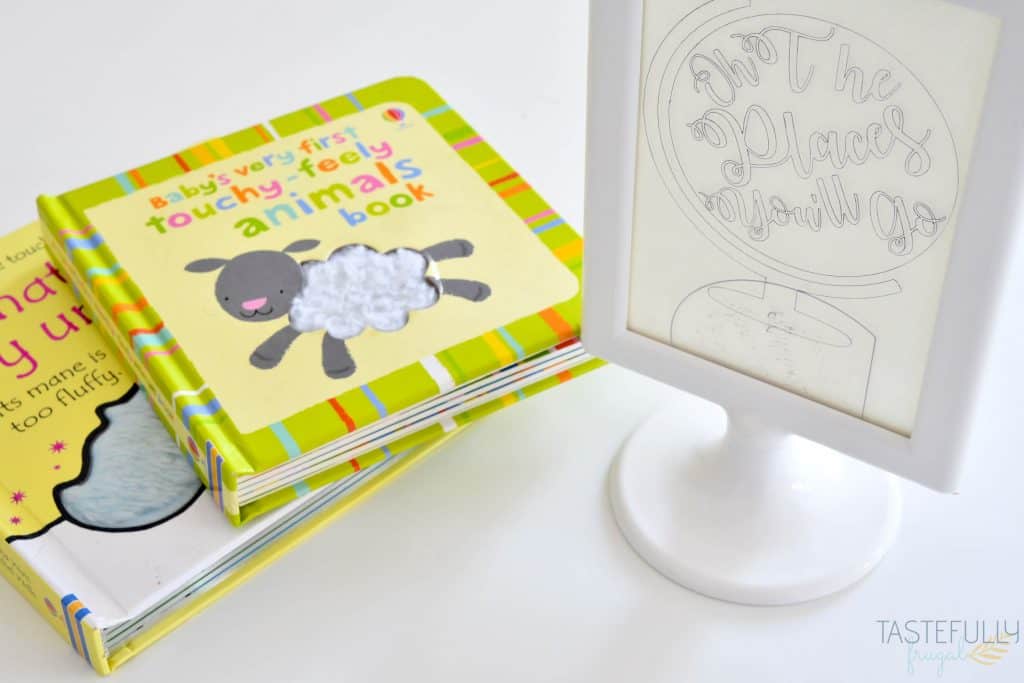
This is one tool that Cricut users have been asking for for years! And it doesn’t disappoint! It makes engraving crisp lines into acrylic, metal, heavy paper and more super easy! Learn from my mistake though, if your material has a protective cover, remove it before using the engraving tip or you will not get a clean design.
This framed art will be going in the baby’s nursery on the bookshelf and I think it turned out darling. I followed the directions for this Design Space project to make my design. If you want to make this same design, you can quickly recreate it by following this Design Space link.
Things to remember when using the Engraving Tip:
- DO NOT use engraving tool on glass! For the same look/affect you can use acrylic.
- Tape what you are engraving down to the mat, just like you would with the knife blade, to ensure design is not ruined during the engraving process.
- If you are doing a larger project, you may notice that every few minutes the engraving tip may pick up and spin. This is totally normal and is done to prevent the tip from going dull.
- You may notice black wear marks on the side of the tip overtime. These are normal and will not affect how the tip works.
I hope this post gives you a better idea of HOW each tool in the Adaptive Tool System works! You can buy the tools right now on HSN or if you’d like to take advantage of the Tastefully Frugal discount code (FRUGAL10 takes 10% off and gets you FREE shipping on $50+ orders) and purchase from Cricut.com, you can do that here.
What tool are you most excited to use? If you’d like to check out more ways you can use your Cricut check out these posts! Need help with your Cricut? Join our Cricut Support Facebook Group!
This is a sponsored conversation written by me on behalf of Cricut. The opinions and text are all mine.


Leave a Reply