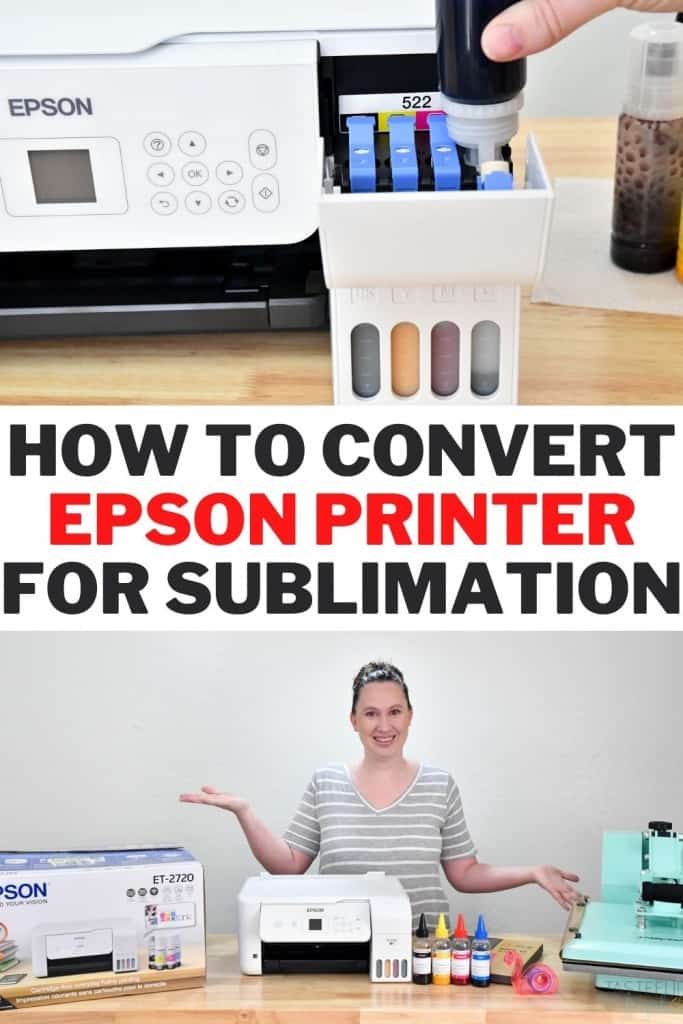
Learn how to convert an Epson Printer for sublimation! In this tutorial we’ll be converting the Epson EcoTank ET-2720 Printer but the steps can be followed for any Epson EcoTank printer.
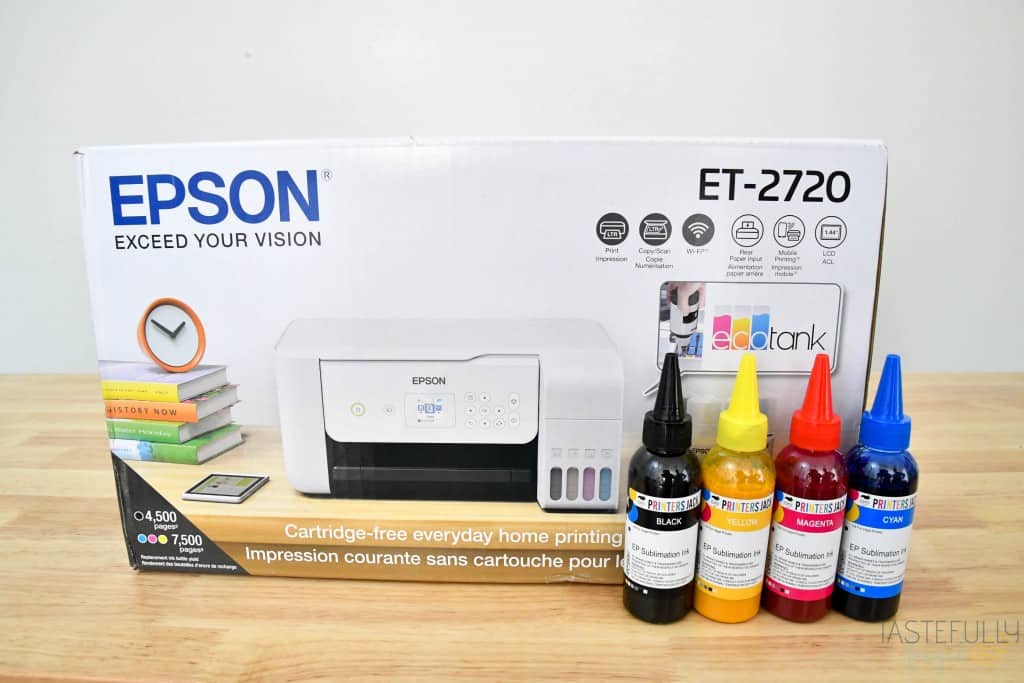
Sublimation is one of the fastest growing trends in the crafting industry right now. Being able to make professional quality shirts, tumblers, mugs and other crafts from the convenience of your own home has changed the way a lot of people look at crafting. Whether you’re making these projects for yourself or to sell, sublimation is a game changer and really opens up the door to a lot more crafting possibilities.
How To Convert an Epson Printer for Sublimation
Converting an Epson printer for sublimation is a more affordable way to get into the craft. And it’s super easy too! In this post we’ll:
- Unbox the Epson ET-2720 printer
- Load sublimation ink into the Epson printer
- Setup your printer preferences to get the best color quality for sublimation
If you still need to buy your Epson EcoTank printer, I’ve had the best luck finding them at Amazon, BestBuy and Walmart.
If you prefer to learn by video check out the YouTube video below for the full process on video.
What comes in the Epson EcoTank box?
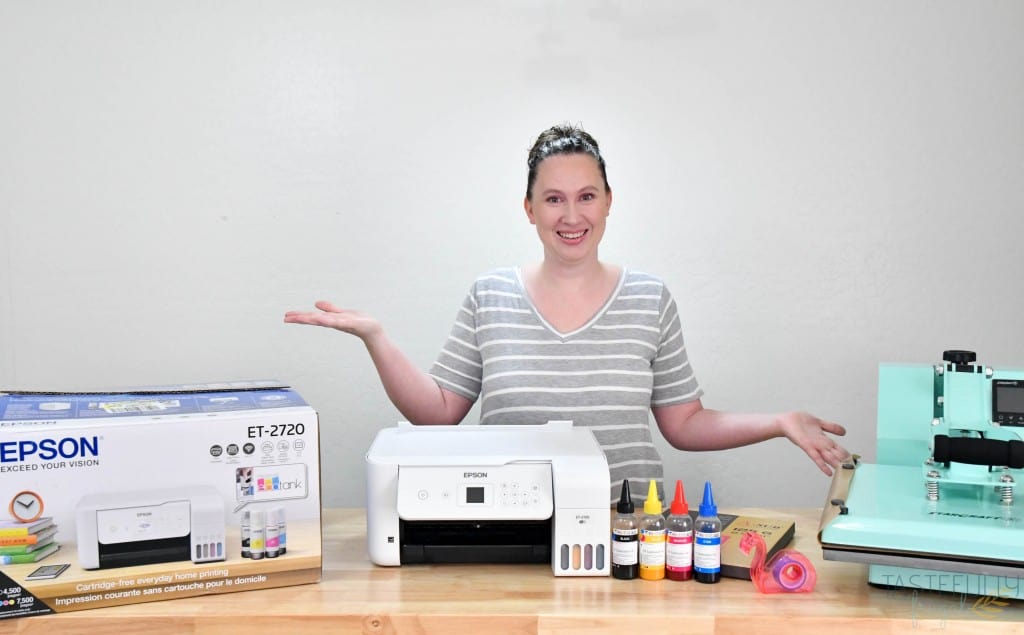
When you get your Epson printer out of the box you’ll also find the following items:
- Owners manual and CD to install printer drivers. If you don’t have a CD drive in your computer, don’t worry you can download the drivers online. The owners manual walks you through the whole process.
- Power cord
- Epson Ink – Don’t throw this away, we’ll be using the bottles to load the sublimation ink into the printer.
- Epson Printer – obviously!
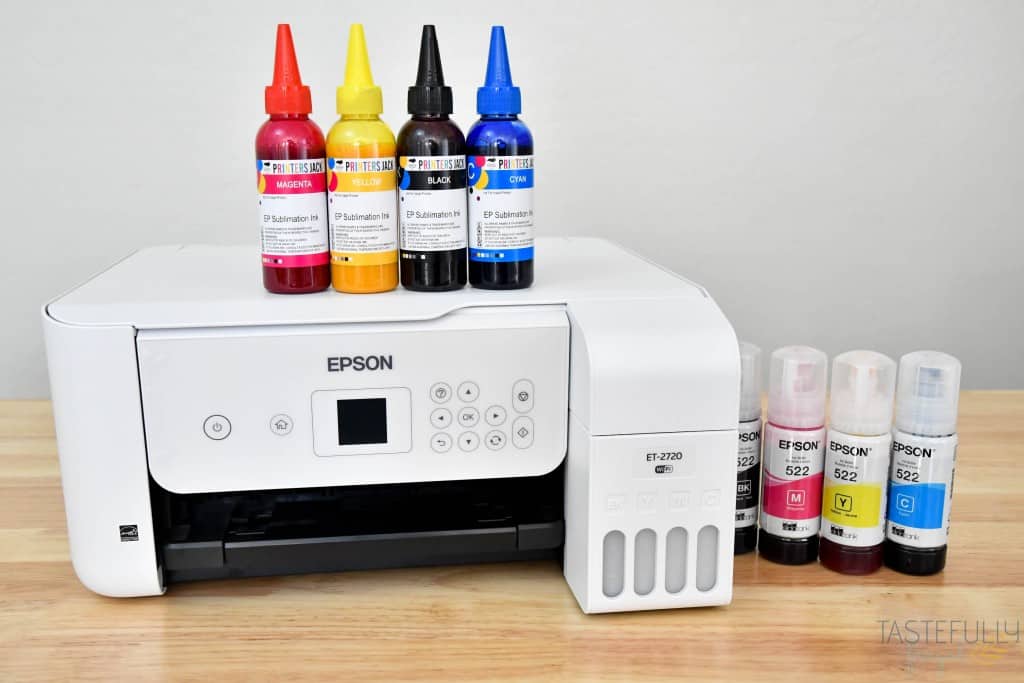
What else do you need to convert to sublimation?
The ONLY other thing you need for the conversion process is sublimation ink. I decided to go with this Printers Jack Sublimation Ink after doing research. So far I’ve made about a dozen projects and have been really happy with this ink. You can find it on Amazon. There are a few other things you may want to get to make the conversion process easier too. Here are the things I used:
- Printers Jack Sublimation Ink
- Jar Opener – use to get the lids off the Epson ink bottles. It makes it so much easier
- Gloves and Paper Towels – to protect your hands and work surface
How to load sublimation ink into Epson EcoTank printer
To make it easier to load the sublimation ink into the printer we are going to use the bottles that the Epson ink comes in. They have a special top that makes loading into the tanks SO much easier. Follow these steps for easy, mess free installation. NOTE – DO NOT TURN THE PRINTER ON BEFORE LOADING YOUR INK.
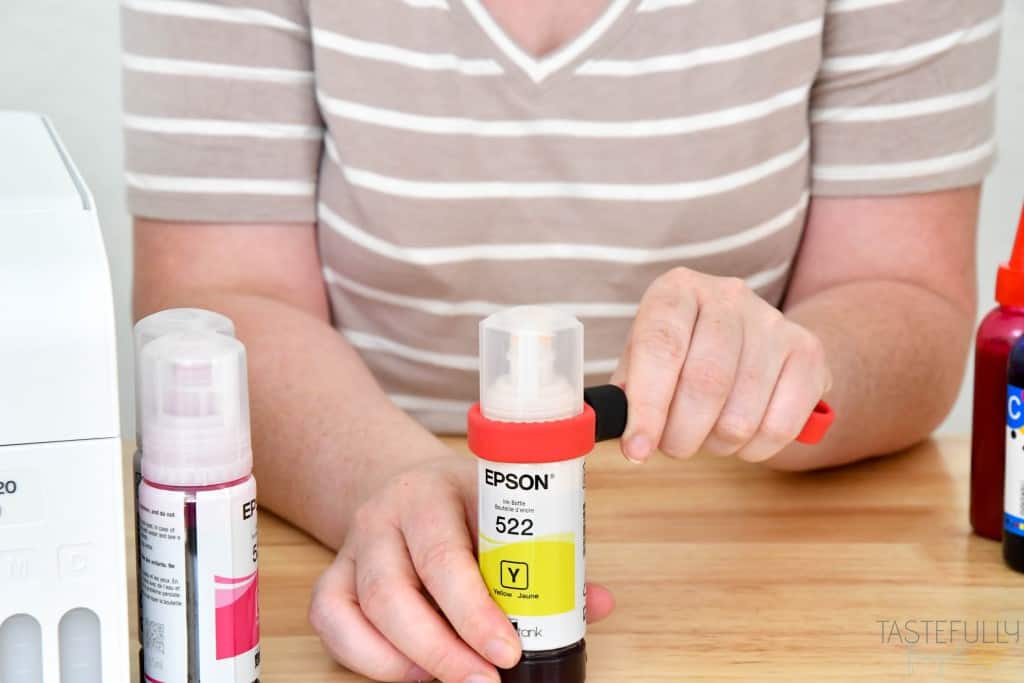
Use jar opener to open Epson ink jars and pour out all the ink. Safely dispose of the ink. You don’t want to just pour it down a drain because it can, and will stain your drains and can cause plumbing issues. We just poured the ink into some old jars, sealed them up tight and threw them away.
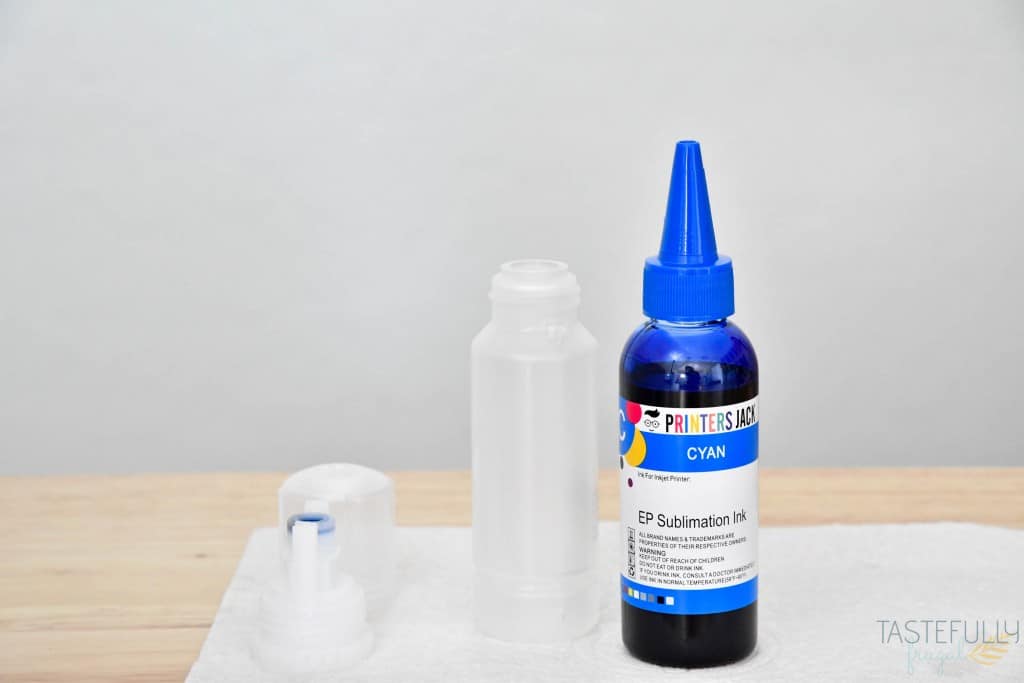
Once you have the ink out of your bottles you’ll want to clean them COMPLETELY! You can’t have any of the regular Epson ink mixed with sublimation ink so take the time to clean the bottles, lid and tips.
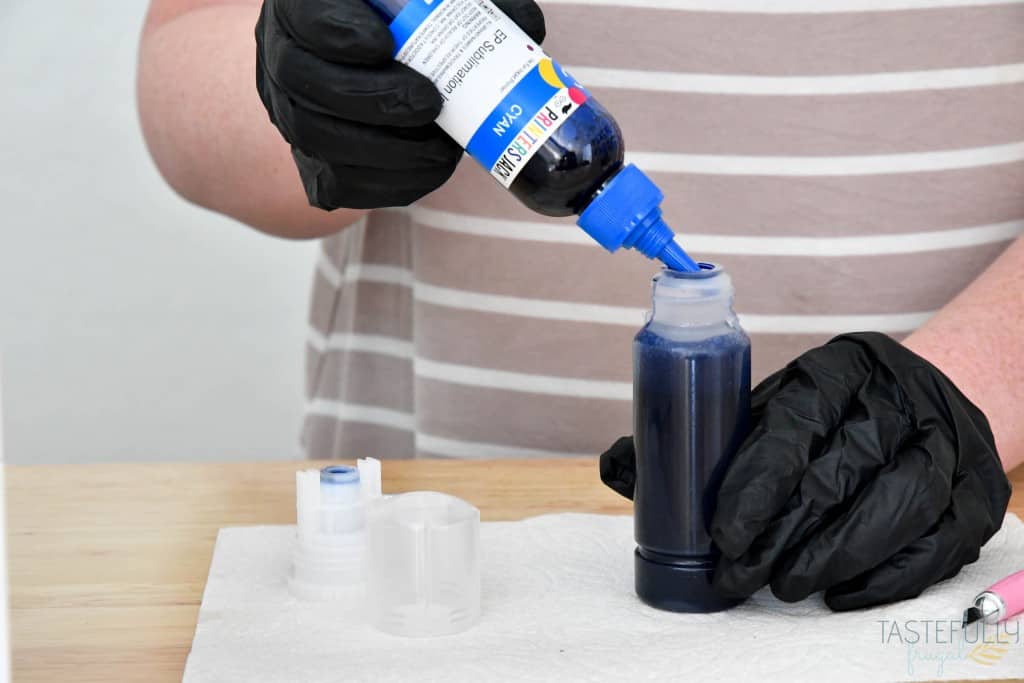
Once your bottles are clean, open up your sublimation ink bottles and put the squeeze tip on to pour the sublimation ink into the Epson bottles.
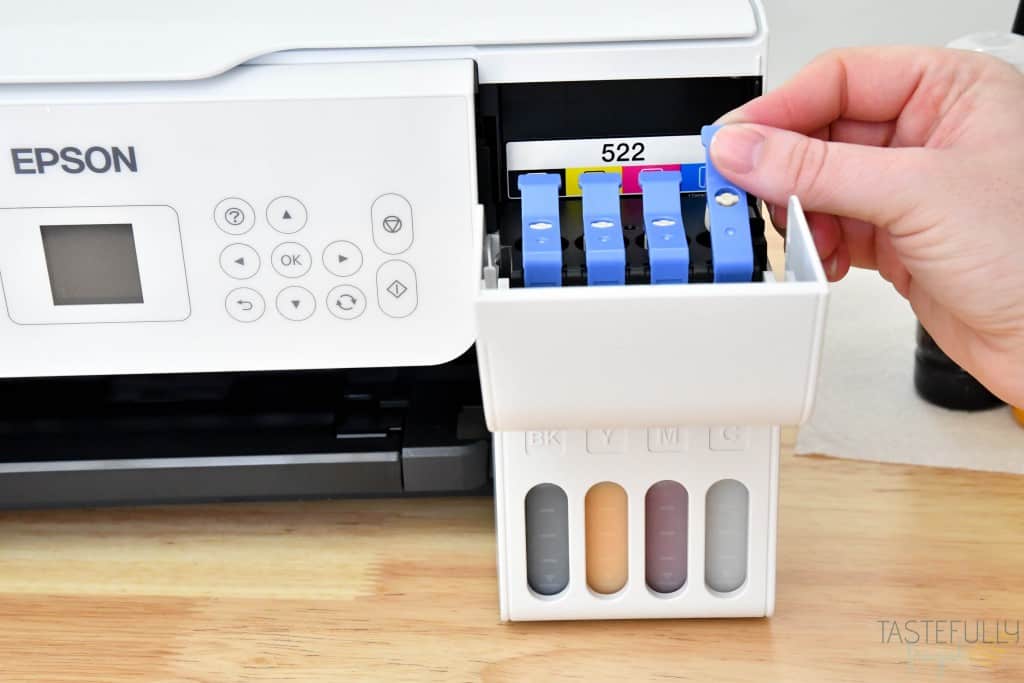
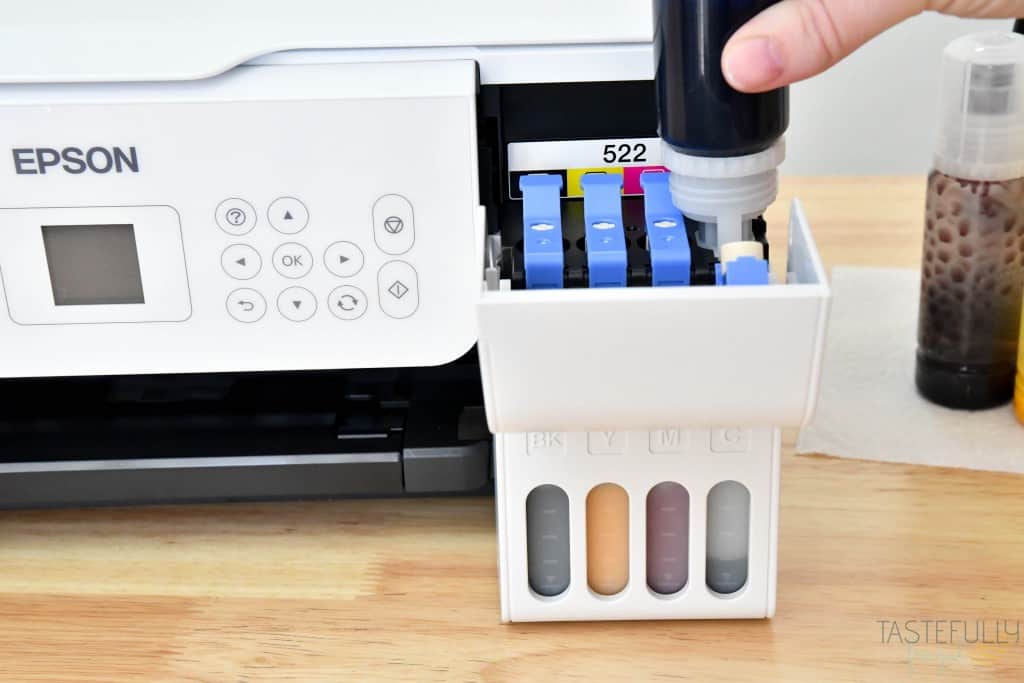
Open up the front panel on the right side of the printer. Pull the blue tabs toward you and pour the correct color of ink into each tab. They will have the colors for each tab on the back wall right above the blue tabs. You will have some ink leftover in the bottles after you fill the tanks and that’s ok. You’ll need to fill the tanks up a little bit after we charge the ink.
How to setup Epson EcoTank printer and charge ink
Once you have all your ink loaded into the printer, plug the printer in and turn it on. You’ll want to follow the prompts on the front screen in selecting a language, preparing the printer (this step basically just makes sure everything is moving and working inside the printer), and charging the ink. The charging process can take up to 10 minutes but you don’t have to be by the printer for the whole process.
Once your ink is charged you may notice that some of the ink tanks are no longer full. You can easily reload them with the leftover sublimation ink in the bottles.
To setup your Epson EcoTank printer to your computer, go here, find your printer and then click SUPPORT. This will download the drivers on to your computer. Follow the onscreen prompts to install your printer and drivers.

Best Print Settings for Sublimation
Before you print any designs or projects you’ll want to change the printer preferences. Remember the EcoTank printers weren’t made specifically for sublimation so not only do we have to convert the printer itself but we also need to adjust the settings. Let’s walk through the changes you’ll want to make!
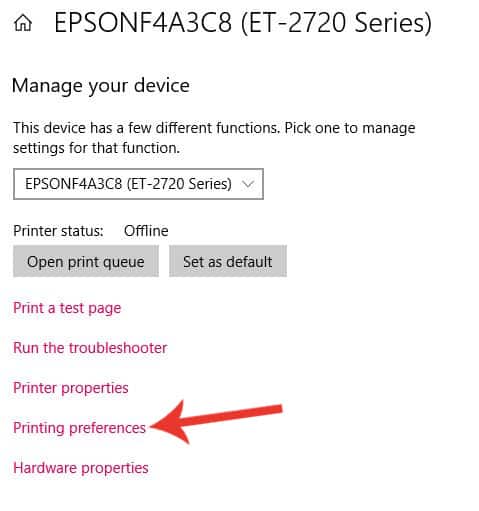
Go to your printer/scanner settings and select the Epson printer from the list. Once selected you’ll want to click PRINTER PREFERENCES.
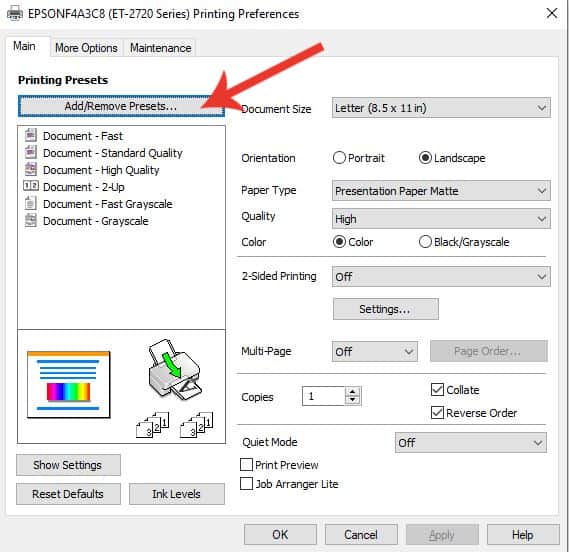
When the screen pops up the first thing we’ll want to do is remove the existing printer preferences. You never EVER want to use these preferences when doing sublimation so it’s easiest to just remove them so you don’t forget in the future to do this you’ll click Add/Remove Presets.
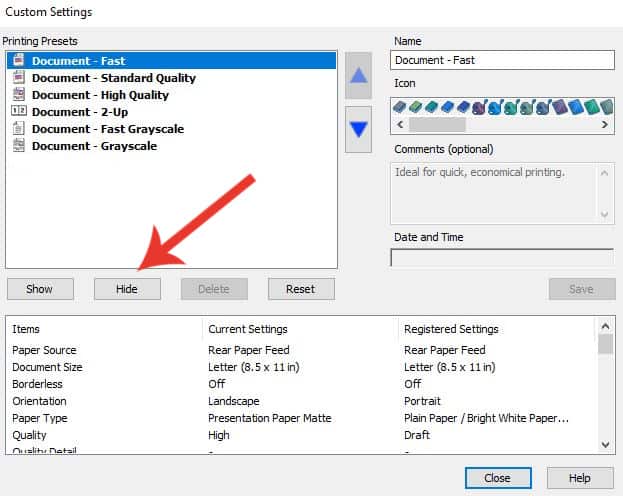
Next select each setting and click HIDE to grey it out. When you’re done hit close and you should be sent back to preferences screen and see zero preferences saved.
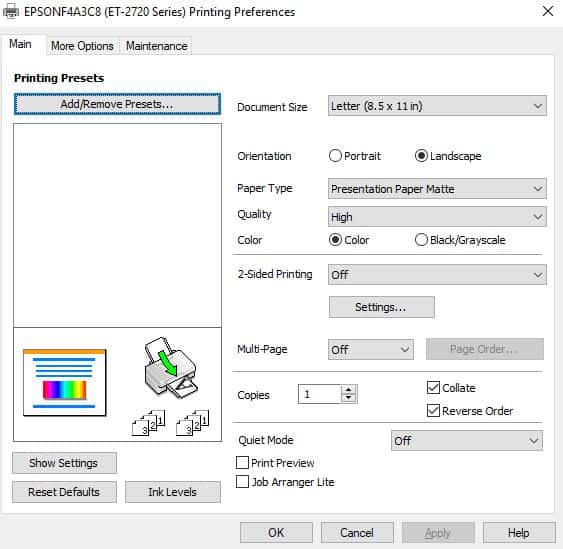
Now let’s start setting up the preferences for sublimation! Change the following settings on this screen:
- Document Size: Letter
- Orientation: Landscape
- Paper Type: Presentation Paper Matte
- Quality: High
- Color: Color
- 2-Sided Printing: Off
- Multi-Pafe: Off
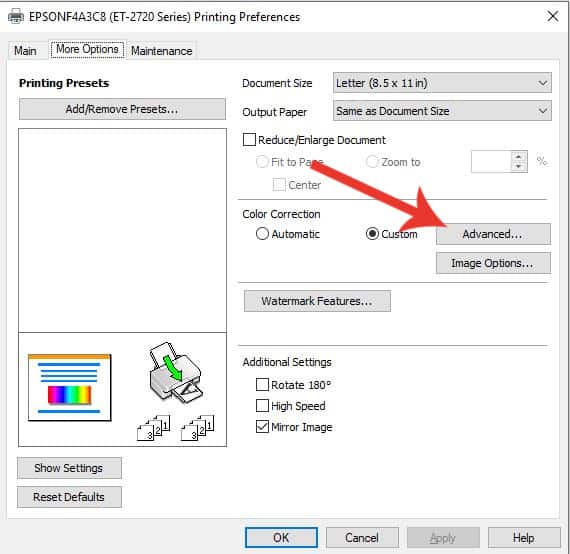
Next click MORE OPTIONS and adjust the preferences on this page to the following:
- Document Size: Letter
- Output Paper: Same as Document Size
- Reduce/Enlarge Image: Leave un-checked
- Color Correction: CUSTOM
- Additional Settings: ONLY CHECK MIRROR IMAGE. Rotate 180 and High Speed should stay unchecked.
Once you have these settings down click the ADVANCED button next to Custom Color Correction. On this screen make the following adjustments:
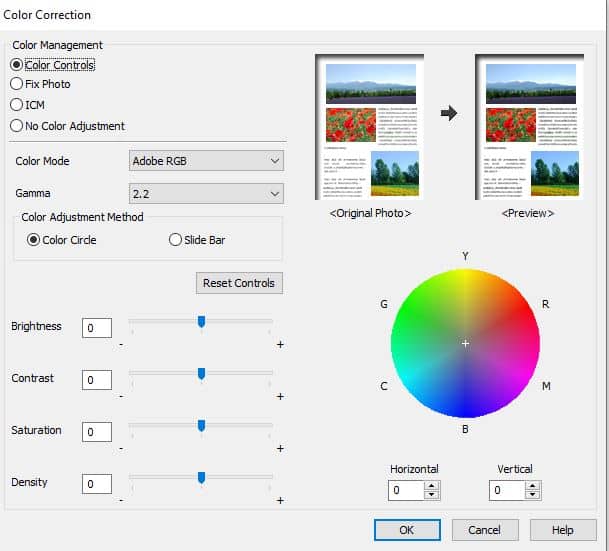
- Click COLOR CONTROLS
- Change Color Mode to ADOBE RGB
- Change Gamma to 2.2
You won’t adjust any of the other settings. Changing brightness/contrast and/or the color wheel is more for like if you are printing pictures of people and if the skin tones are off. I’ll go over adjusting these settings in a later post. Once you have made the above changes you’ll want to click OK.
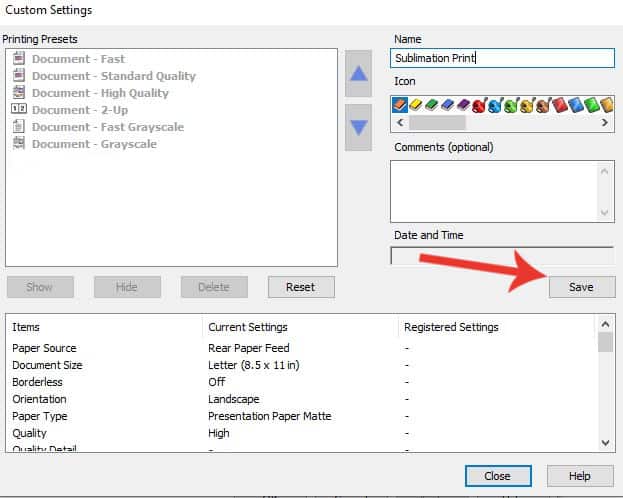
Lastly, you’ll want to name your setting. So click Add/Remove Presets again and in the Name box in the top right corner put in the setting name. You can pick anything you want. I just went with Sublimation Prints to make it easy to remember. You’ll want to scroll through the settings in the bottom of the box to make sure the adjustments we made above are all still in there. If everything looks good hit the SAVE button.
Sublimation Supplies You’ll Need
Aside from a sublimation printer there are a few other supplies you need to make sublimation projects:
- Sublimation Paper – this is special paper that gives your projects a more vivid, full color finish
- Heat resistant tape – you’ll need this to tape your paper down to whatever you’re pressing it on.
- Sublimation Blanks – You can use any high polyester count shirt or other sublimation blanks too. You can check out some of my favorites that you can get on Amazon here.
- Lint roller- Use this to clean your blank and remove any fibers or debris that could affect your design.
- Heat source – I have used my EasyPress 2 with sublimation but I feel like I get a better, brighter finish with a heat press. This is the one I have and love. You can use code TF5 to save 5% if you want to order it (or anything else) from 143Vinyl.
- Parchment or butcher paper – Put this over your design after it’s taped down to your blank to keep your heat press or EasyPress protected from ink bleed.
- Cardstock – I always put this inside my shirt when doing Infusible Ink or sublimation to prevent the inks from pressing through to the back of the shirt. This is also good to use when you’re making pillows, bags, etc.
How To Convert an Epson Printer For Sublimation – Recap
As a quick recap, here are the steps you need to take to convert your Epson printer:
- Empty Epson Ink Bottles and clean.
- Put sublimation ink into Epson ink bottles.
- Load sublimation ink into Epson printer.
- Turn printer on and charge ink.
- Install Epson printer drivers on computer. You can find the drivers here.
- Adjust printer preferences for sublimation.
I hope this post helped you learn know how to convert an Epson printer for sublimation. If you have any questions, leave them in the comments and I’ll get back to you as soon as I can!



Nik says
Hi I have a question… after you convert the printer, can you use the printer to print regular documents again or once the printer is sublimated, it’s sublimated.
Sydney says
Hi Nik! That’s a great question! Once it is converted for sublimation with sublimation ink it can only be used for sublimation. If you decide you don’t want to do sublimation anymore you can flush the lines and add regular ink back into it though.
Donnell Murray says
Thanks a million. I had previously converted my Epson ET-2760 to sublimation but I did not change the settings. This was easy to follow and I will now attempt a sublimation project again.
Sydney says
Yay! I’m happy to hear it was helpful 🙂 Let me know how your project turns out!
Heather says
My printing preferences don’t look like yours🤷♀️
Sydney says
Are you on a MAC or windows computer? You can email me and we can get the correct settings setup. [email protected]