Tips and tricks for using pens and foil to address envelopes with Cricut!
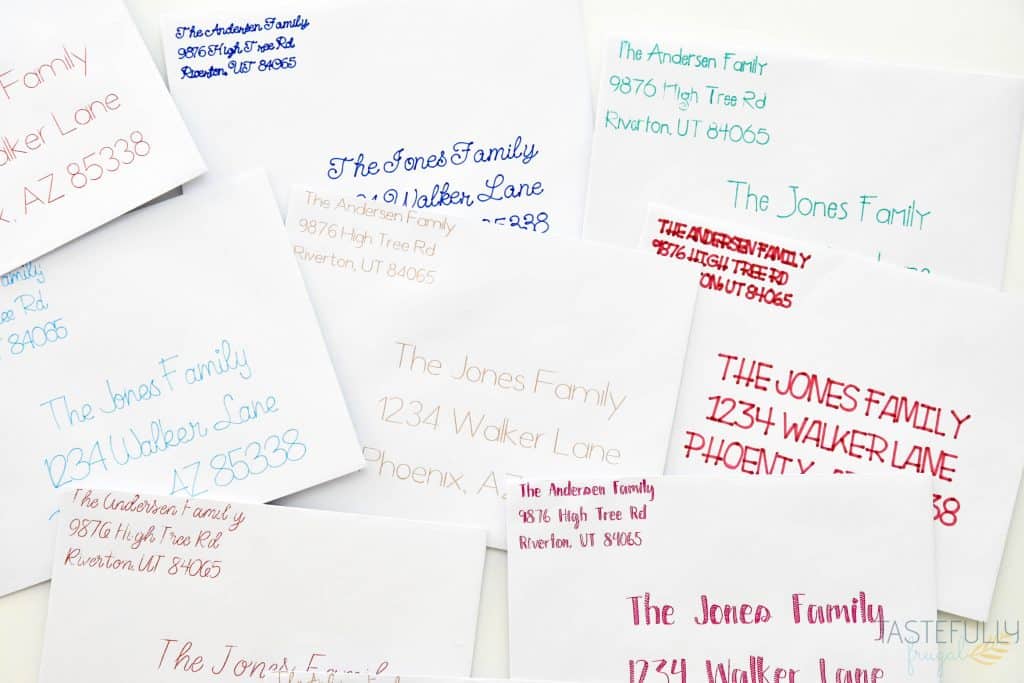
One of the things I love most about my Cricut machines is that I can personalize just about anything and everything I want. From our playroom bins to pantry labels and, maybe most importantly, gifts for friends and family. I have shared how to design and customize cards but I realized as I was getting ready to send out Christmas cards, I never shared how to address envelopes with Cricut. So today is the day!
How To Address Envelopes with Cricut
I love how many options there are when it comes to addressing envelopes! And it doesn’t matter what Cricut machine you have – you can address envelopes with ALL of them! Because there are so many options sometimes it can be overwhelming. So today we’ll be going over:
- How to find the best fonts for writing/using foil
- Size your addresses to fit you envelope
- How to line your addresses up on your mat
- What pens work best for writing/drawing
- How to draw/foil with your Cricut machine
Let’s get started in Design Space!
How to Find The Best Fonts For Writing And Using Foil
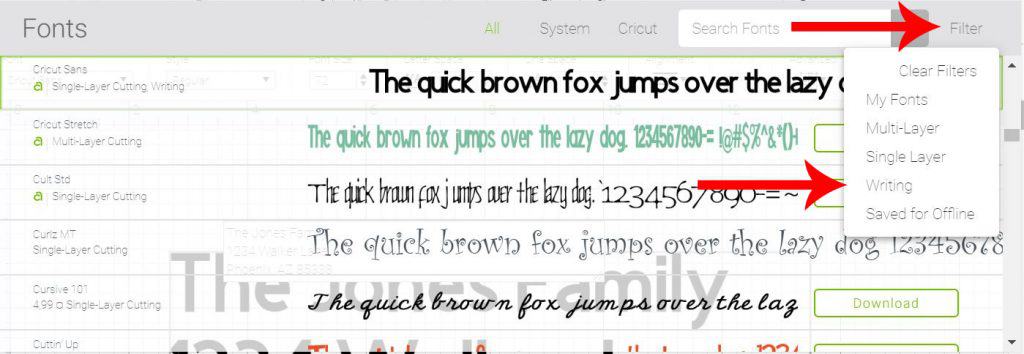
There are hundreds and hundreds of fonts in Design Space already! But not all these fonts are best for writing. Some are better for cutting and don’t have a writing style included. But don’t worry there are still a TON of writing fonts available… Over 170 to be exact! Here’s how to find the best fonts for writing with your Cricut:
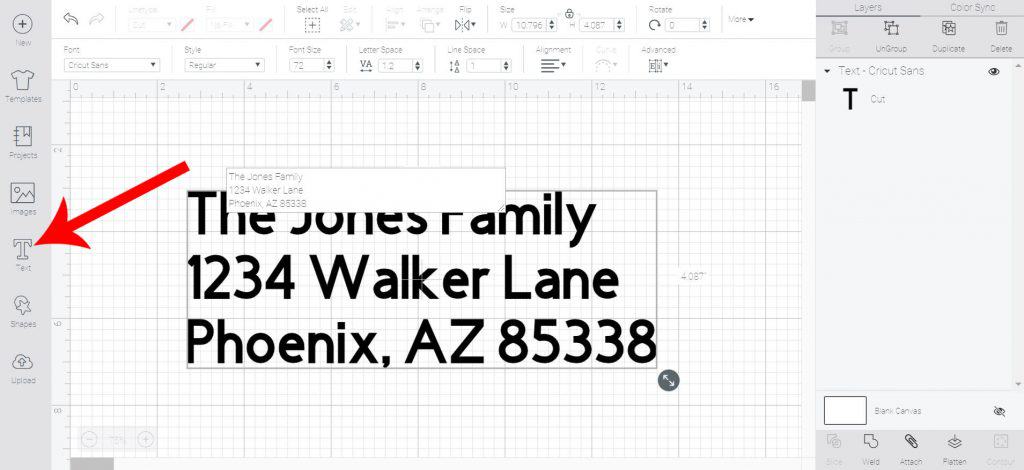
- Click the TEXT button in the left menu and type your address (or whatever words you want to add).

- The default text will be Cricut Sans. If you click the box that says Cricut Sans a drop down menu will pop up with all the fonts available
- On the far right side of the box there is a FILTER drop down menu. Click that and select WRITING. This will filter the results to only show you the fonts that are good for writing/drawing. These fonts are also the best for using with the Foil Transfer System too.
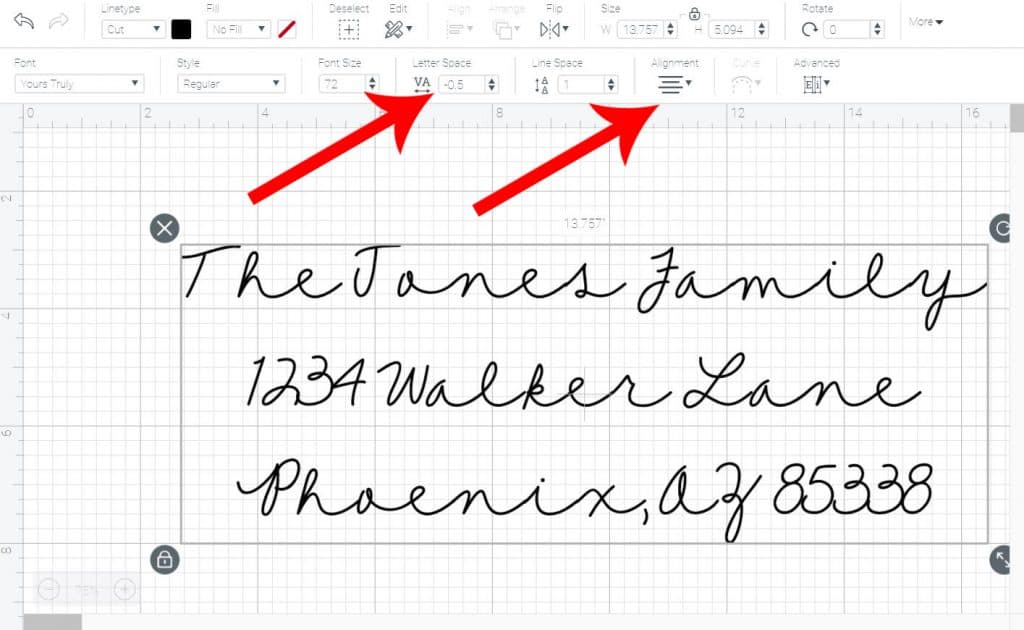
- You can change the letter spacing (which I suggest doing on script fonts), line spacing and alignment in the top menu also.
- Whatever font you choose will now be the first font that pulls up when you add more text to this project. If you start a new project it will default back to Cricut Sans.
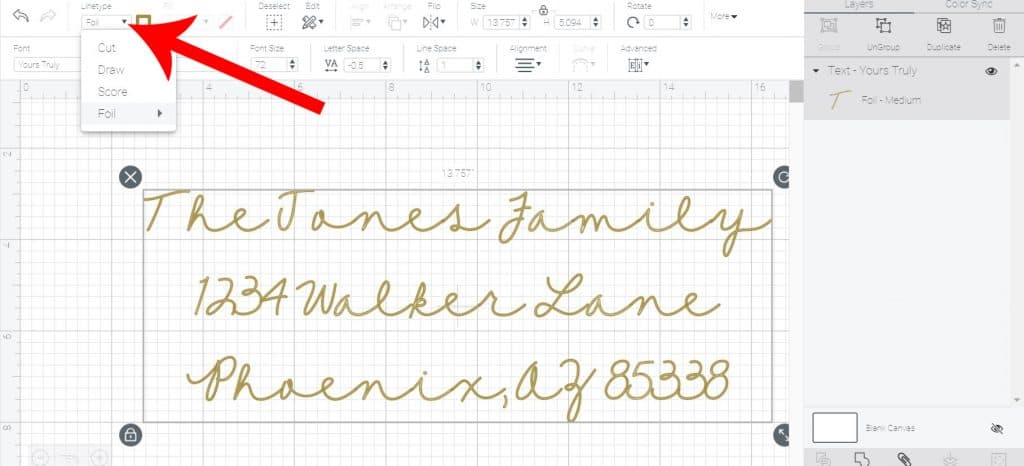
- NOTE – If you are using foil instead of pens, the steps above are all the same but you’ll want to change the LINETYPE from DRAW to FOIL and make sure to use the FINE tip for envelopes.
How to Size Your Addresses To Fit Your Envelope
This is actually the easiest part! The hardest part, for me at least, is picking what font to use! The best way to size your addresses to fit is to:
- Measure your envelope
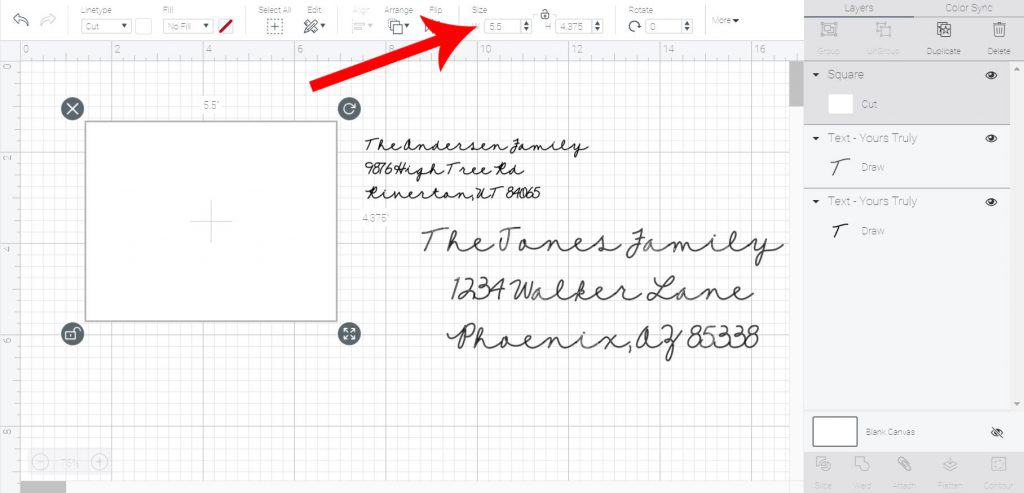
- Add a square in Design Space and resize to the dimensions of your envelope – to do this you’ll first click SHAPES in the left menu, and add square. Then in the top menu you’ll change the width and height. Make sure to click the lock logo to be able to change the width and height independently.
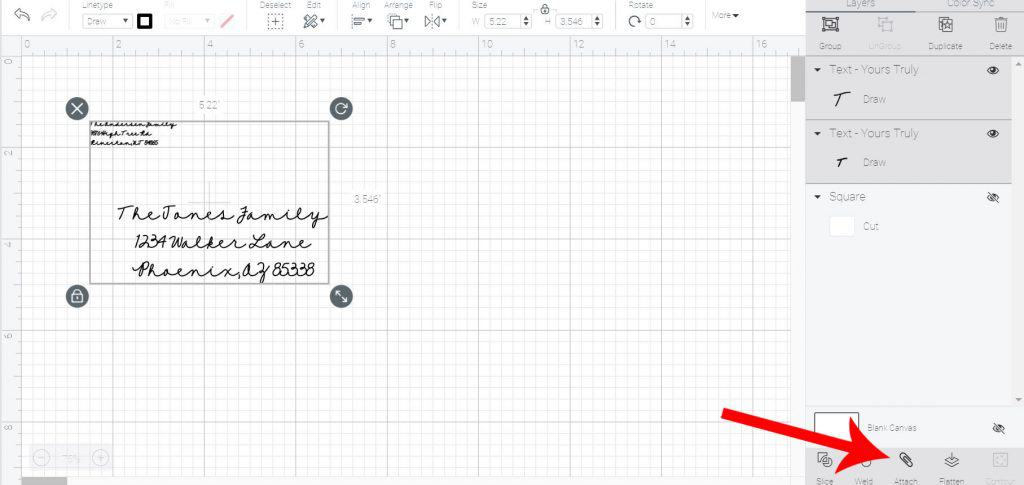
- Move your text box(es) with your addresses on top of the rectangle and change the size so they fit properly.
- Once you have the sizes right, select both the addresses (return address and mailing address) and click ATTACH in the bottom right toolbar. This will make it so that when you go to draw or foil your design they will be spaced correctly.
I’m using A2 envelopes today but you can use any size envelope just adjust the sizes to fit your envelope’s dimensions.
How to Line Your Addresses Up On the Mat
This is the part that can either make or break your hopes of addressing envelopes. But have no fear… I tried ALL the ways and am here to share the EASIEST way to get your addresses set up the right way every time.
The easiest way I found is to do two envelopes per mat (or four if you use a 12×24 mat). On the preview screen, the screen that pops up after you click MAKE IT from your canvas, you’ll want to move your designs. If you’re doing more that two envelopes you’ll want to move the others to new mats. To do this:
- Click the address and it will show up with a rectangle around it with a circle with three little circles in the top right corner. Click that button and click MOVE SELECTED.
- A pop up will come up and ask you what mat you want to move it to or if you want to add it to a new mat. I click new mat and create a new mat for each 2 addresses.
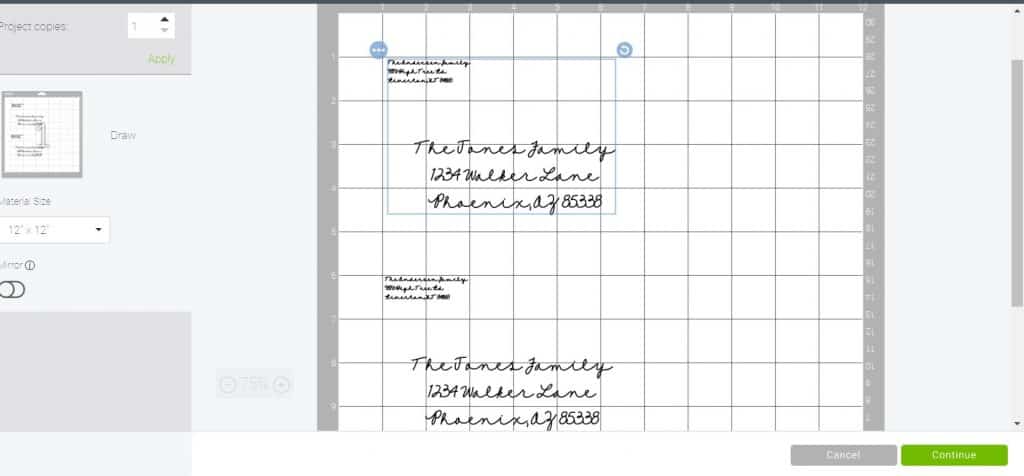
Once you have two addresses (4 technically if you’re including the return address) on your preview mat, move your first design down so it starts just under the 1″x1″ mark. This way you can line your envelope up perfectly on your cutting mat to the 1×1 mark and it will line up the addresses perfectly.
Move the second address just below the 1″x6″ mark. Just like above this way you can line your envelope up on the 1×6 mark on your cutting mat and it will write/foil in the perfect spot.
Click CONTINUE and select your machine and material on the next screen. When I am just writing/foiling (no cutting) I select COPY PAPER from the drop down menu.
If you are using different color pens or foils, follow the prompts underneath the materials menu on what pen/foil sheet to add first.
Now that we’ve got the designs done let’s talk about how to actually write on the envelopes!
What Pens Work Best for Writing and Drawing
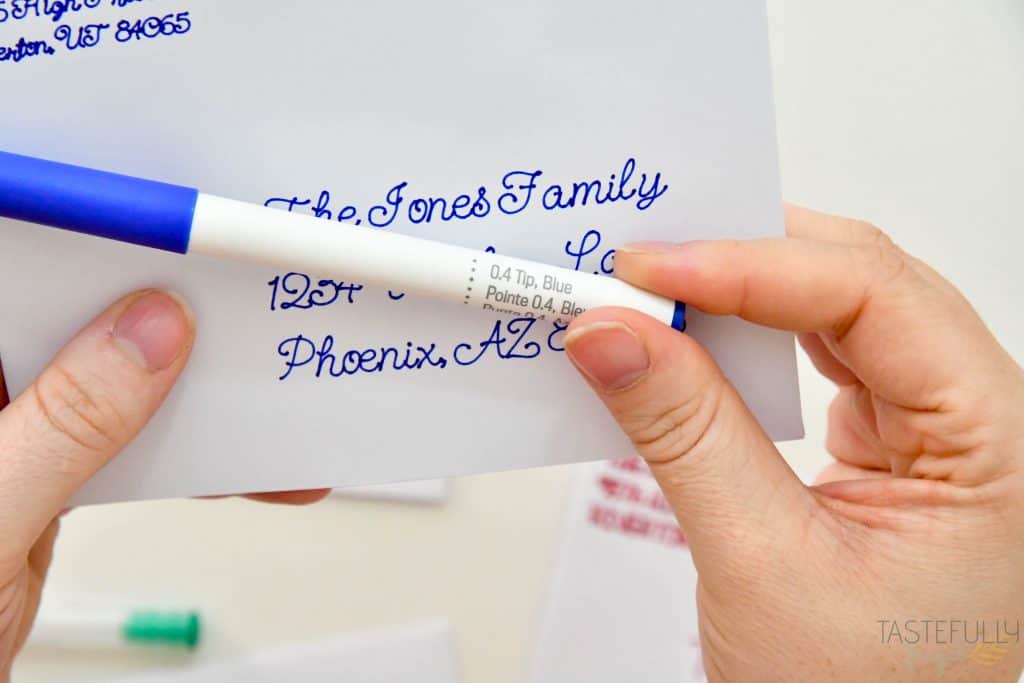
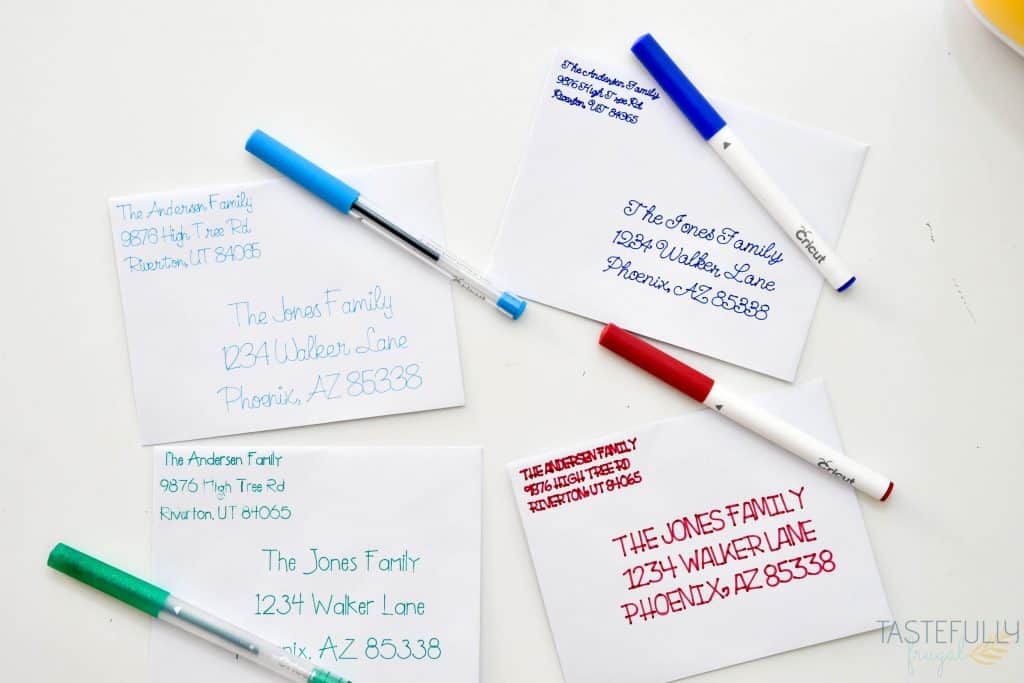
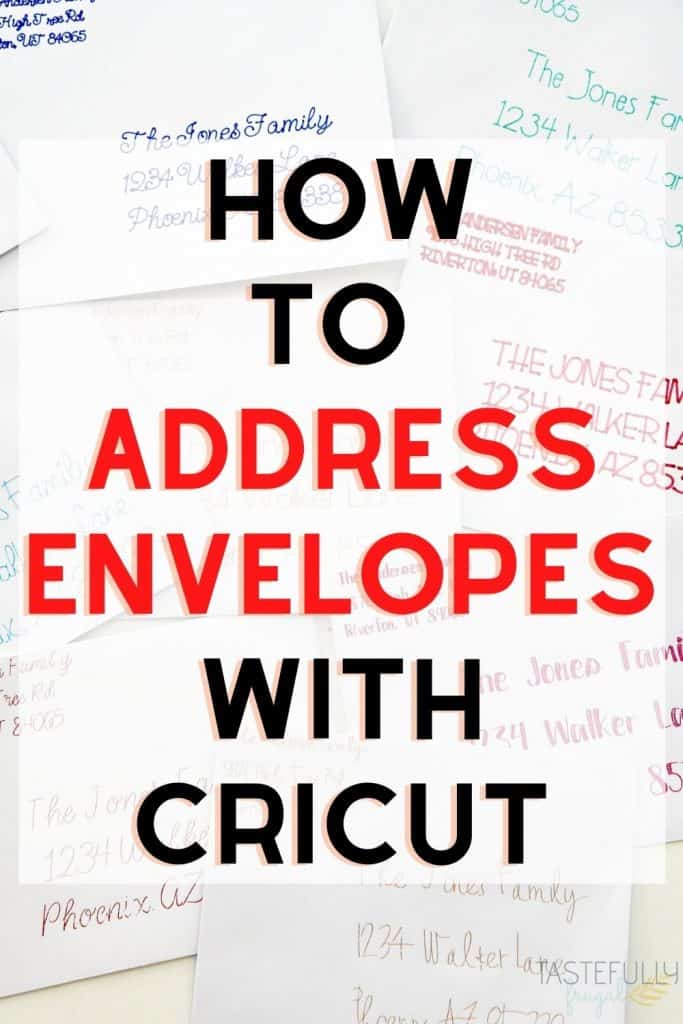
Just like font options, there are a lot of different pen options too! But some pens do work better than others. I’ve found the pens that work best for addressing envelopes are the Fine Point and Extra Fine Point Pens. As you can see I also use the Glitter Pens and the Markers and they both work too but they just don’t look as good (in my opinion) as the fine point pens.
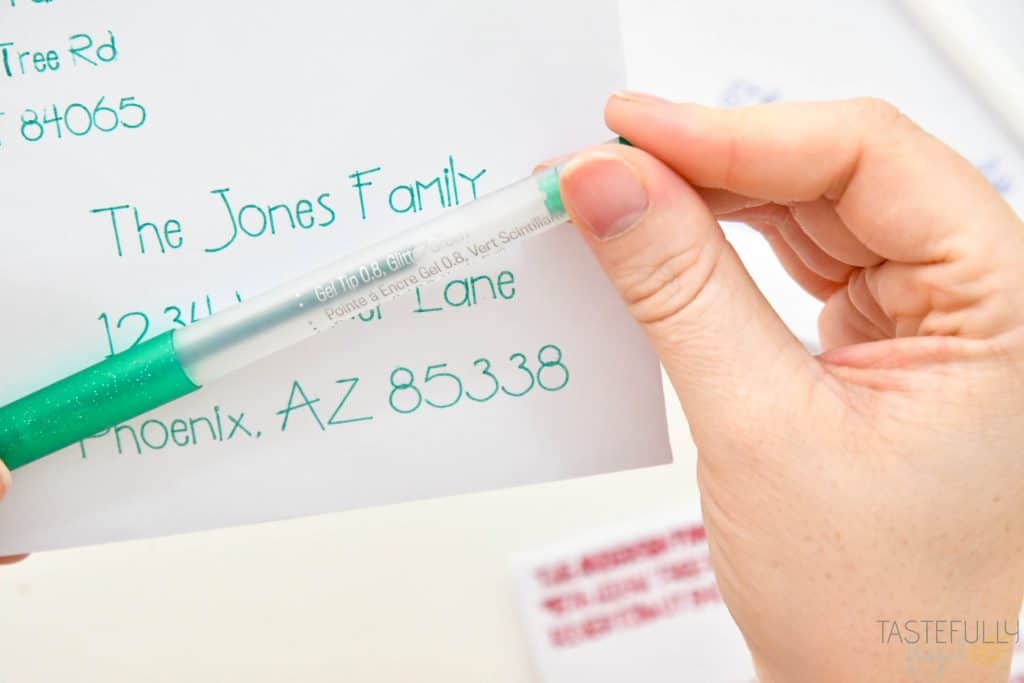
The glitter pens add a fun sparkle to your envelopes but they do take longer to dry so they can smear. The markers work on some fonts (mostly serif fonts) but are hard to read, especially on script fonts.
You can check out all of the pen styles and colors Cricut has here. If you need to order supplies and your order is over $50, use code SAVE10 to save 10% and get free shipping on your order.
How to Write or Draw with Cricut
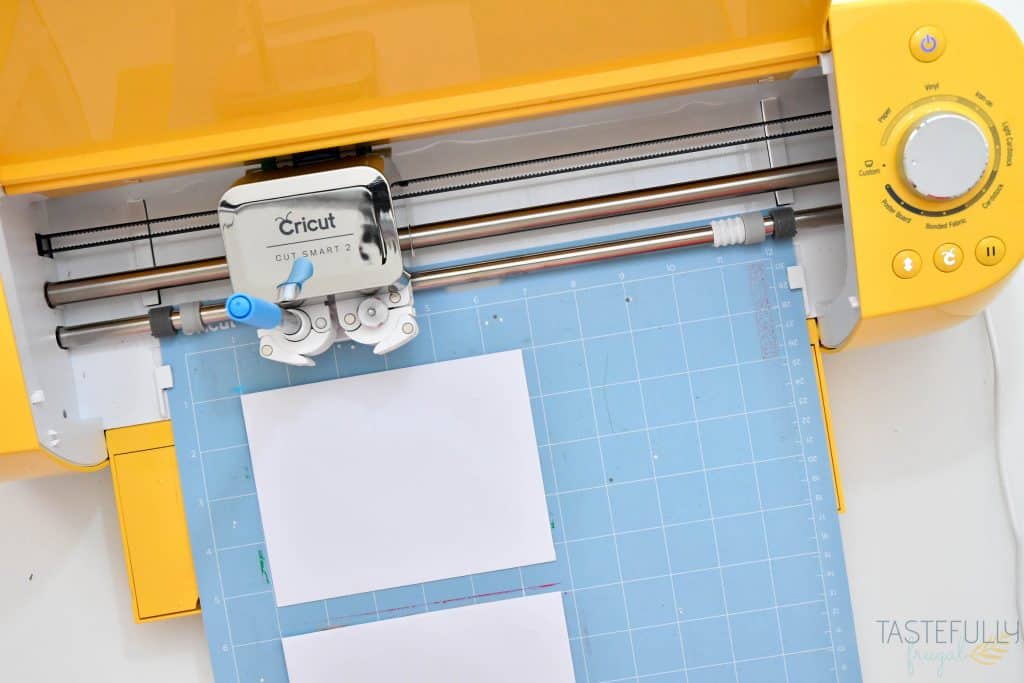
Once you have your design lined up in Design Space and material selected it’s time to start writing! You’ll want to use a LightGrip cutting mat with envelopes to prevent the envelopes from curling when you’re done.
Line your first envelope up on the 1×1 square on the mat. Line your second envelope up on the 1×6 square.
Load your pen into the B clamp in your Cricut machine. **I like to have a scratch piece of paper next to me and draw a little line or two with the pen before I load it to make sure the ink is flowing well. Also, store your pens upside down to prevent the ink from drying out**
Load your cutting mats with the envelopes on it into your Cricut machine and click the flashing C light to begin writing. When the writing is done you can click the flashing C light again to unload.
Turn your mat over and pull your mat away from your cards. I do this vs pulling the cards off of the mat to prevent curling.
How to Apply Foil with Cricut
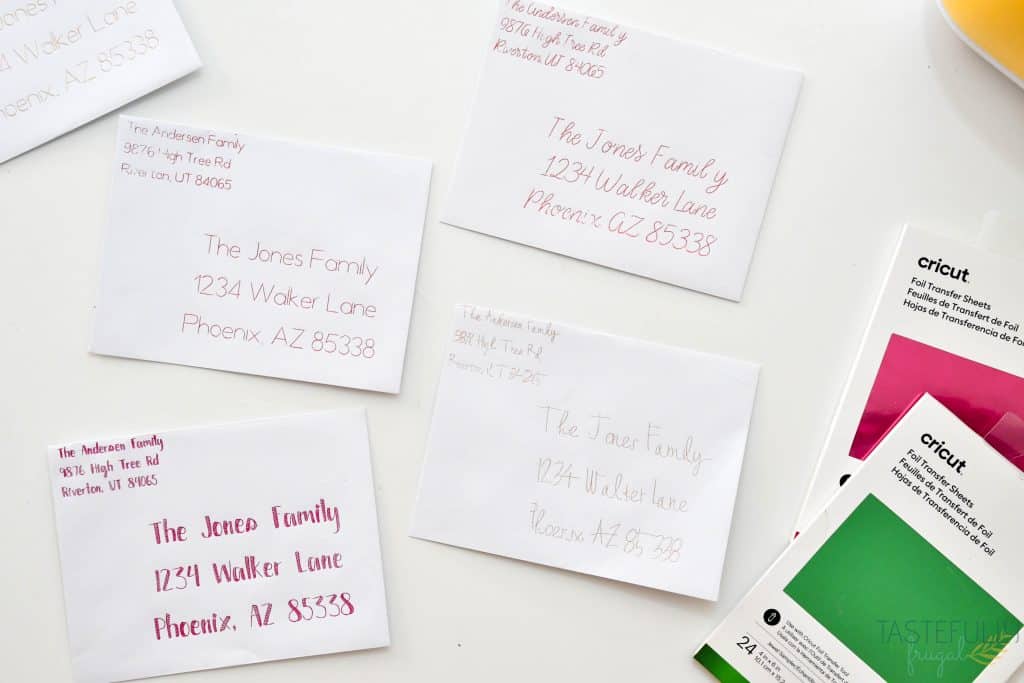
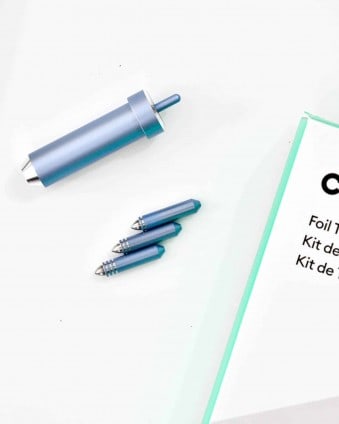
If you’re new to the Foil Transfer Kit, you can check out this post for more in depth info on how to use it.
You’ll want to line your envelopes up on your LightGrip mat the same you would for pens.
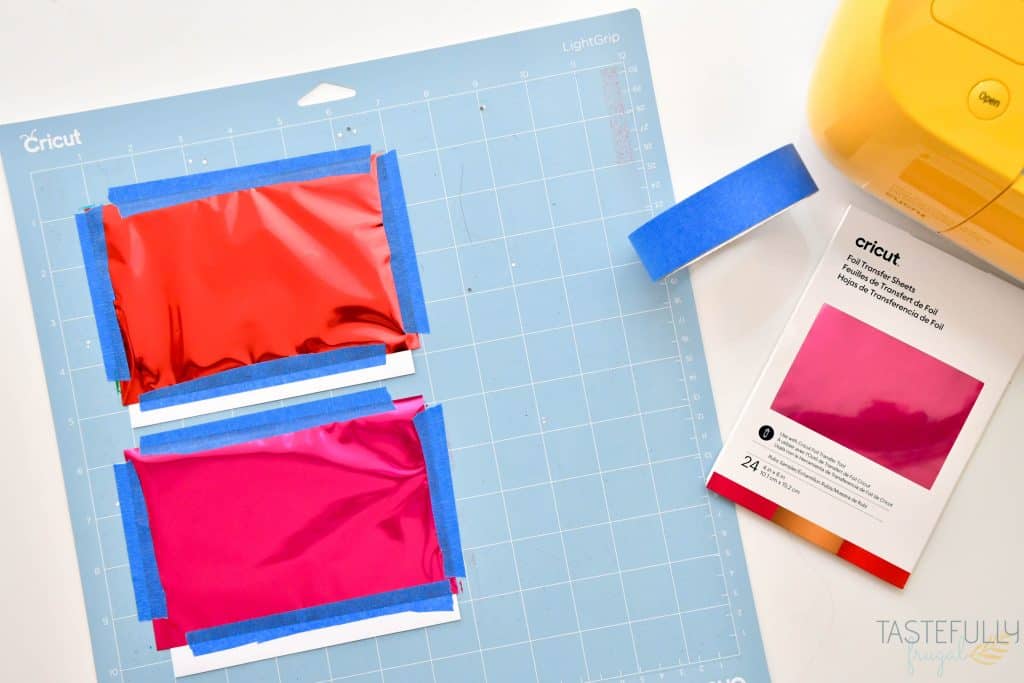
Next, we’ll attach the foil sheets to the envelope. You’ll want to make sure you start the foil sheet above the envelope so that you can tape it down and not have the tape be where your addresses go. Sometimes the foil tip won’t have enough pressure to press through the tape AND the foil.
I’ve also found that painters tape works better for attaching the sheets to your envelope, mat. When you’re attaching your foil sheets, make sure it’s as tight as possible and there aren’t any wrinkles. The wrinkles can get caught on the tip and ruin your design.
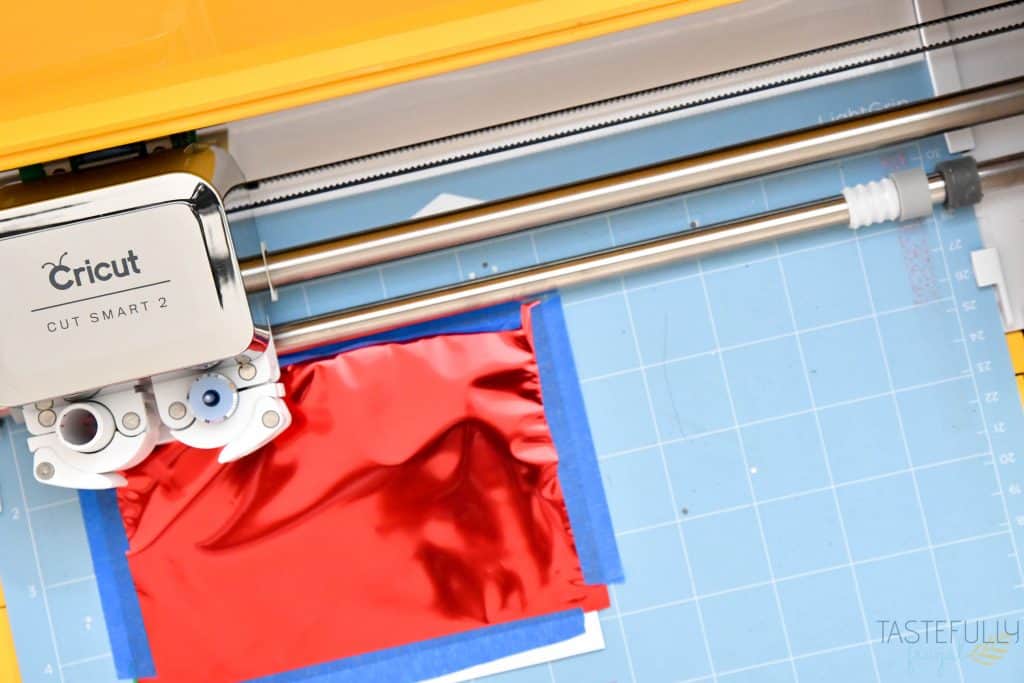
Load you mat with foil sheets and envelopes into your Cricut and put the Foil Tip in the A clamp. Press the flashing C light to begin foiling. When you’re design is done, click the flashing C light again to unload.
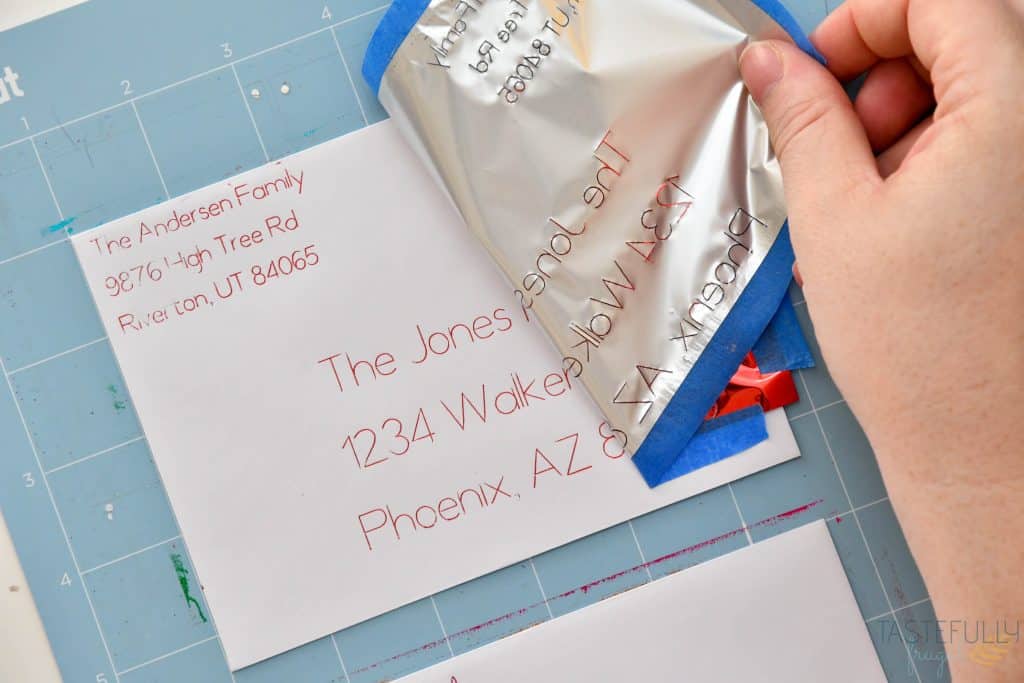
Slowly remove foil from envelopes/mat.
Don’t you just love the personal touch the Cricut gives when addressing envelopes too?! Make sure to subscribe to my YouTube channel to check out all the video tutorials. For more Cricut projects and tutorials, check out these posts. For tips, tricks and immediate help, be sure to join our FREE Cricut Support Group.


Leave a Reply