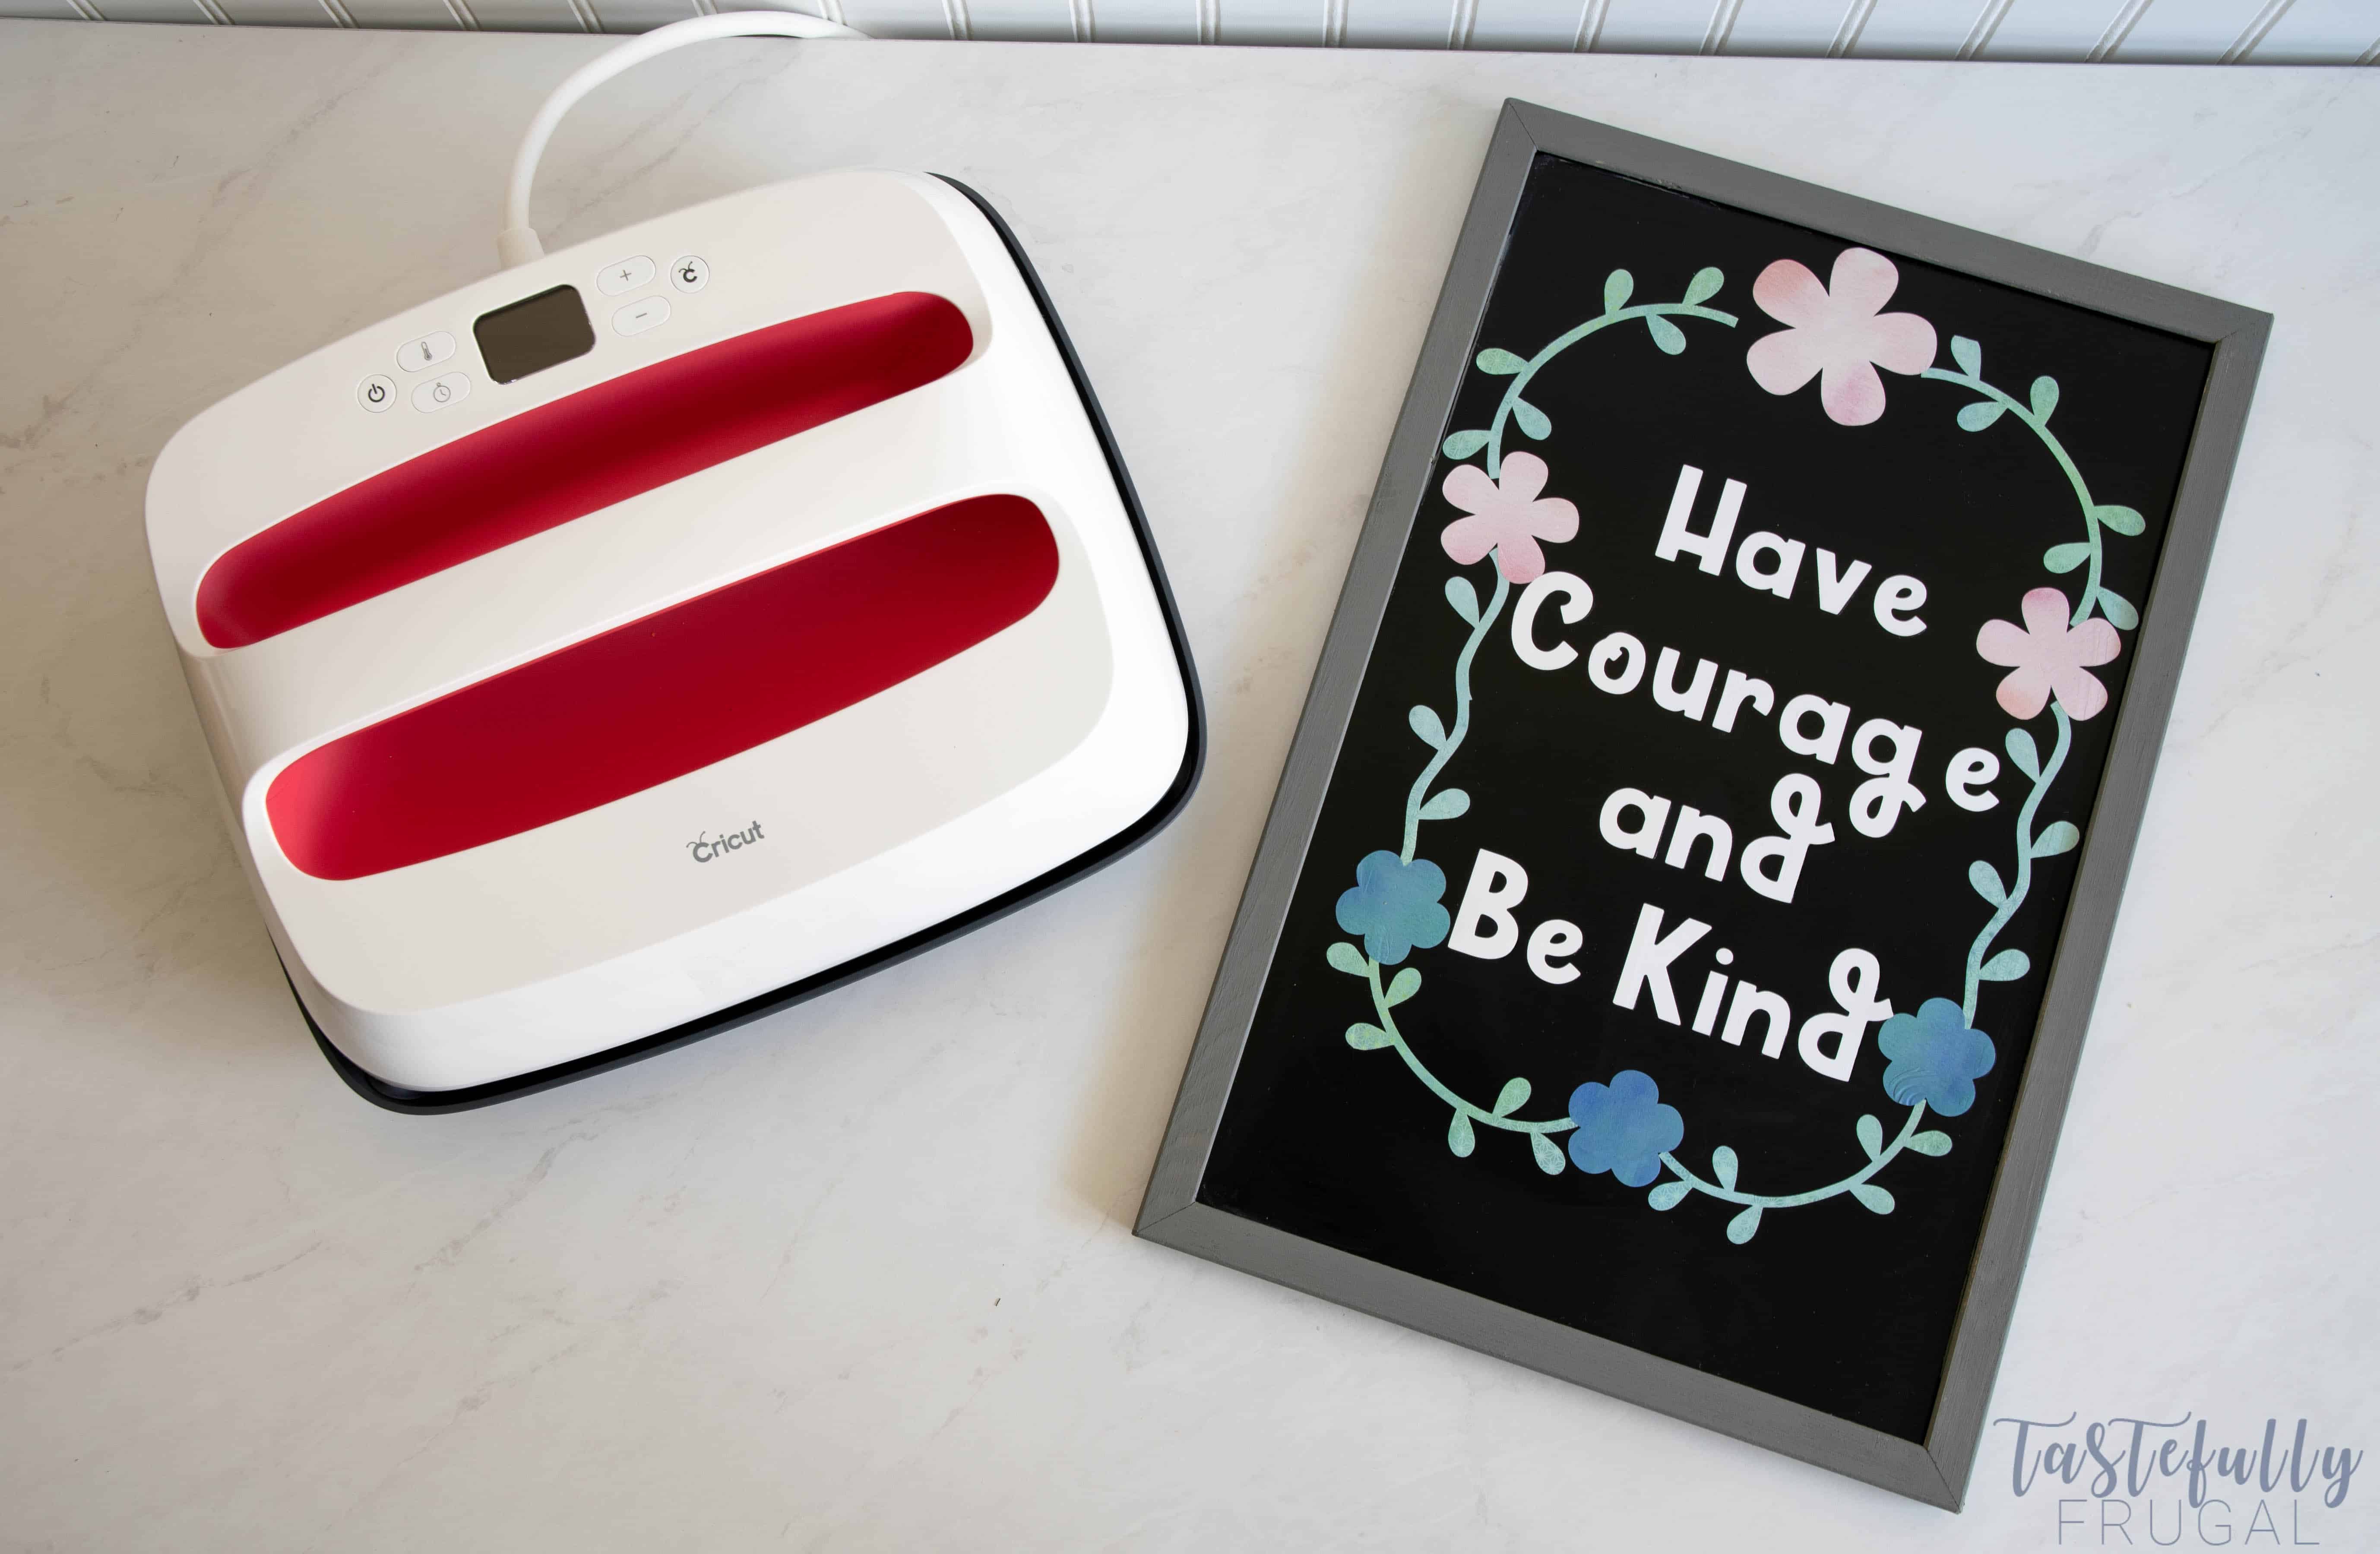
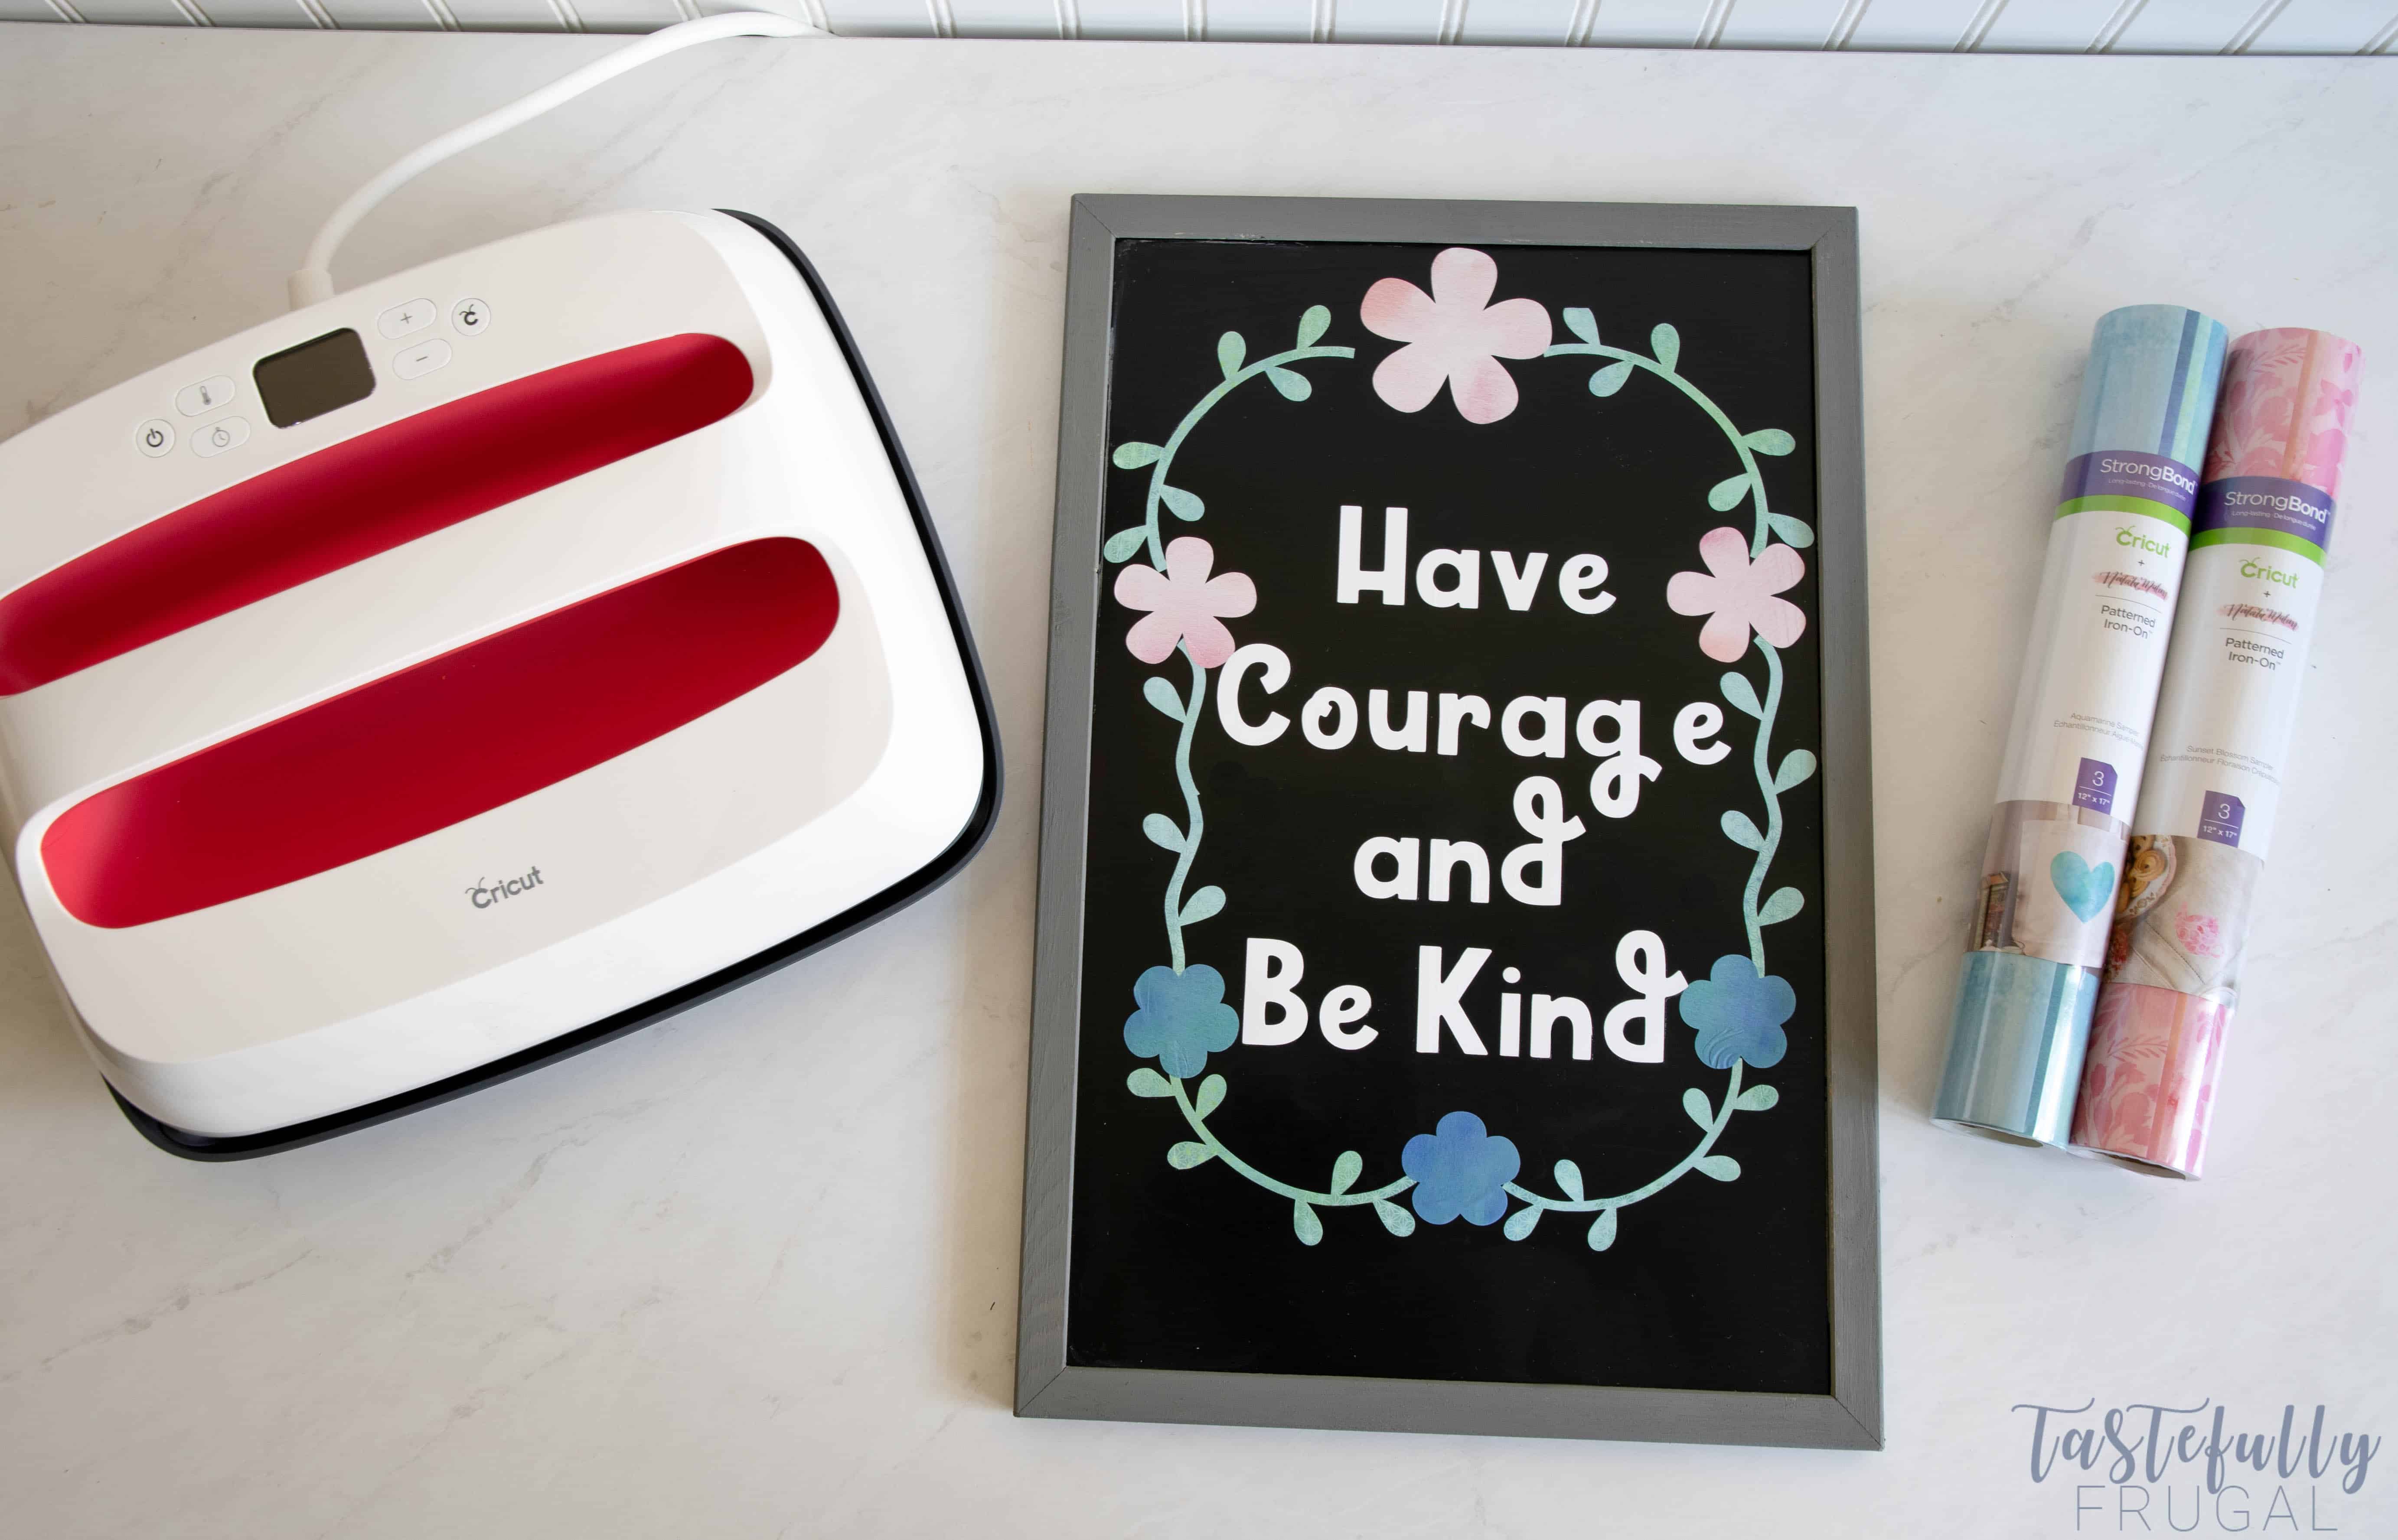
Make this large inspirational quote sign quickly and easily with the Cricut Maker and EasyPress 2.
As soon as I learned about the new EasyPress 2 and different sizes available at the Make-A-Thon the list of projects I wanted to make grew tremendously! I was so excited to hear about all the features, like the USB port to make upgrades easily (you can read all about the EasyPress 2 and all the new features here), but was even more excited about the larger and smaller sizes.
The new 12″x10″ EasyPress 2 is perfect for larger shirt and hoodie designs (think men’s shirts or full shirt designs), pillow covers, blankets, customizing sports apparel, tote bags and lots more! The 6″x7″ EasyPress 2 is great for baby onesies, cosmetic bags, hats, mugs, signs, banners and more too! And there is still a 9″x9″ size that you can use for any project; really you can use all three for almost any project.
The new EasyPress 2 machines will be available in the Fall. Prices for each machine are below:
As always when you’re shopping on Cricut.com use code TFRUGAL to save 10% and score FREE shipping (though I’m not sure if the code will work with the new EasyPress 2 machines). And keep your eyes peeled on the Facebook page and in our Cricut Support Facebook Group to be the first to know when they are available for purchase!
I’ve *FINALLY* started putting things up on the wall in our home and I have quite a few sign ideas I’ve been wanting to make. One I’ve wanted to do for awhile is the saying ‘Have Courage and Be Kind’. In this day in age, I feel like this is something that not only I need to remember, but also that I want my kids to learn and remember.
The design itself for this was really easy to create in Cricut Design Space and cutting and applying the iron-on was even easier! I got the chalkboard/magnet board at JOANN for less than $5 with a coupon and already had the iron-on vinyl from a project I did this spring. My hubby was excited to see some of my craft stash get used up for a project and I got the sign I’ve been thinking months about. It’s a win-win! Let me show you how EASY it was to make!
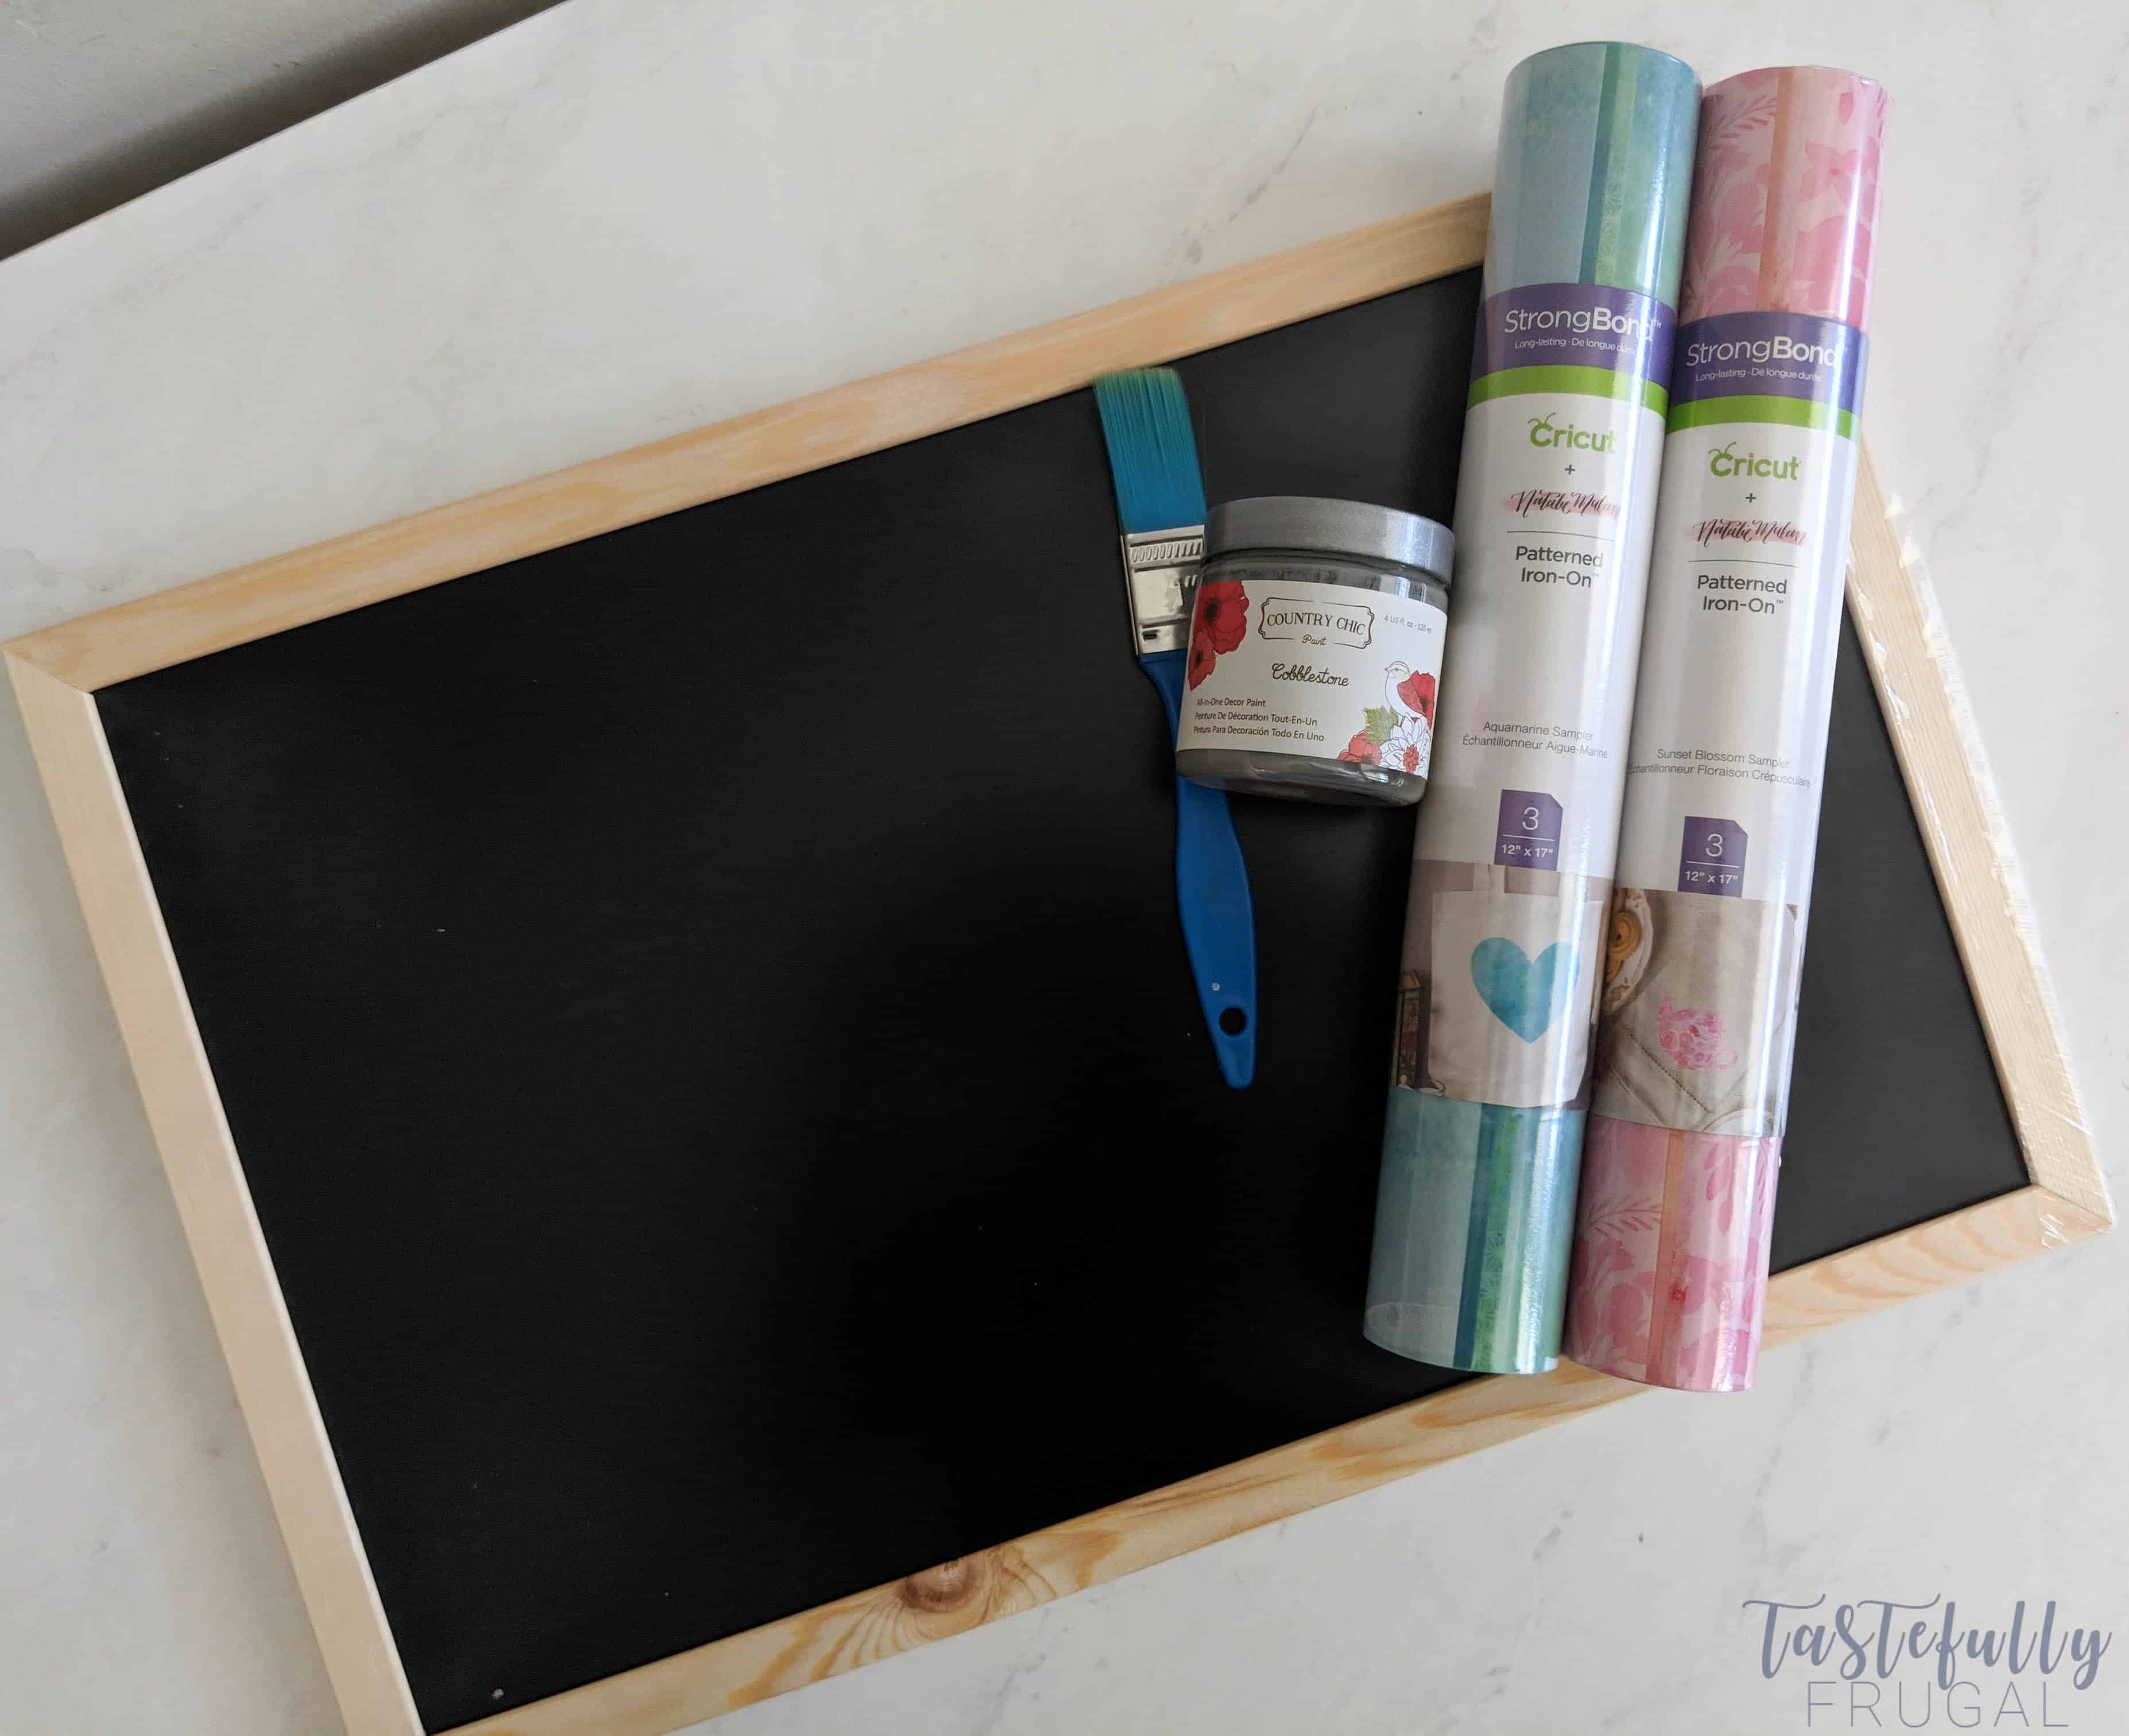
SUPPLIES:
Grey Paint (I used Cobblestone Chalk Paint from Country Chic)
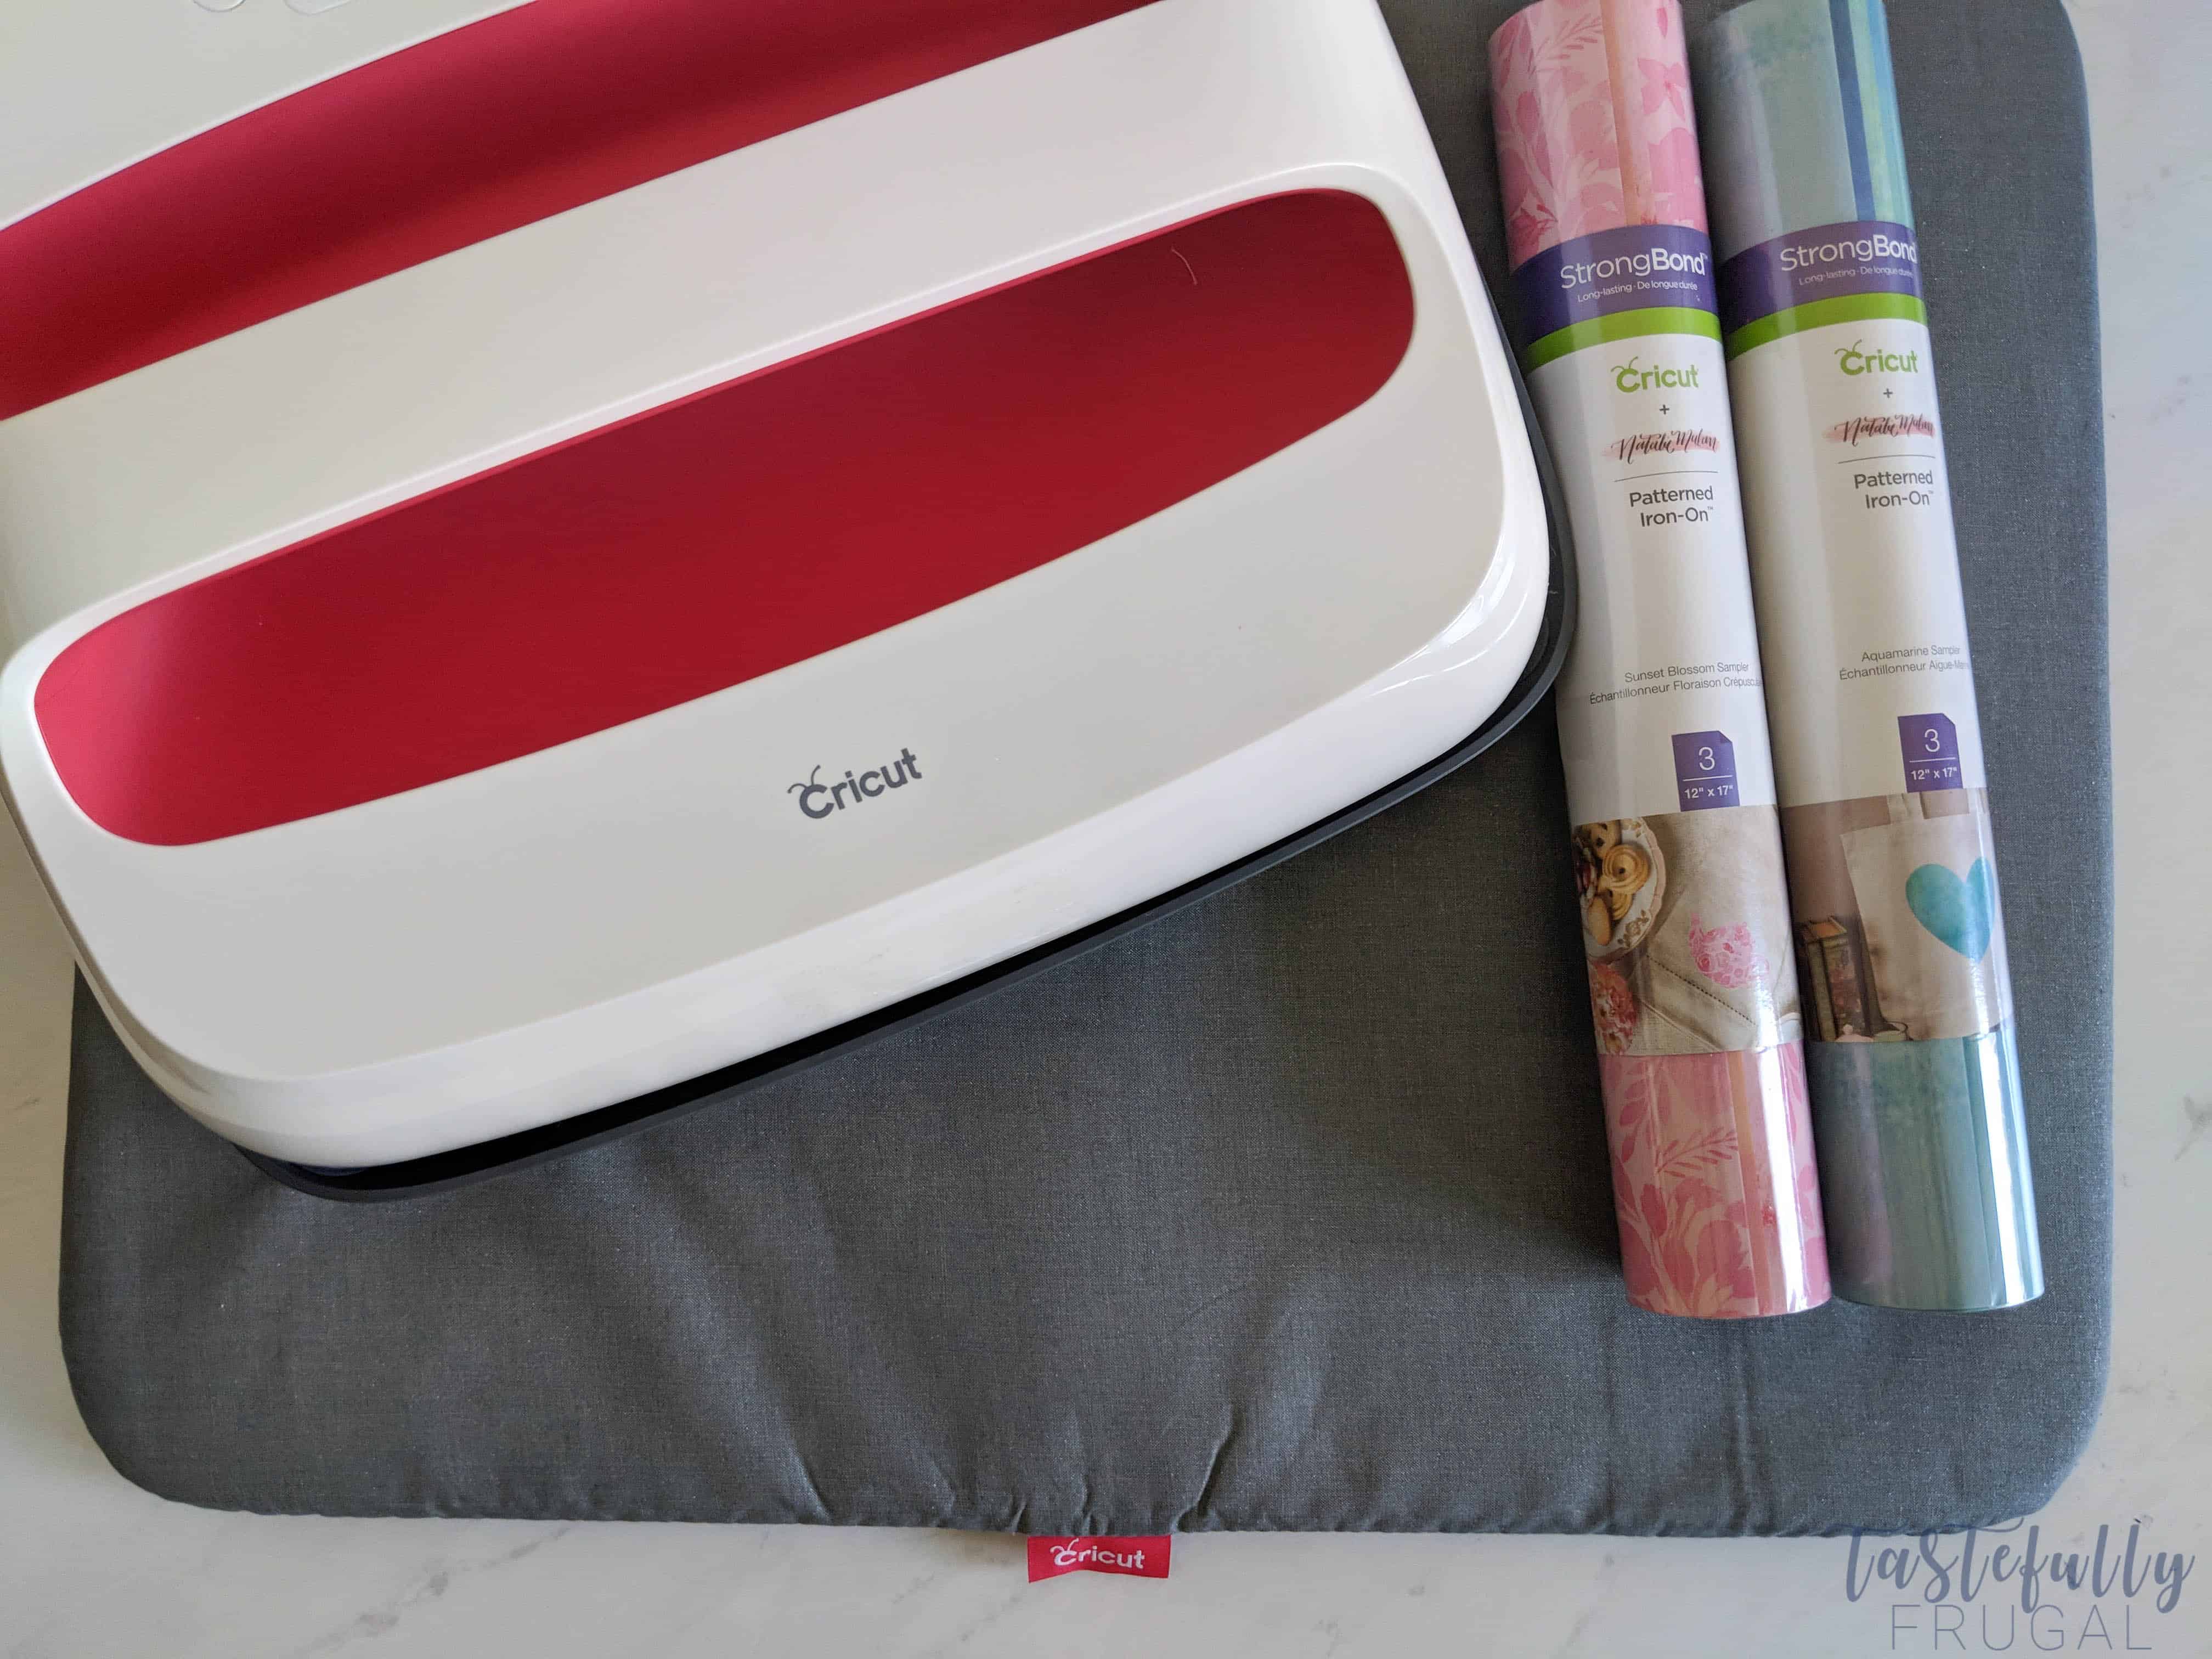
Watercolor Iron-On Vinyl (I used blossom and aquamarine)
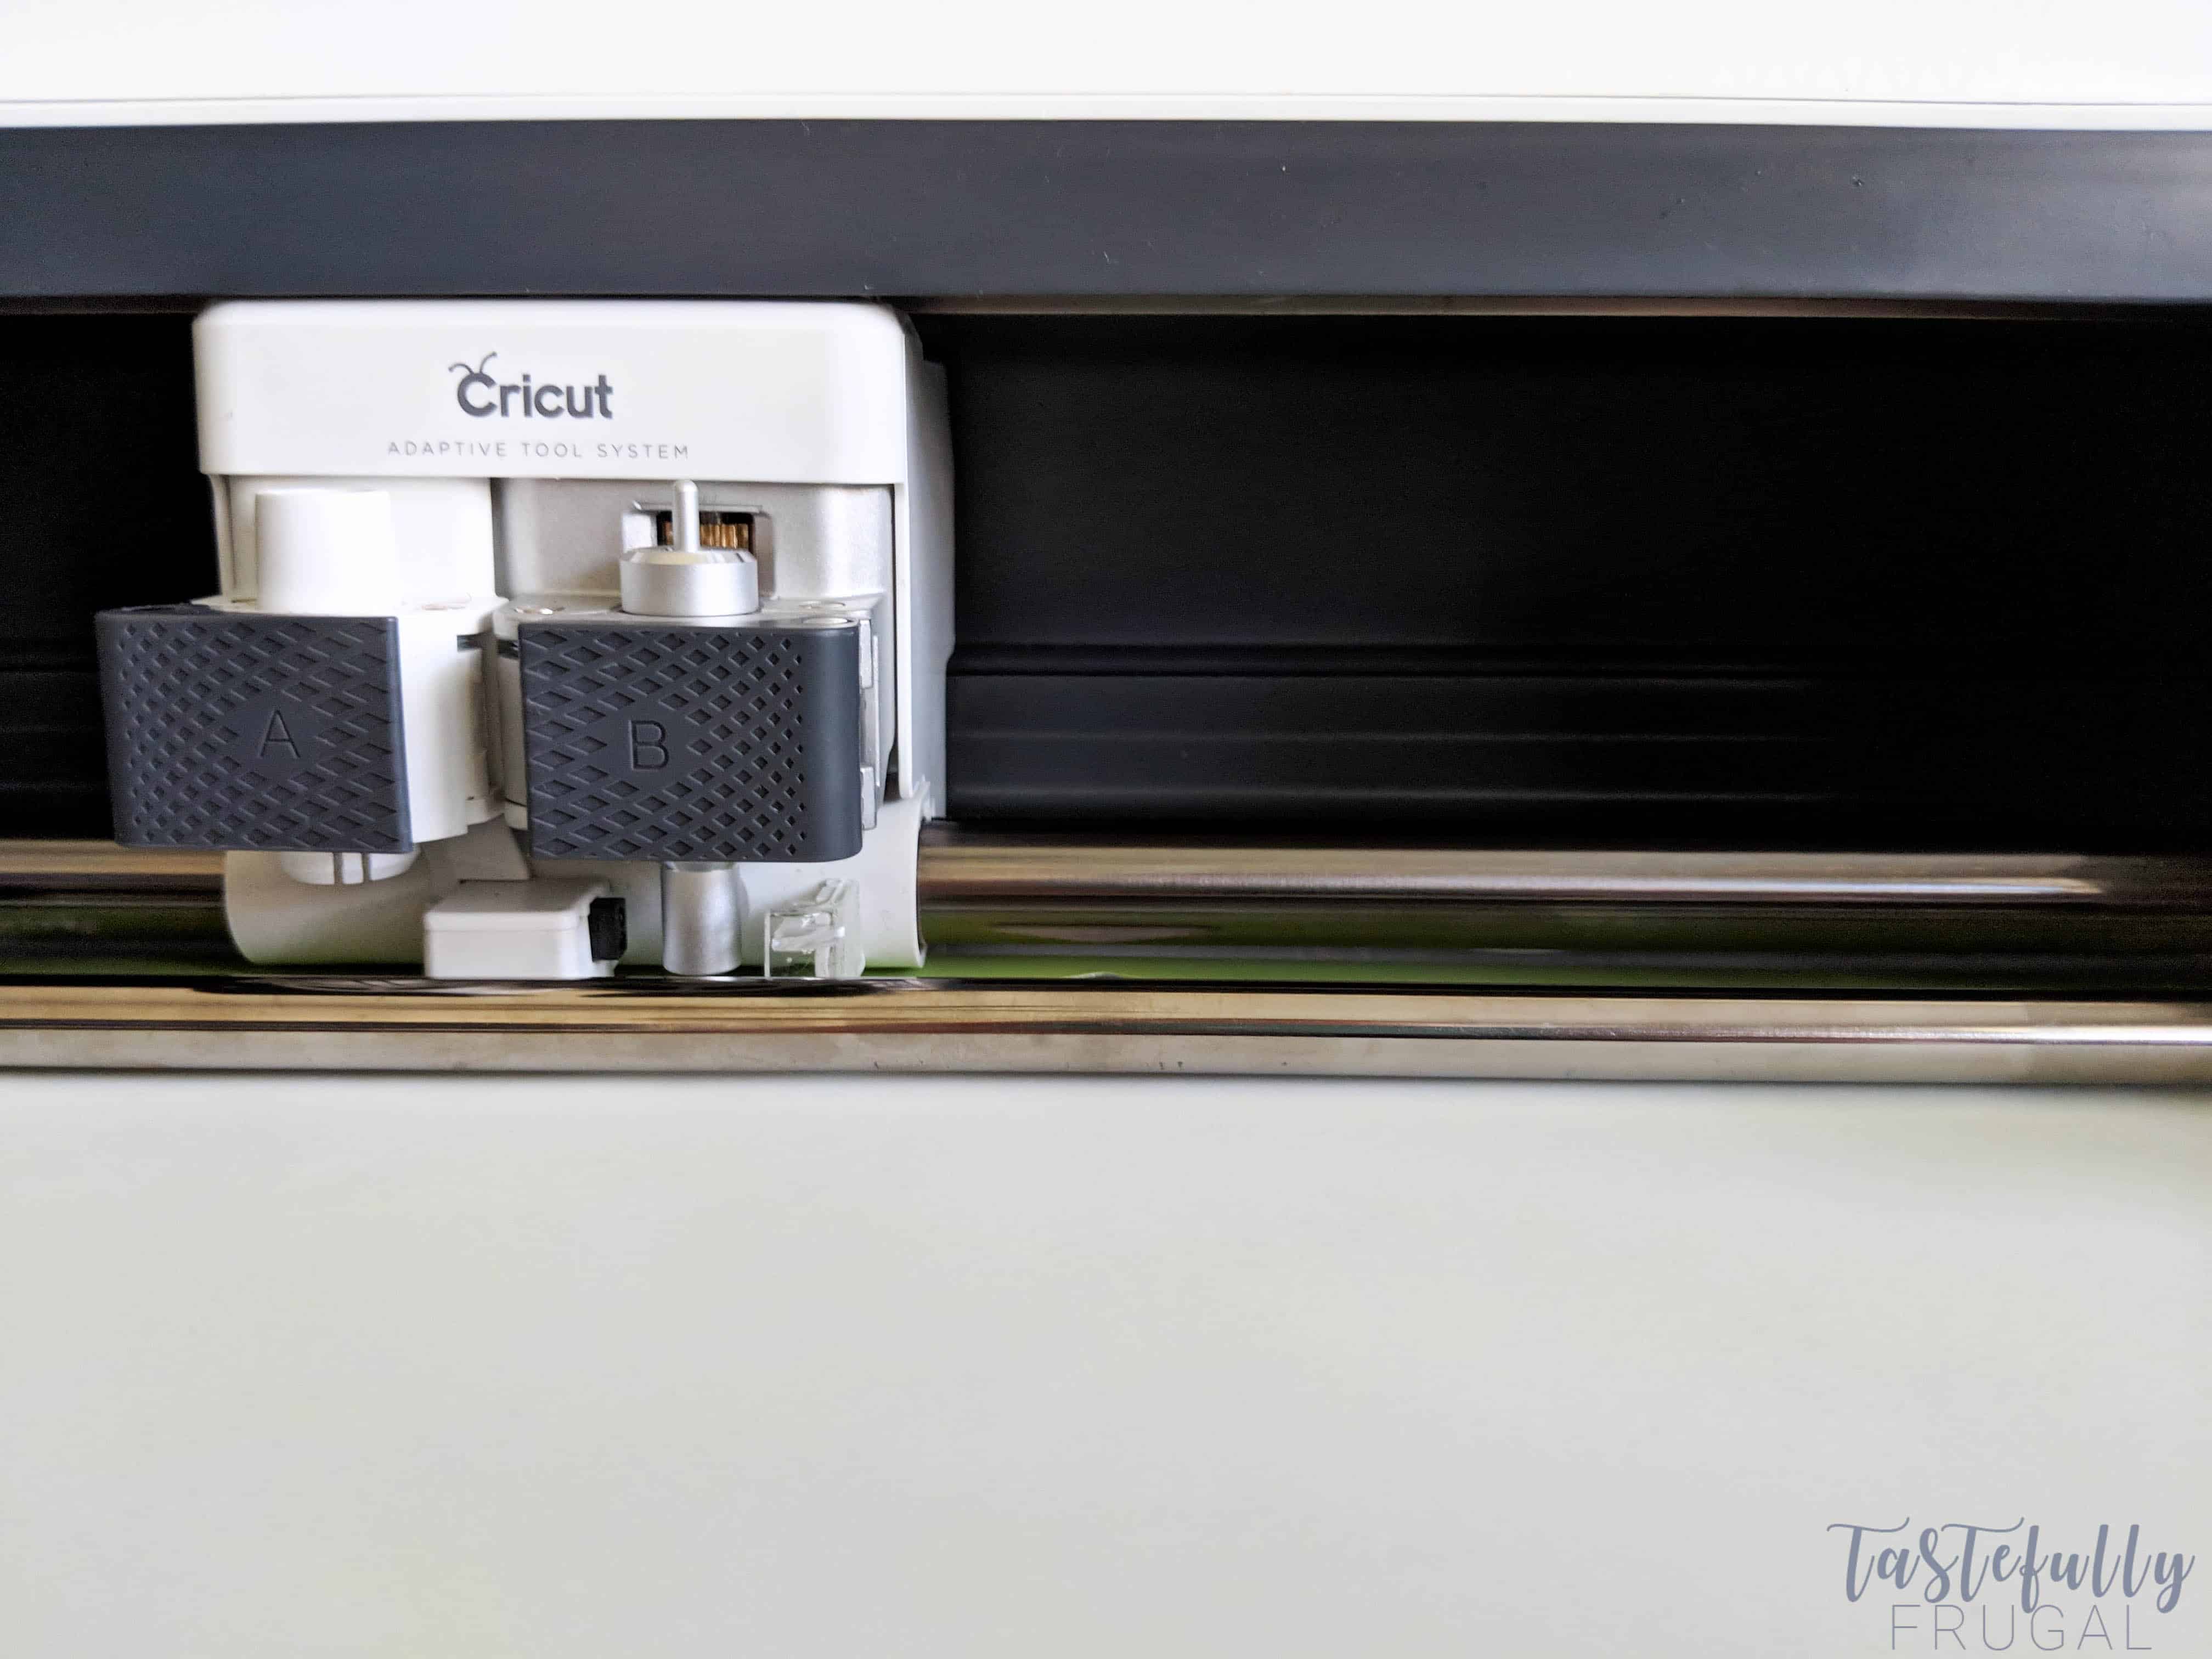
Cricut Maker (or any Cricut cutting machine)
12″x12″ and 12″x24″ StandardGrip Cutting Mat
When ordering from Cricut.com make sure to use promo code TFRUGAL to get 10% off and score FREE shipping!
DIRECTIONS
Prep your board by painting the frame. I use painters tape to make sure the paint doesn’t get on the chalkboard surface. Let dry 2-3 hours before applying vinyl.
The first part will explain how to create this design, and how to use images in design space. If you want to just cut the file and make your sign you can skip over the first 7 steps.
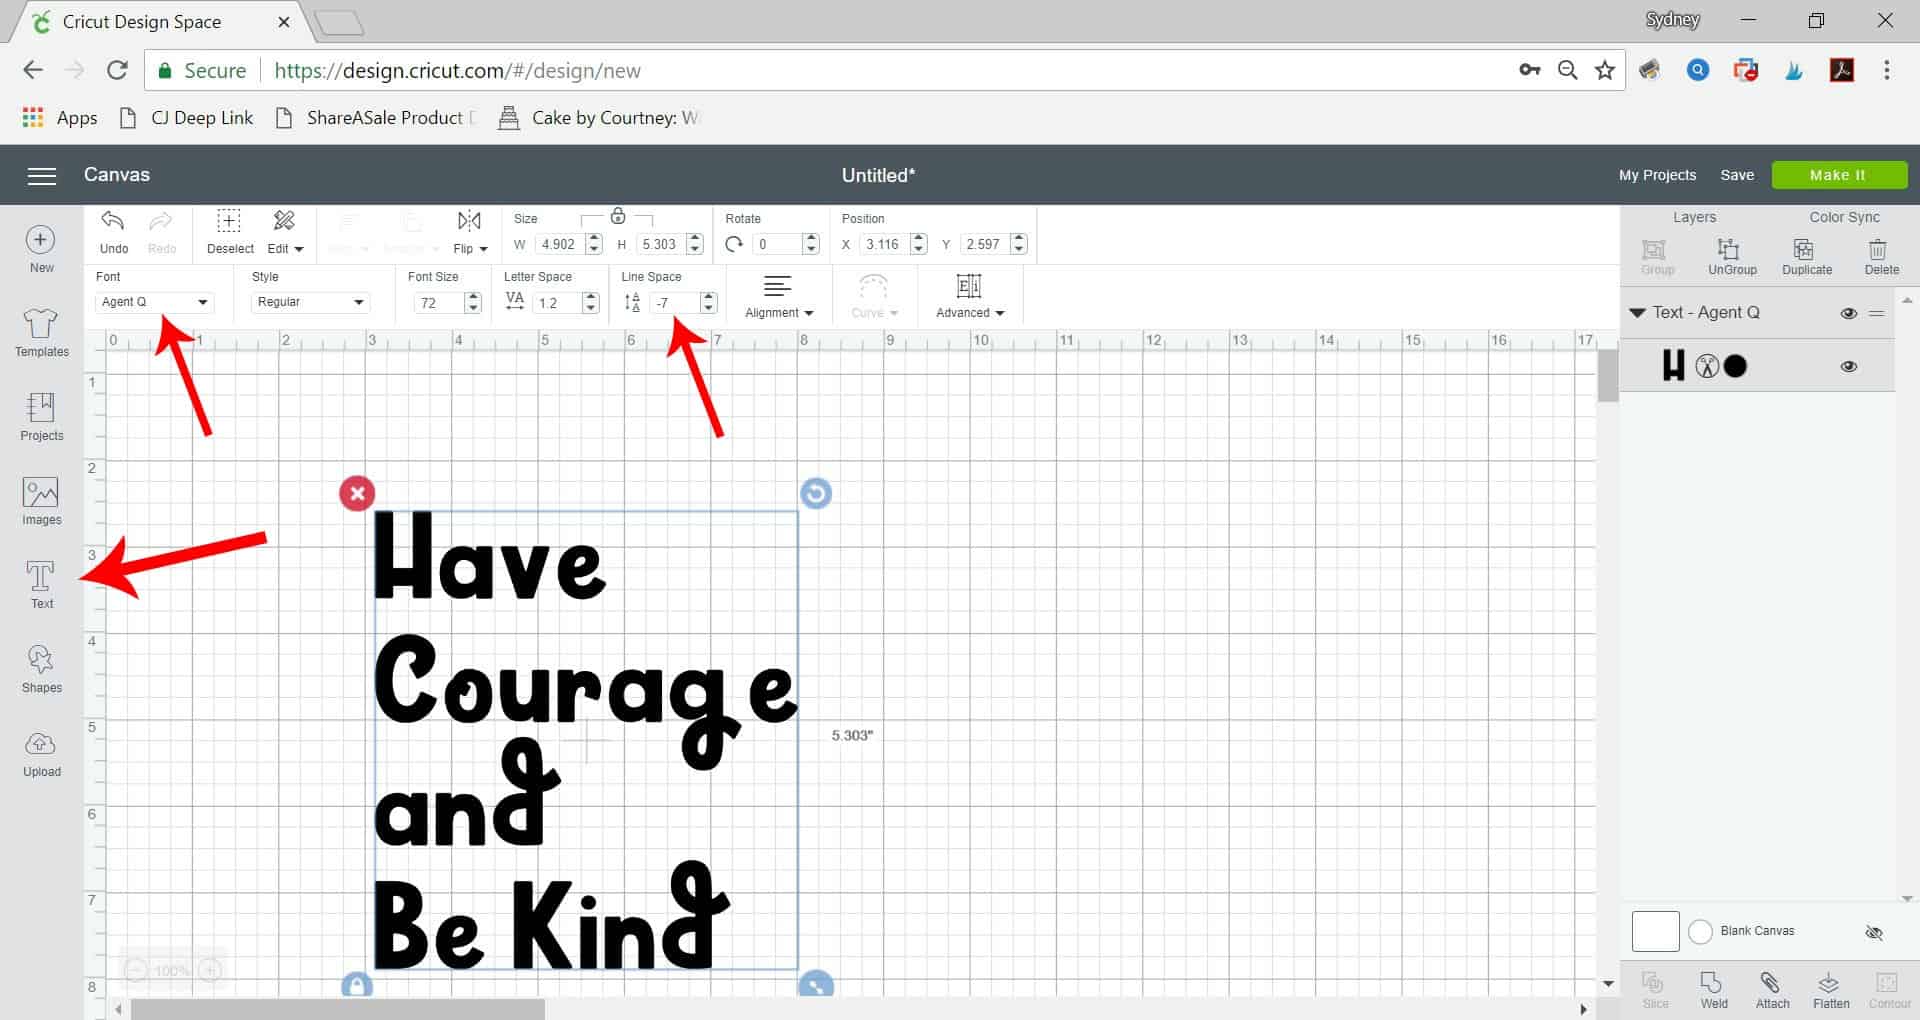
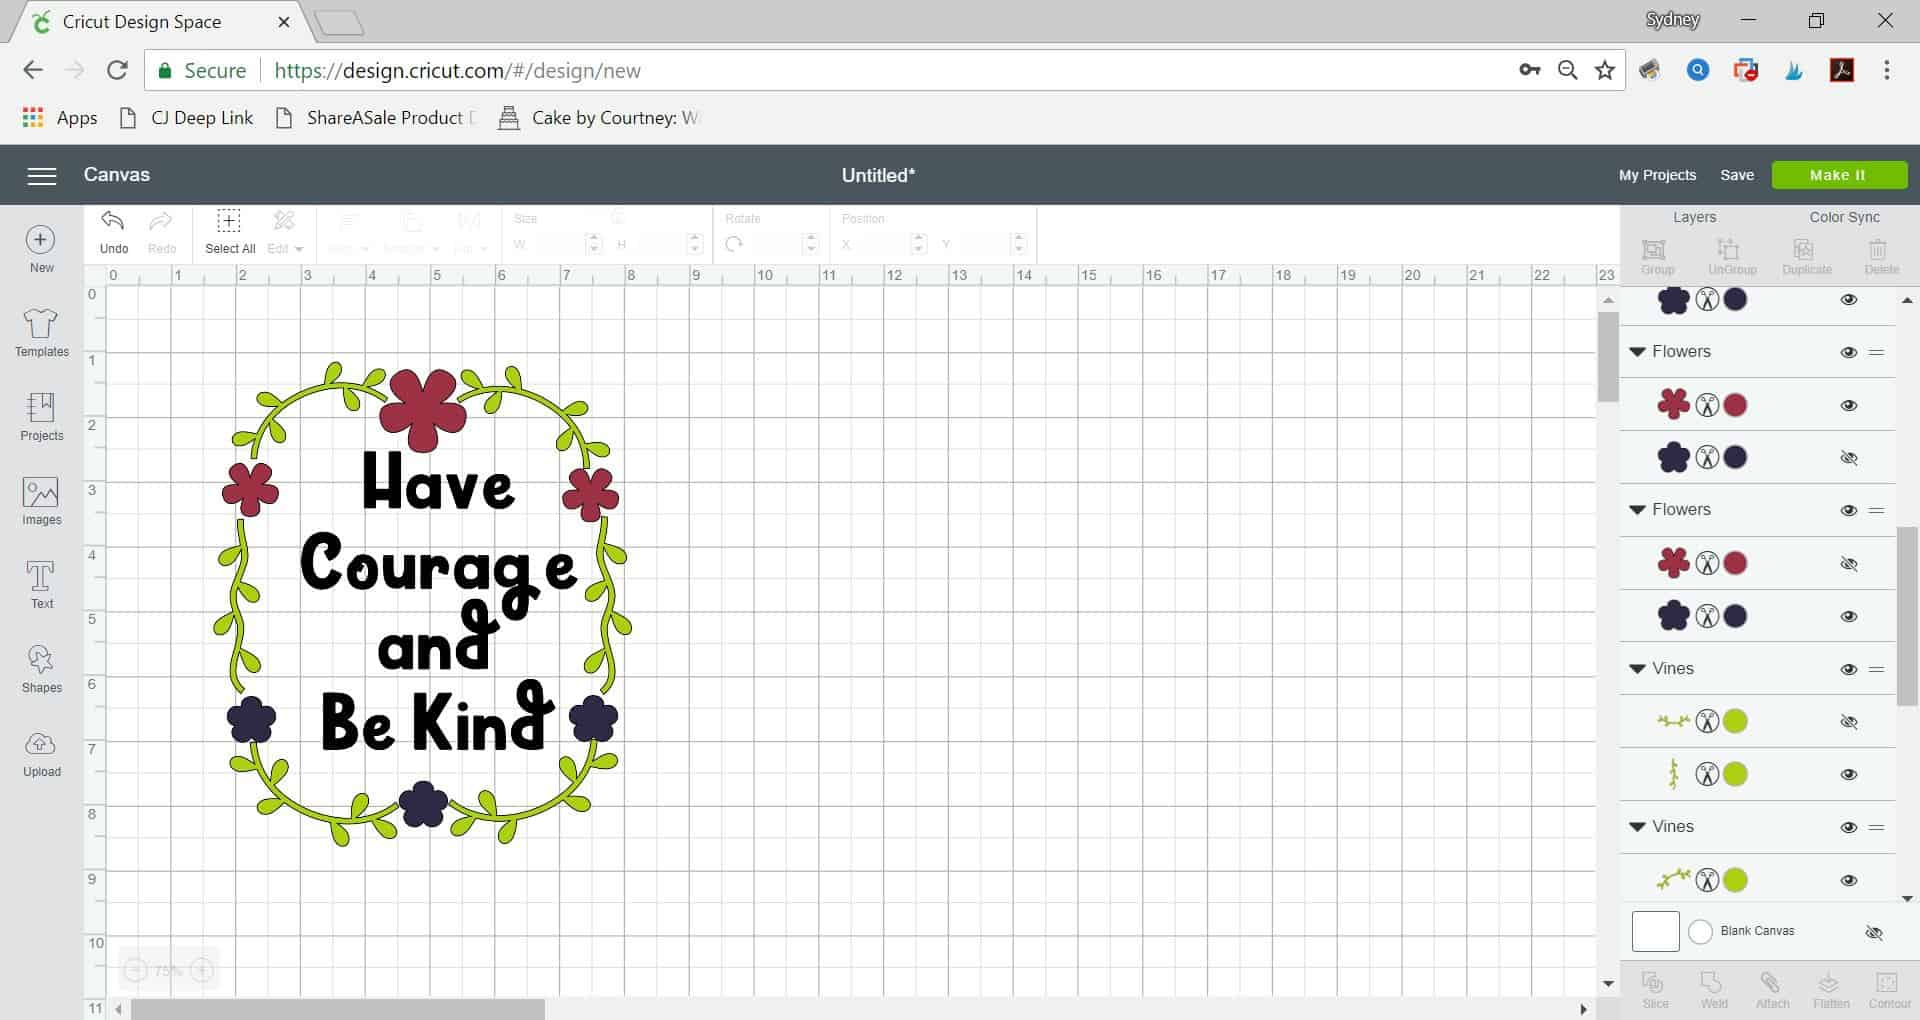
Step 1- Open design space and add your text. To keep as much space as possible (and to not waste iron-on), change the line spacing to -5 (or less) depending on how close you want your words. If you want to use the font I have here it’s called Agent Q.
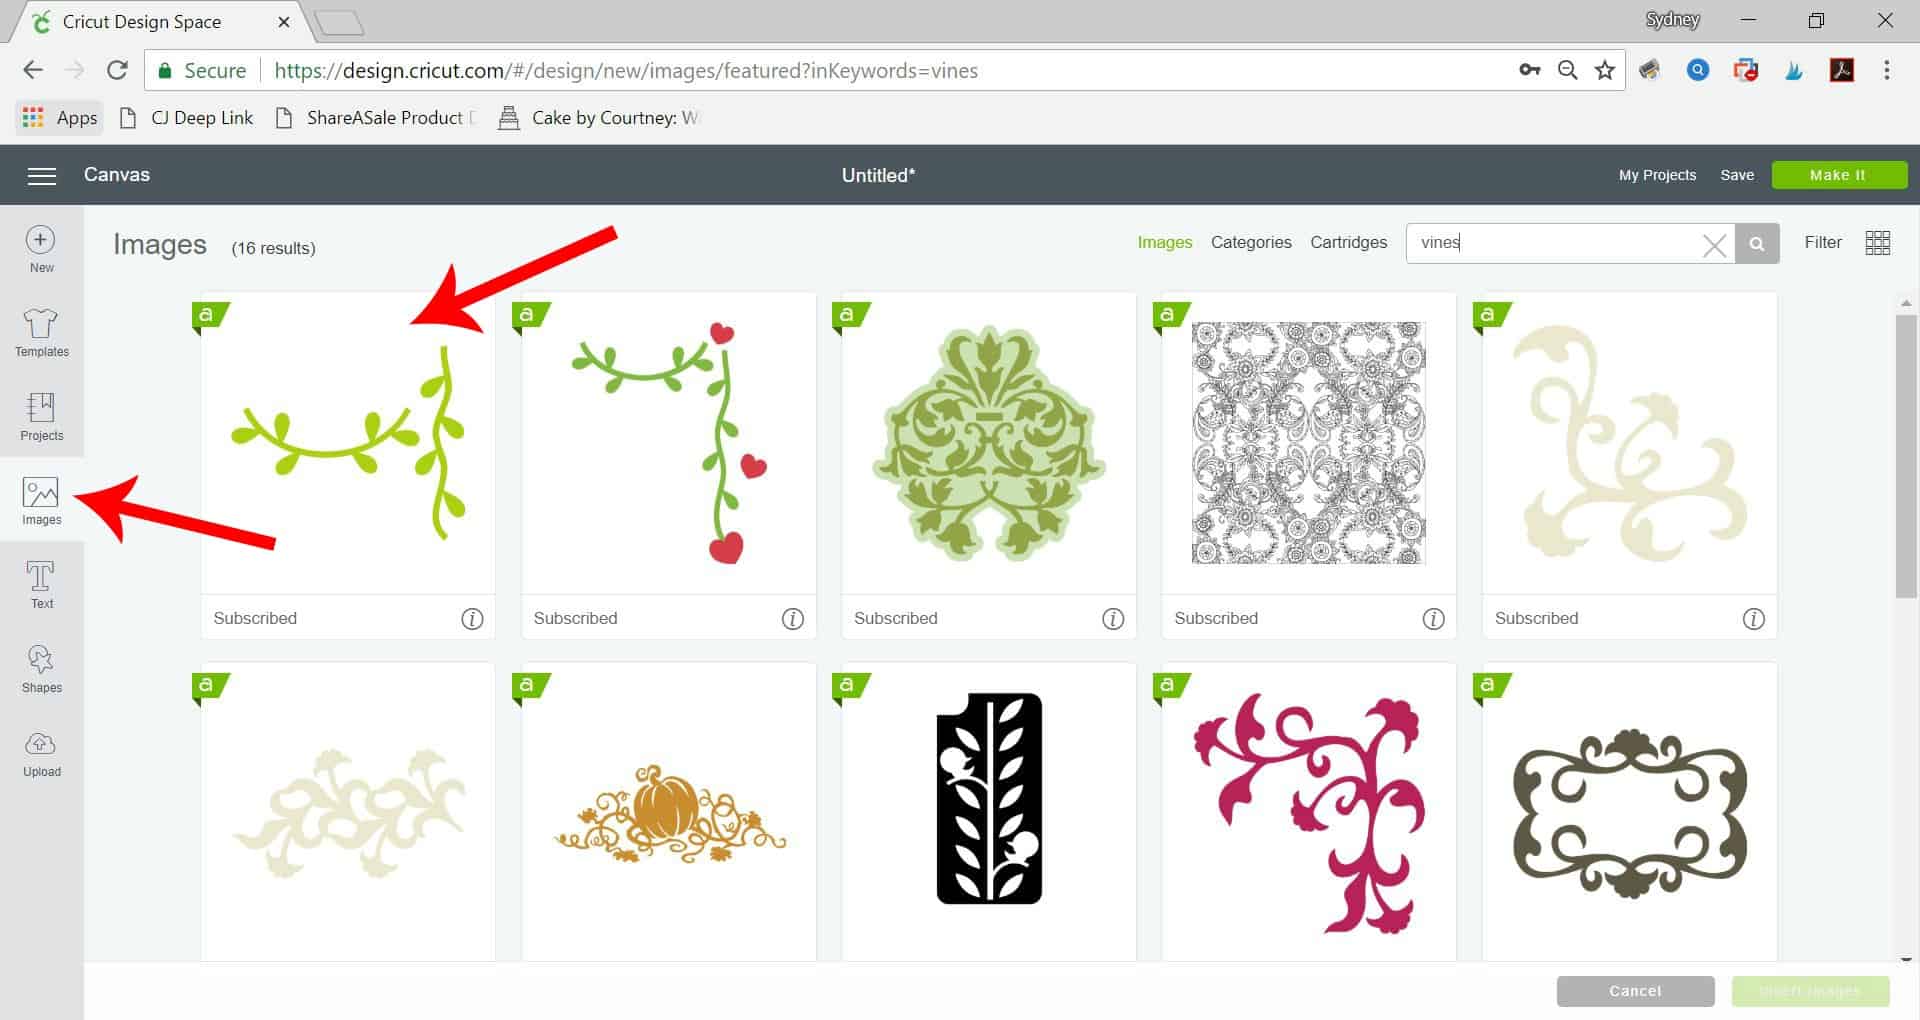
Step 2- Go to images and search for vines. The image I used had both the curved vine and the straight vine.
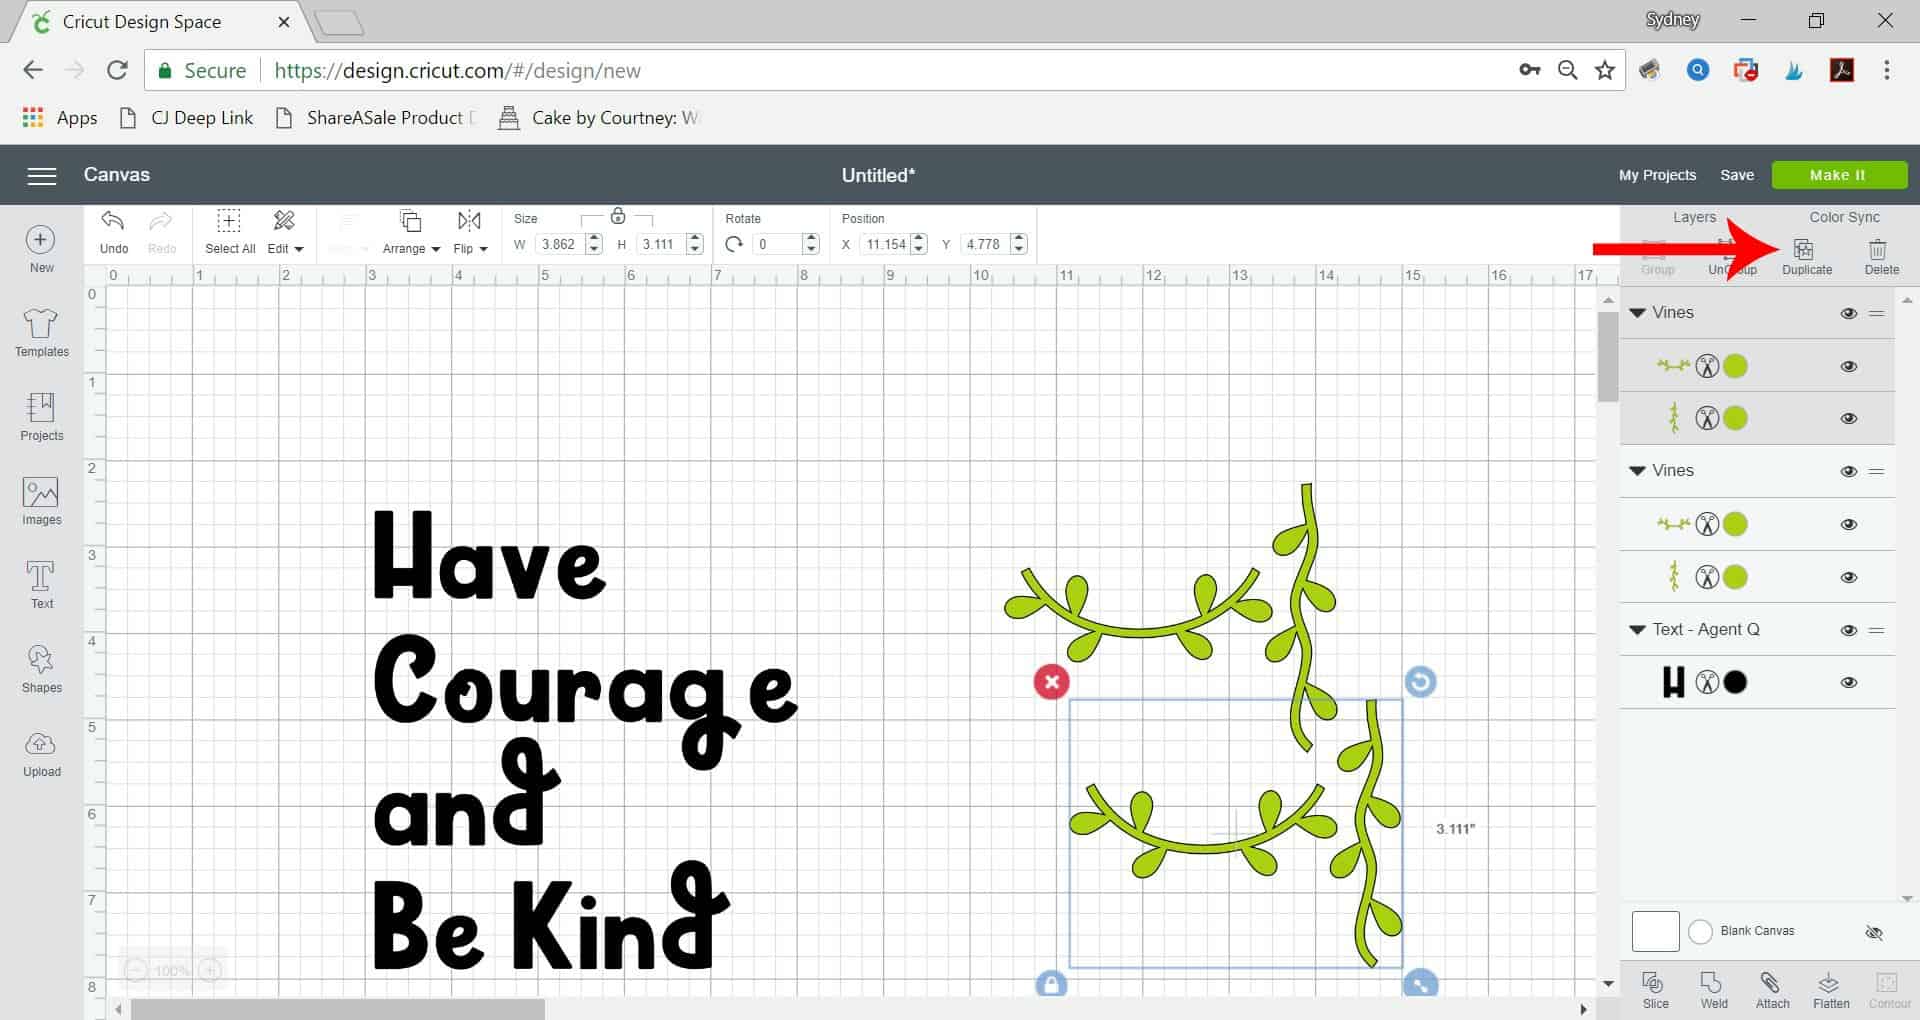
Step 3- To make the individual pieces, duplicate the design and change the visibility on each piece.
One piece you’ll want to make the straight vine not visible, the other you’ll want to make the curved vine not visible.
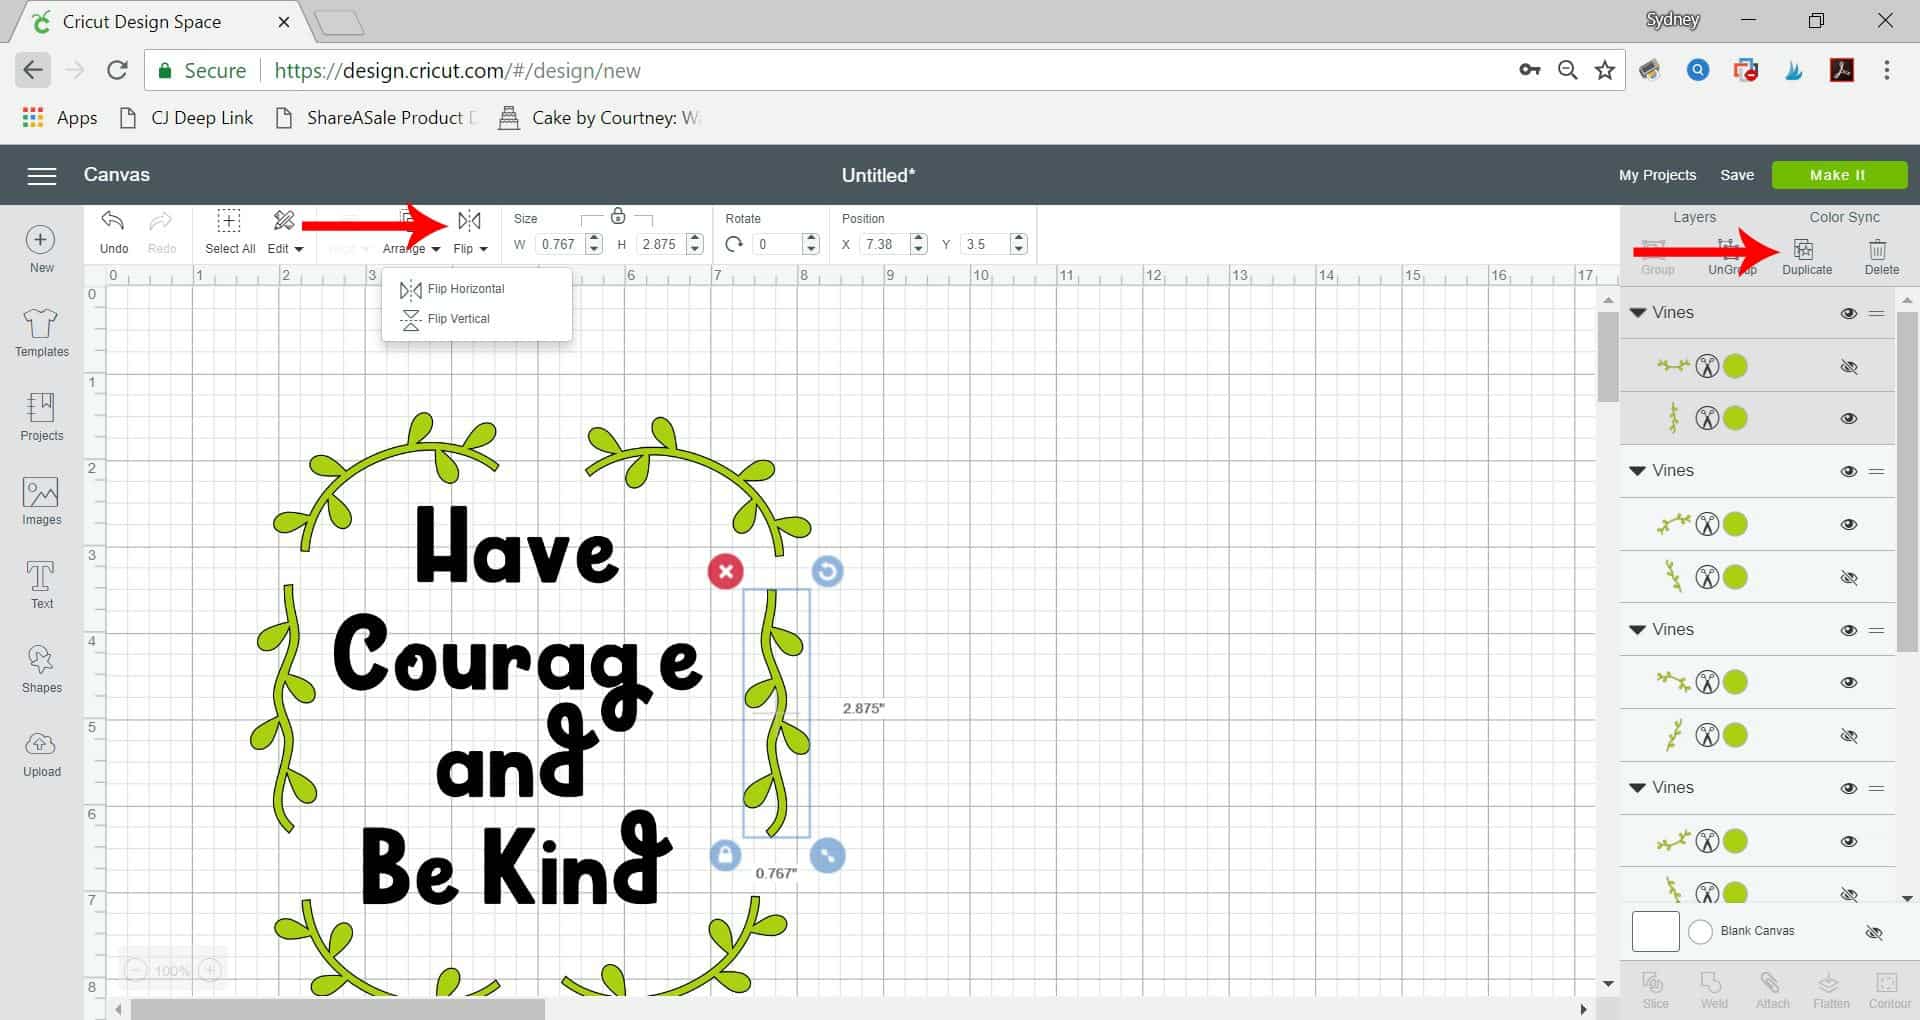
Step 4- Size your vines to fit around your letters. Do one side at a time, duplicate each piece and then flip (horizontally for the straight pieces and vertically for the curved pieces).
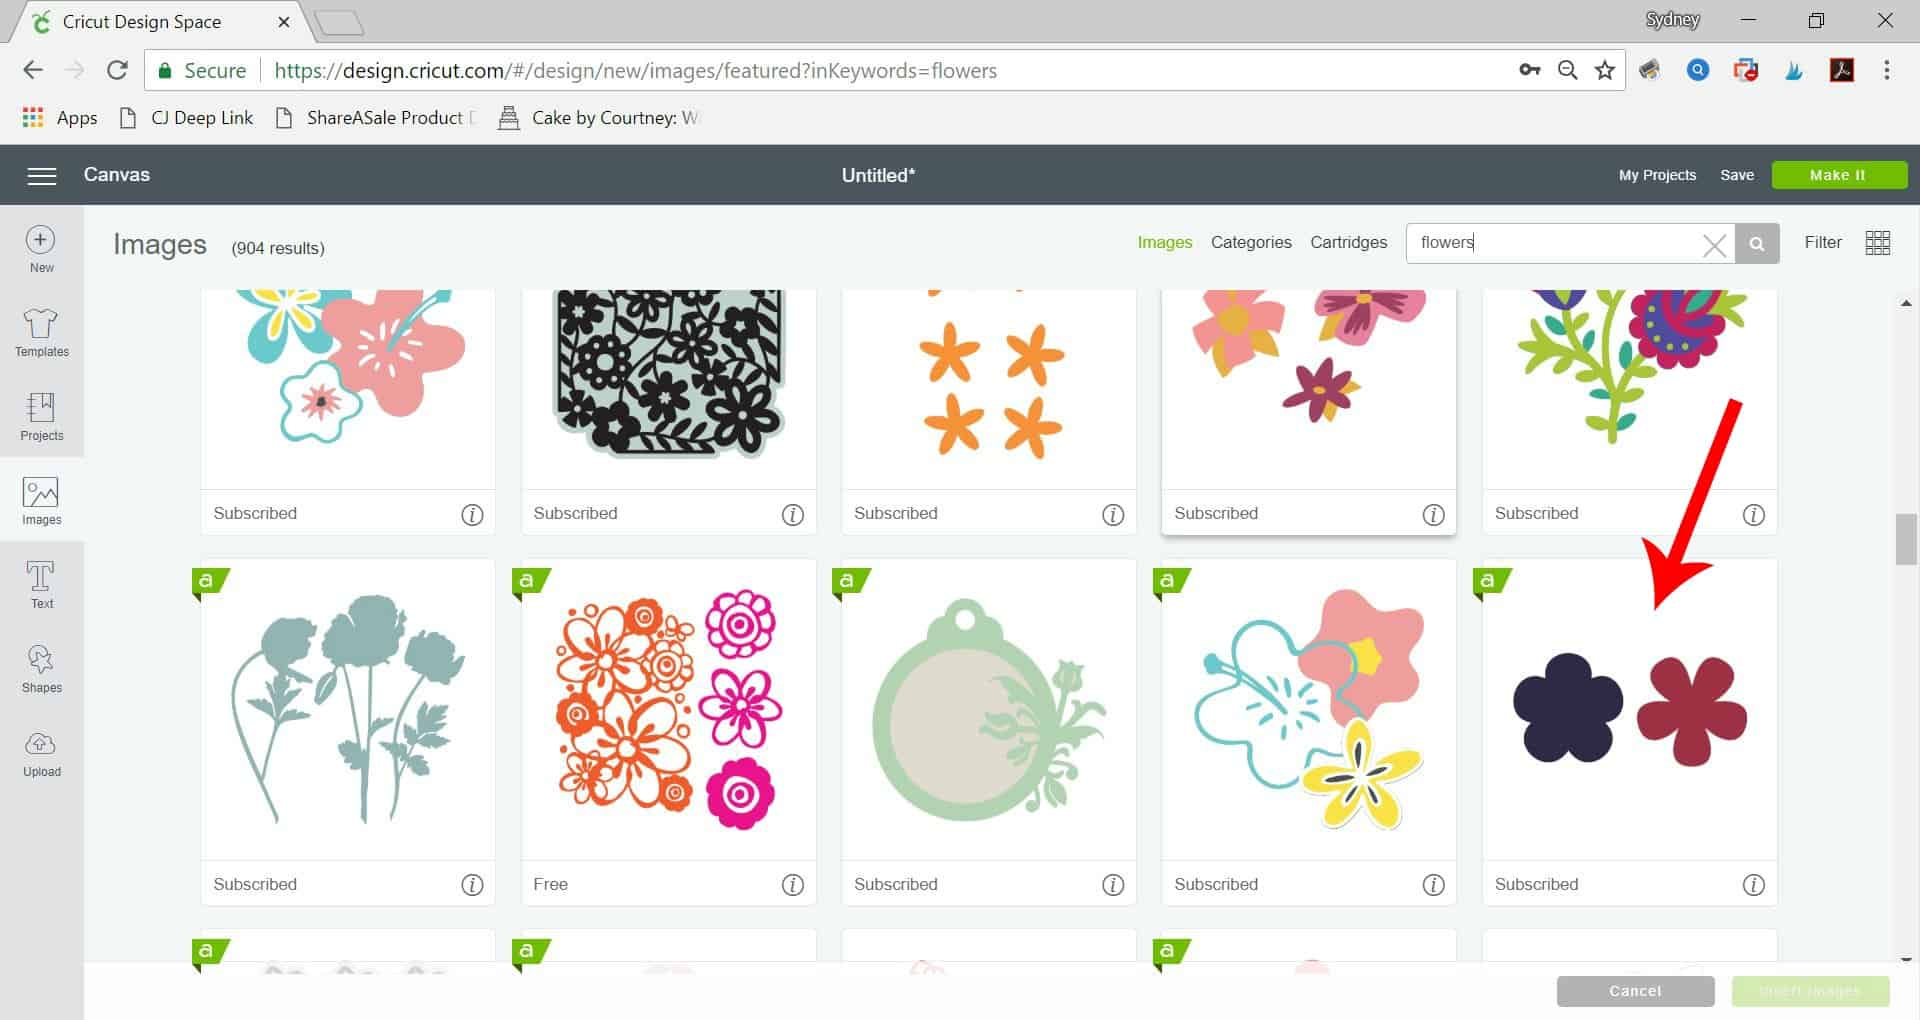
Step 5- This is the image I used for the flowers. You can see that it has both the blue and pink flowers in it. Repeat Steps 3 and 4 with the flowers and fit around the vines.
Step 6- Select the whole design and change the size to fit your surface.
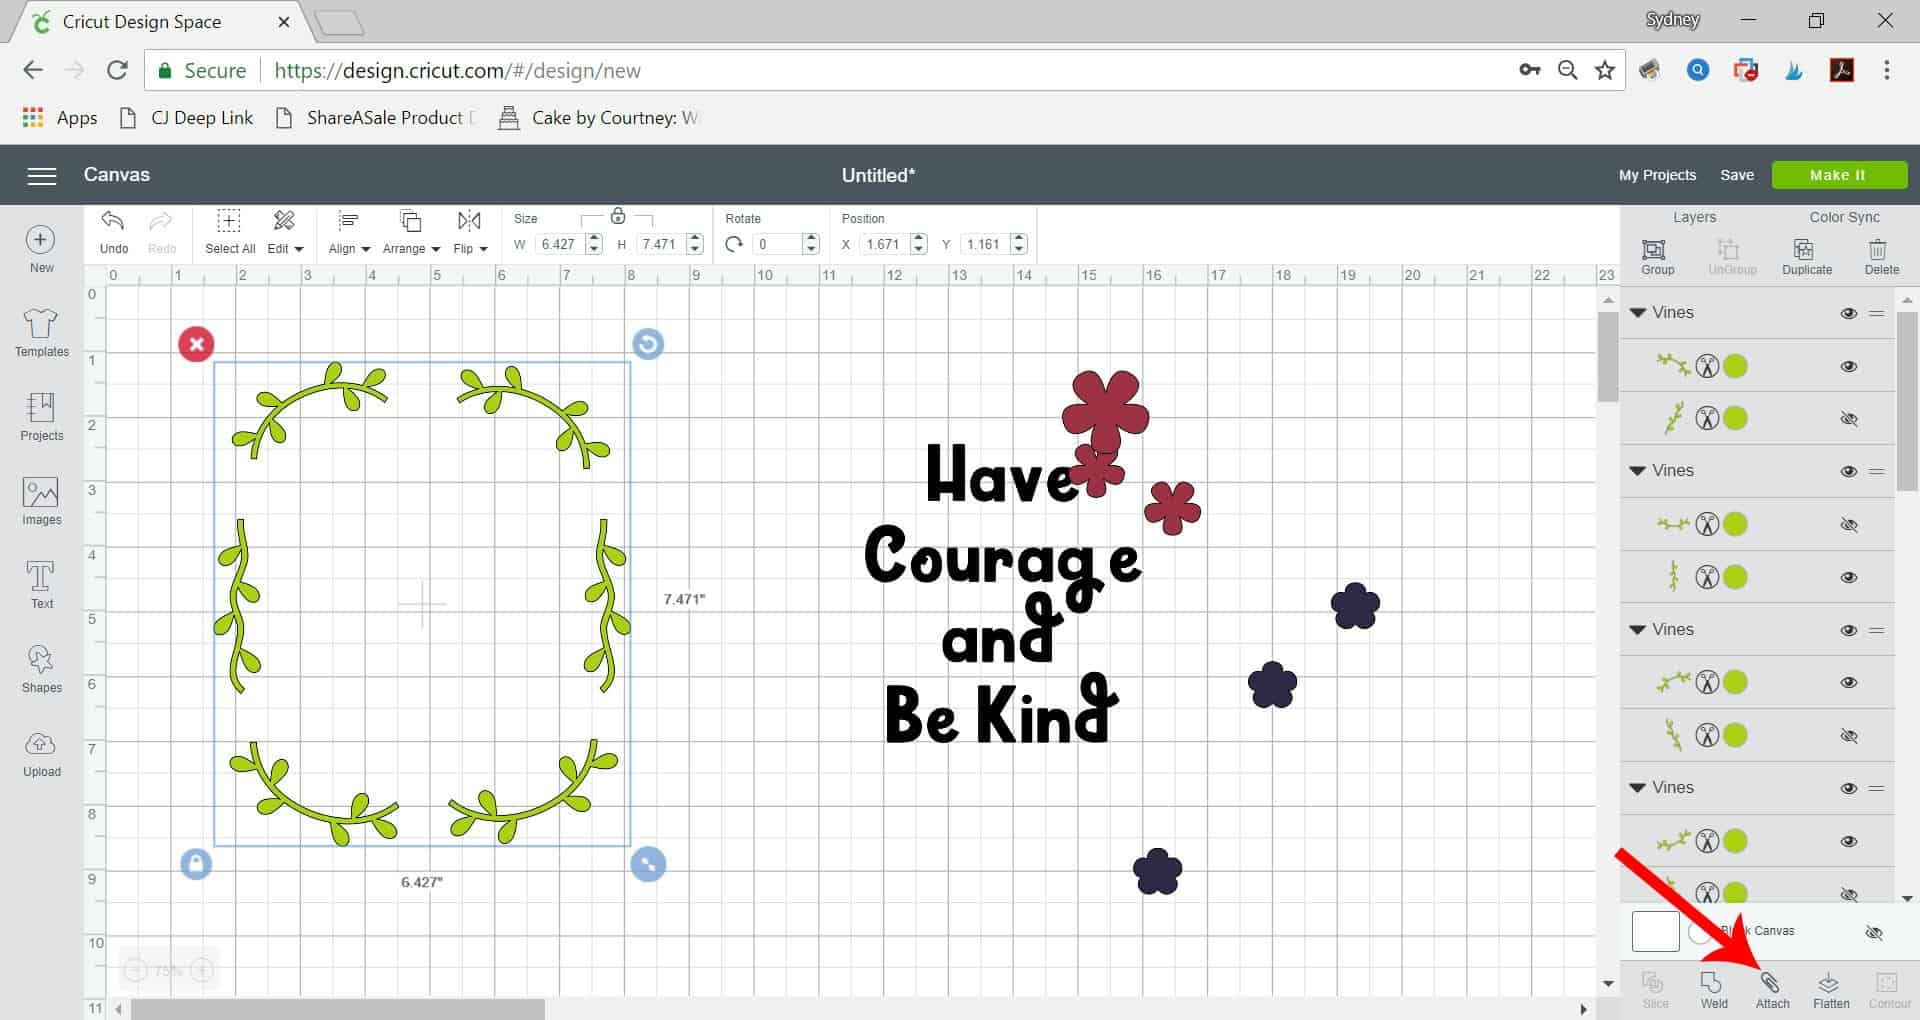
Step 7- Move the letters and flowers and attach the vines together – this makes it easier to line up your design on your board. If you want to save vinyl, you can skip this step. Send design to mat.
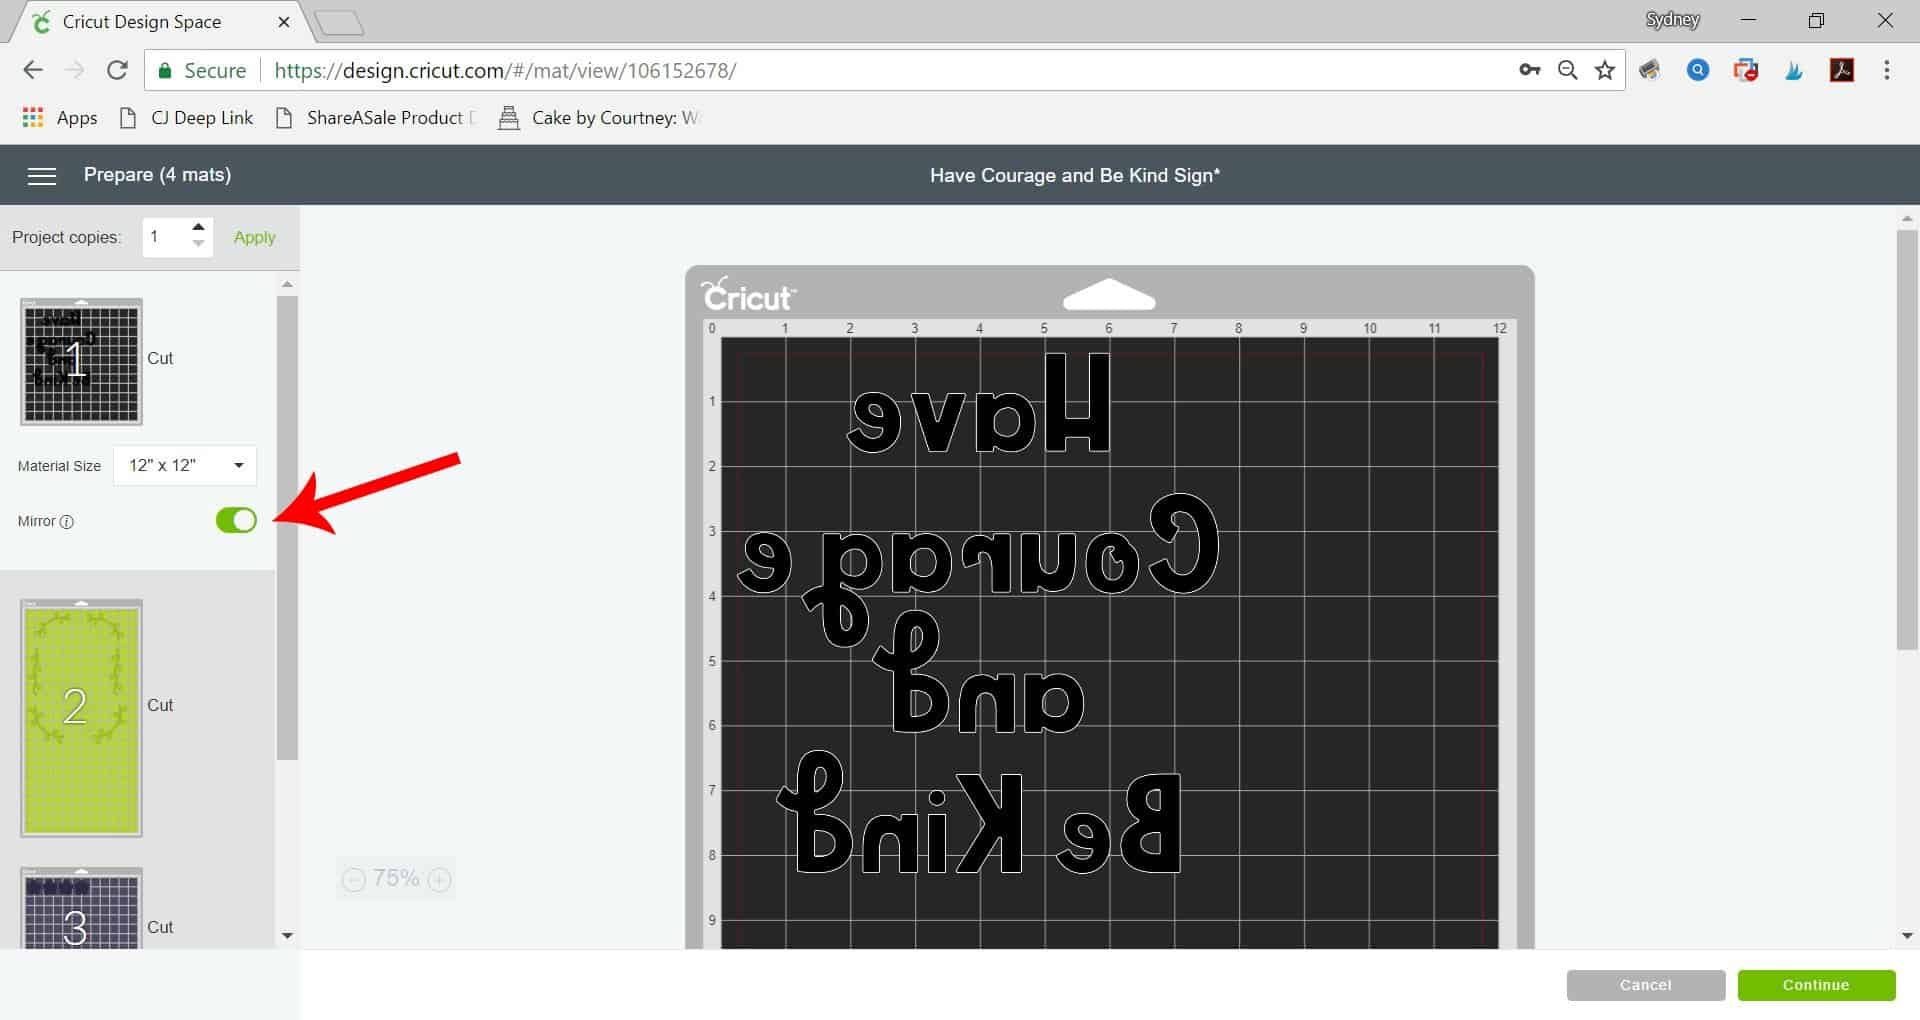
Step 8- MIRROR YOUR IMAGES. Make sure to click mirror on all 4 mats.
Step 9- Select your material from the drop down list (if you’re using patterned iron-on you’ll have to use the search option).
Step 10- Load your mat with your iron on, shiny (or patterned side) down and load into Maker.
Step 11- Cut designs and weed excess vinyl.
Step 12- Preheat EasyPress 2 to 340° F and 30 seconds (the temperature changed on this design mid price, which does happen, but it didn’t affect the application). Two of the things I REALLY love about the new EasyPress 2 is how quickly it heats up (it took less than 2 minutes to reach temperature) and it remembers the temperature from the last time I used it. So if I make another sign this weekend, which is a definite possibility, when I turn the EasyPress 2 on, it will automatically heat up to the right temperature and time setting.
Step 13- Preheat surface for 5 seconds.
Step 14- Press your design in 3 layers. First you’ll press the vines, second you’ll press the flowers and lastly you’ll press the letters. NOTE that Patterned Iron-On is a cold peel so you’ll need to let it completely cool before you peel it (about 2-3 minutes). Also, MAKE SURE TO PUT THE PLASTIC BACKING, OR A TEFLON SHEET, DOWN BETWEEN YOUR LAYERS AND THE EASYPRESS 2 WHEN PRESSING 2ND AND 3RD LAYERS TO PREVENT DESIGN FROM GETTING RUINED.
There you have it. You can make a custom sign for about $5 and in 30 minutes or less! What projects are you most excited to make with the new EasyPress 2 ?! If you’d like to check out more ways you can use your Cricut check out these posts! Need help with your Cricut? Join our Cricut Support Facebook Group!
This is a sponsored conversation written by me on behalf of Cricut. The opinions and text are all mine.




Leave a Reply