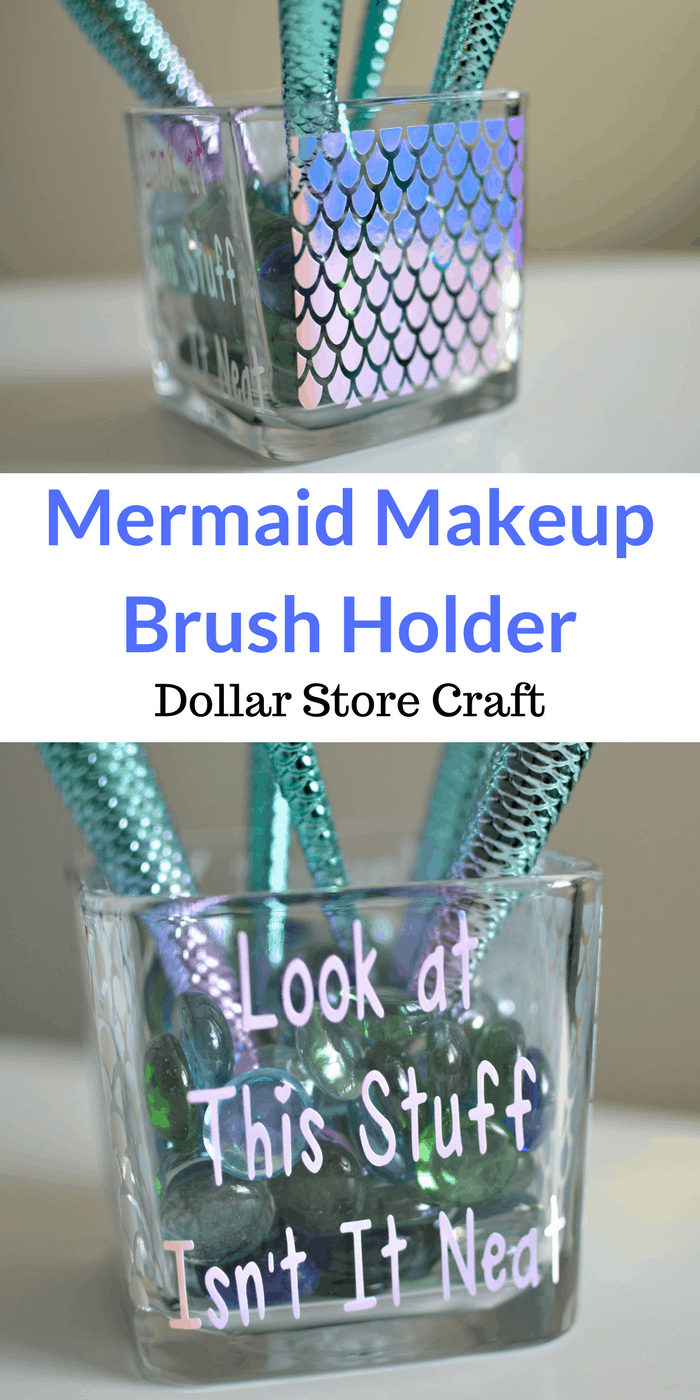
Make this fun makeup brush holder in minutes with supplies found at the dollar store.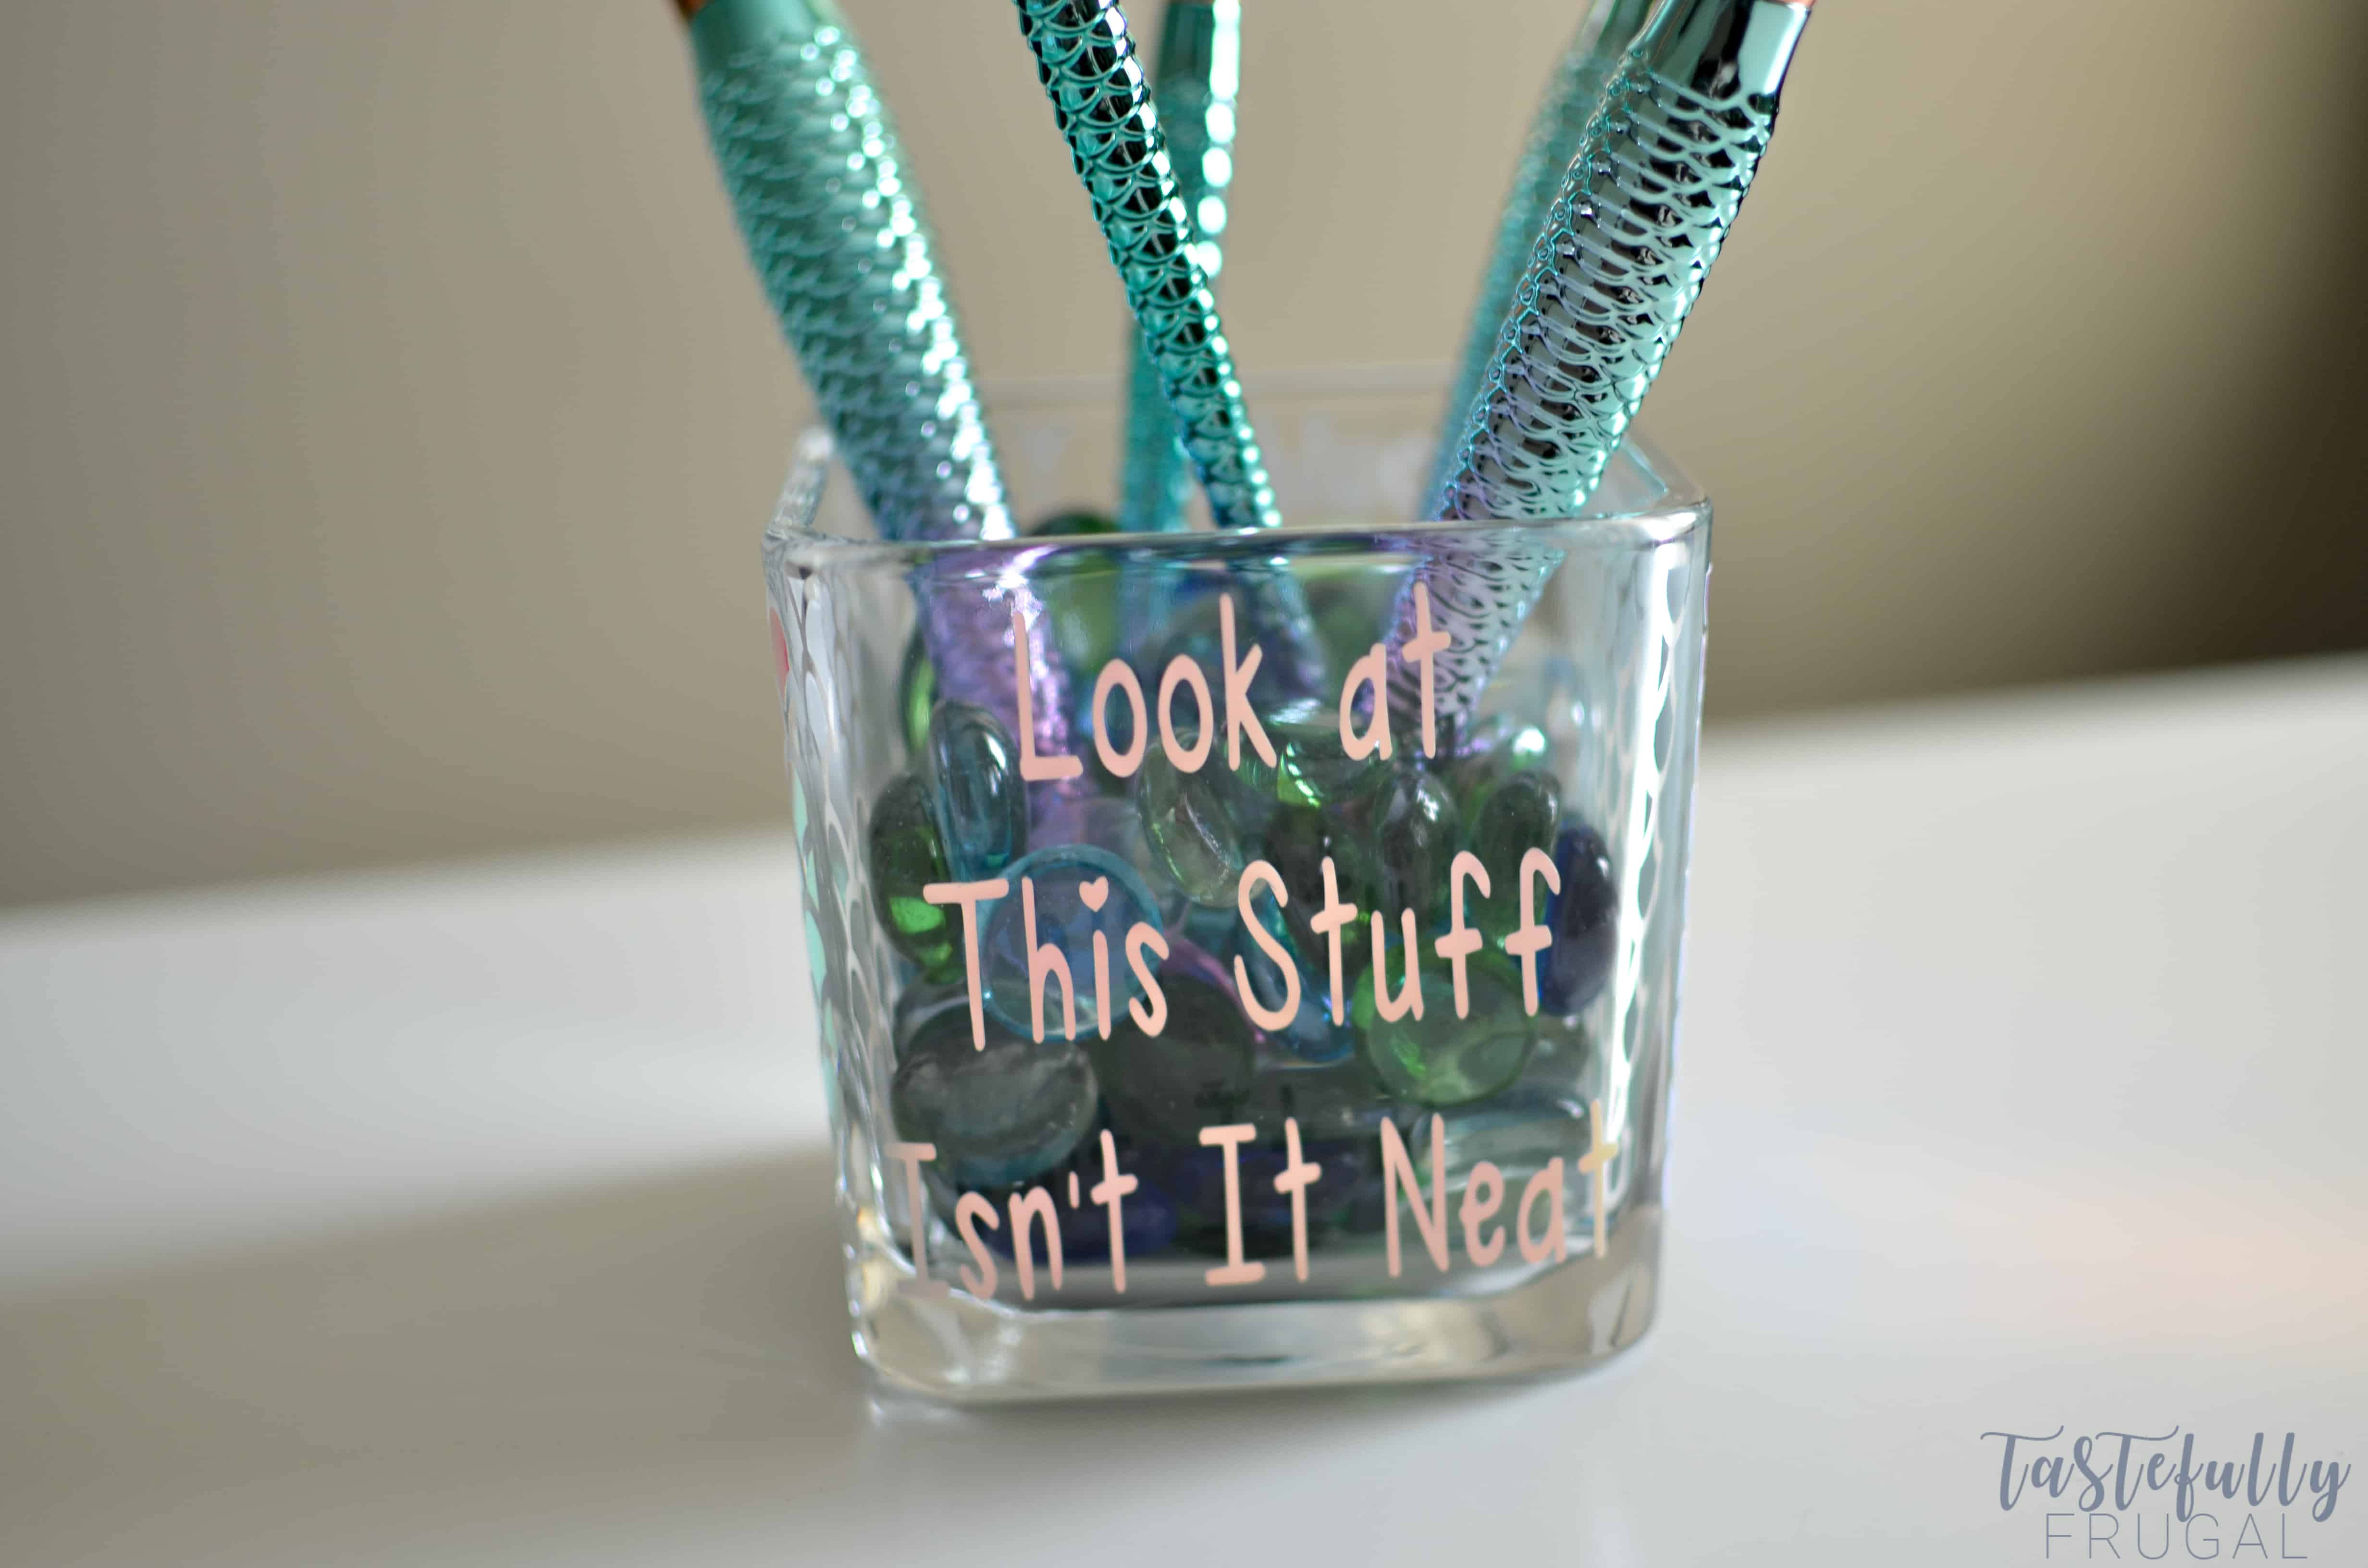
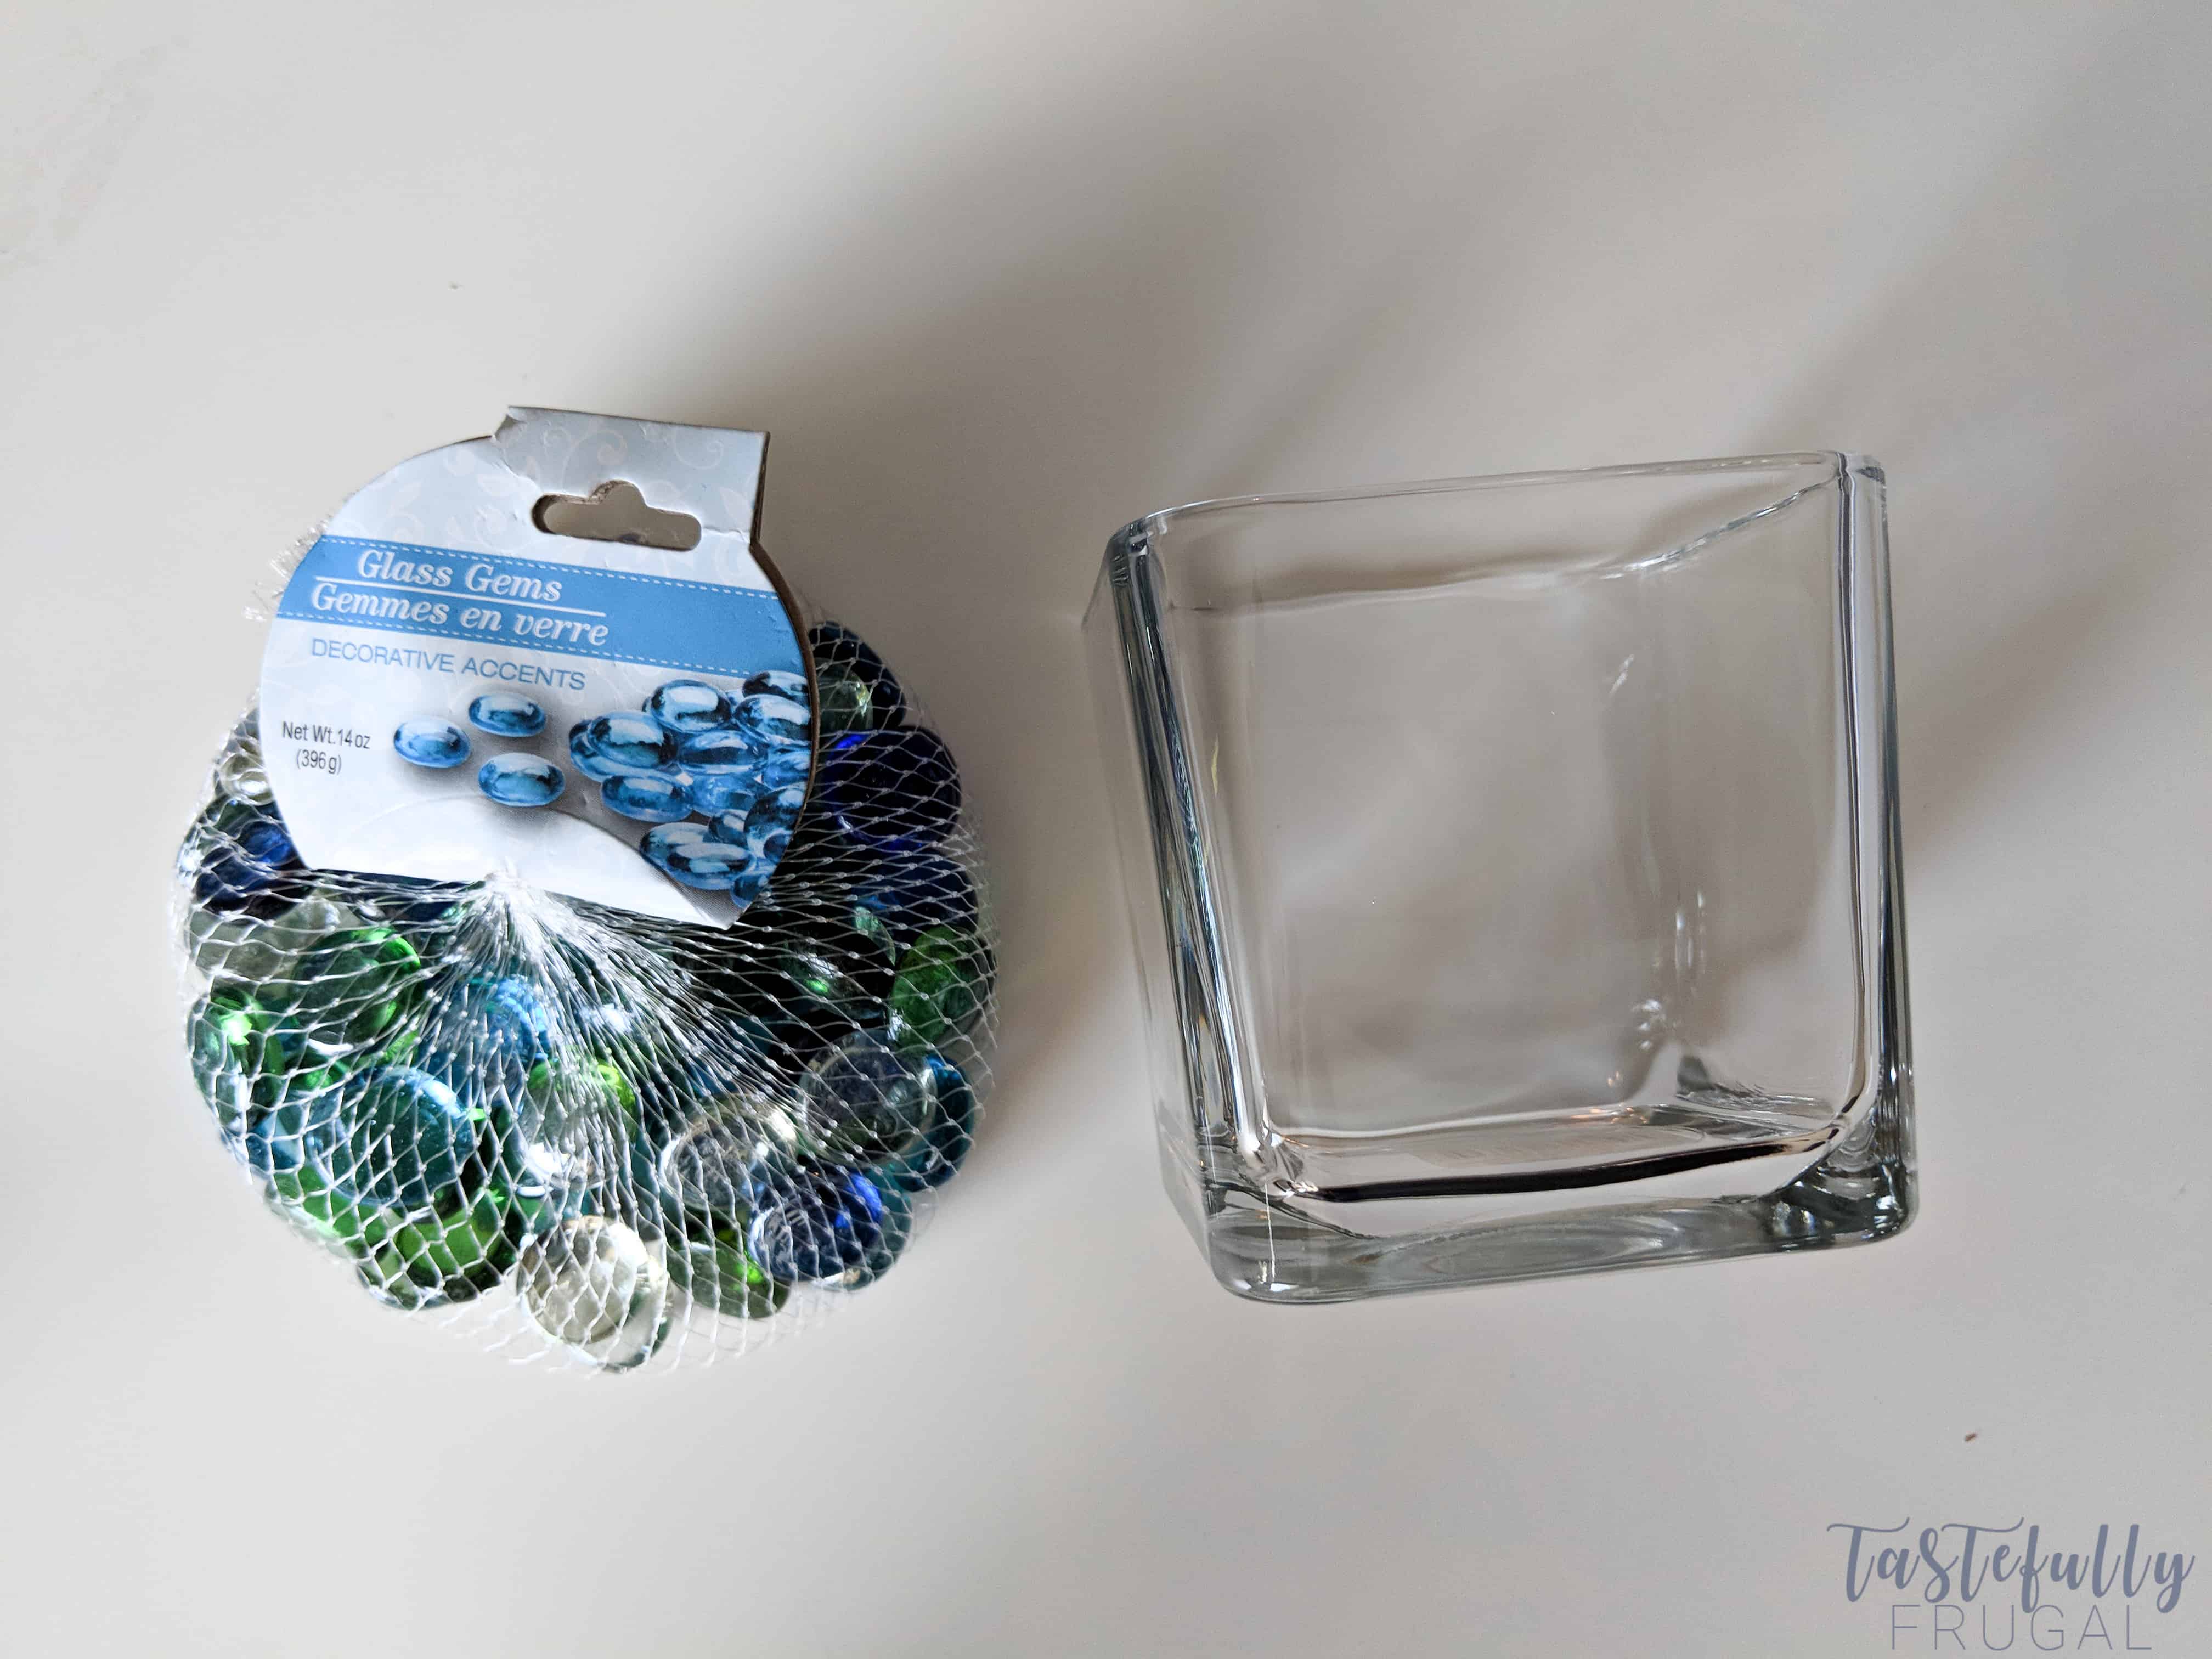
One of my (and my kids) favorite places to shop for craft supplies is the dollar store. Not only is everything only $1 (or less), but the last few years they have really upped their game when it comes to the quality and cuteness of the things they carry. As I was walking through the aisles picking things up for Valentine’s Day, I found this candle holder and colorful rocks beneath and new they would a perfect addition to my otherwise dull and boring bathroom.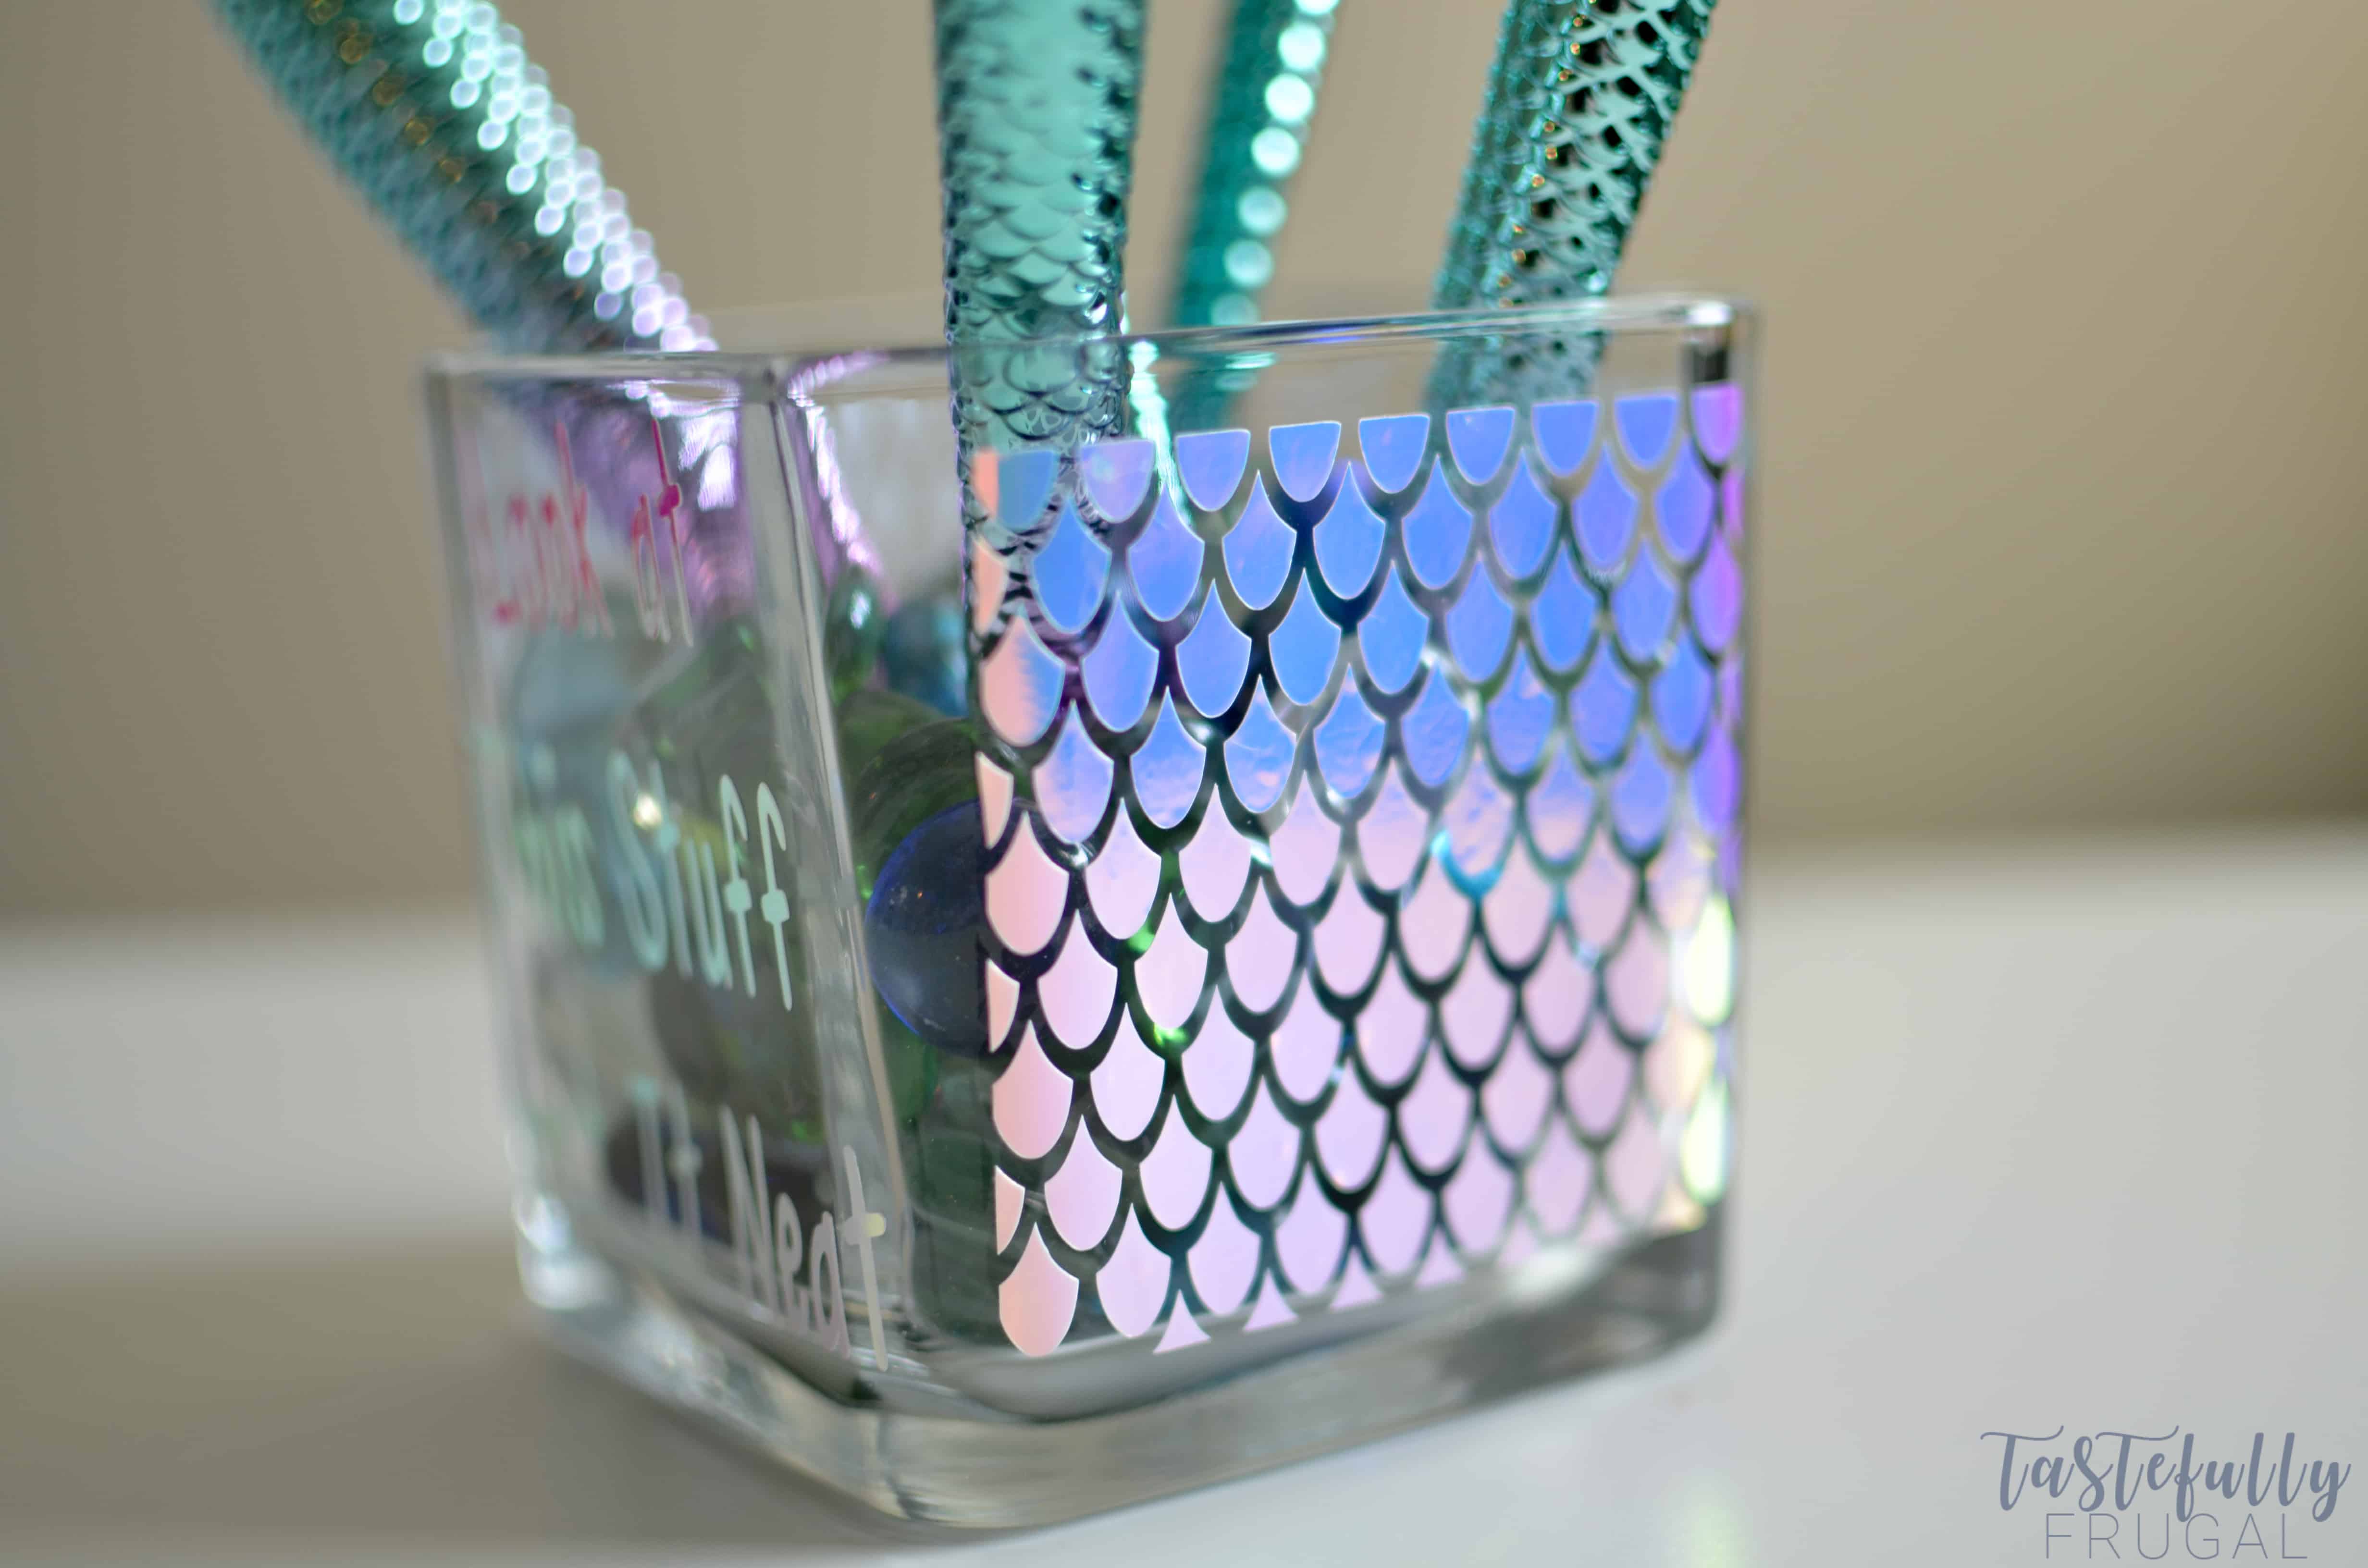
The inspiration for this makeup brush holder came in the middle of the night one night when I was up with Mahle, my one year old. We were watching Little Mermaid and the song “Part Of Your World” came on. If you’re not familiar with the movie, the song starts out in her little cave with her collection of things she collected from above. She sings ‘Look at this stuff. Isn’t it Neat. Wouldn’t you think my collection’s complete.’ And that pretty much sums up how I feel about my mermaid makeup brushes.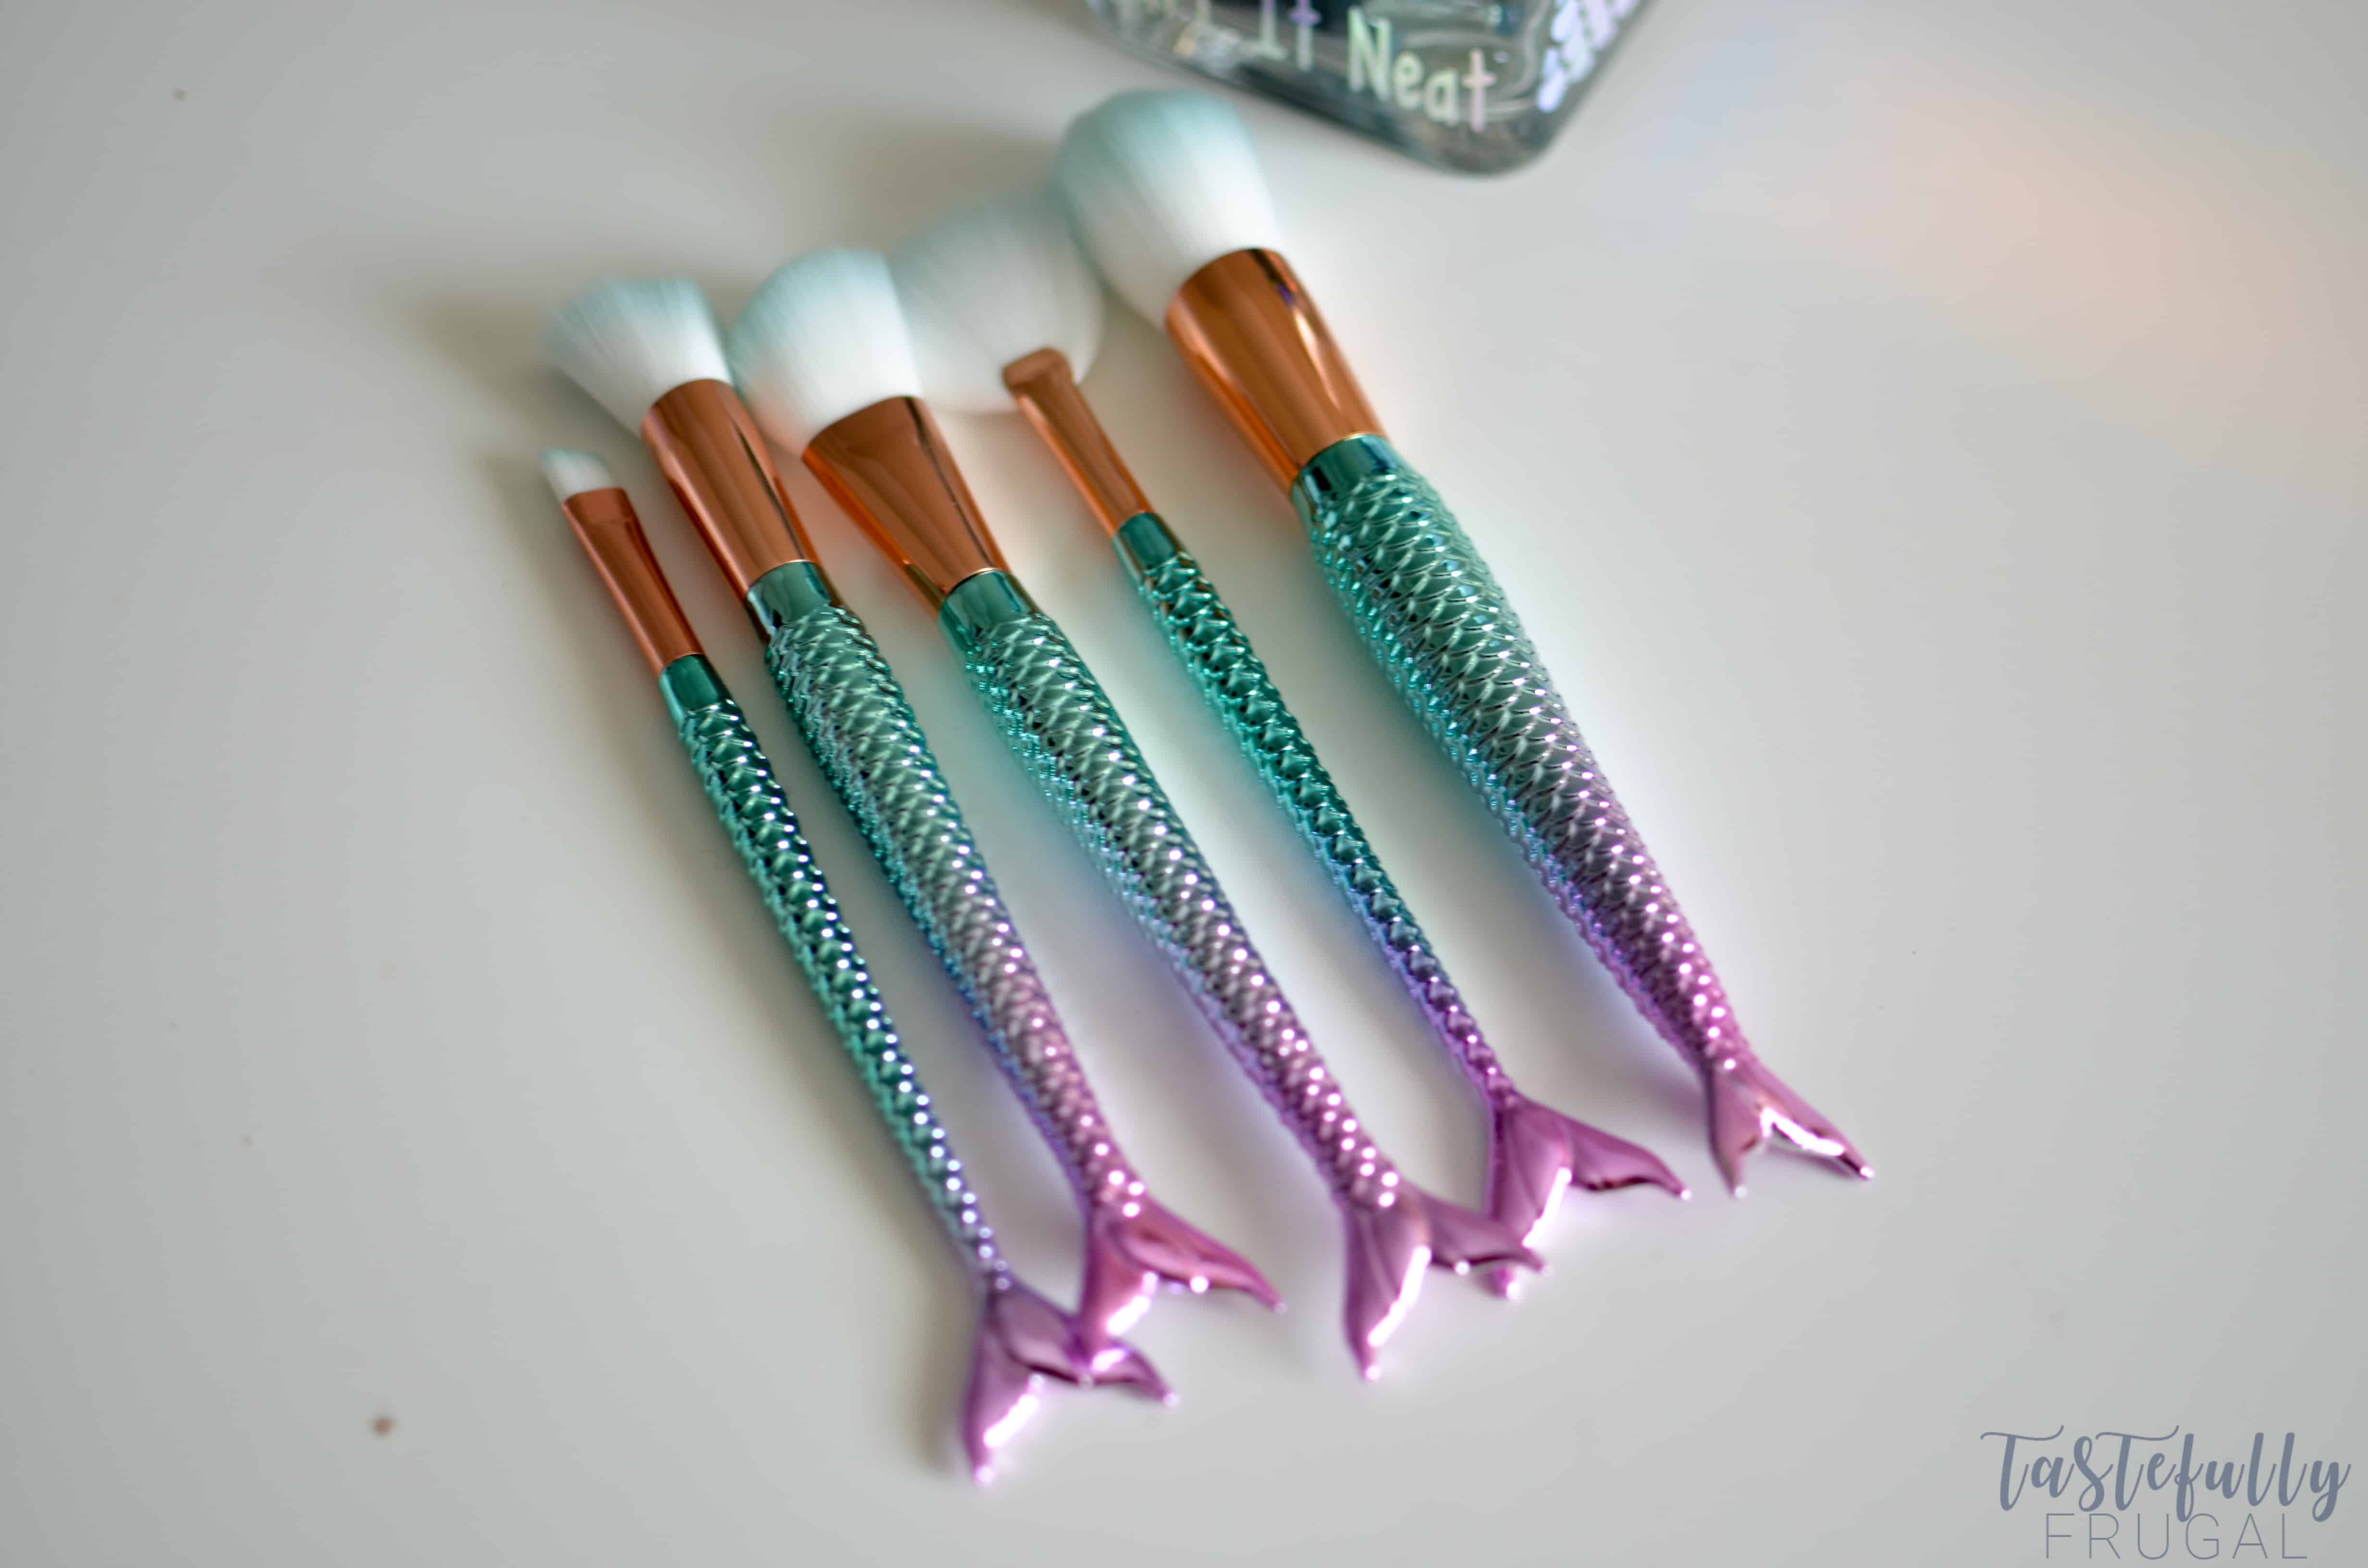
They are so bright and colorful and I only paid like $5 for the set. Unfortunately, I haven’t had a chance to use all of them because I just haven’t had anywhere to store them. So in the box they sat. But not anymore! Thanks to my dollar store supplies and my Cricut Maker they are now displayed proudly and they are easy for me to reach when I’m getting ready. Let me show you how EASY this makeup jar is to make!
SUPPLIES
**When ordering from Cricut.com make sure to use promo code TFRUGAL to get 10% off and score FREE shipping!**
Makeup Brushes (if you don’t already have them)
Blue Holographic Vinyl + Transfer Tape
Essenital Tool Kit (not 100% necessary but it makes weeding and applying vinyl SO much easier)
DIRECTIONS
Measure one side of your candle holder to get the dimensions of how big you need your design. Mine was 3″x3″ so I made my designs 2.75″x2.75″.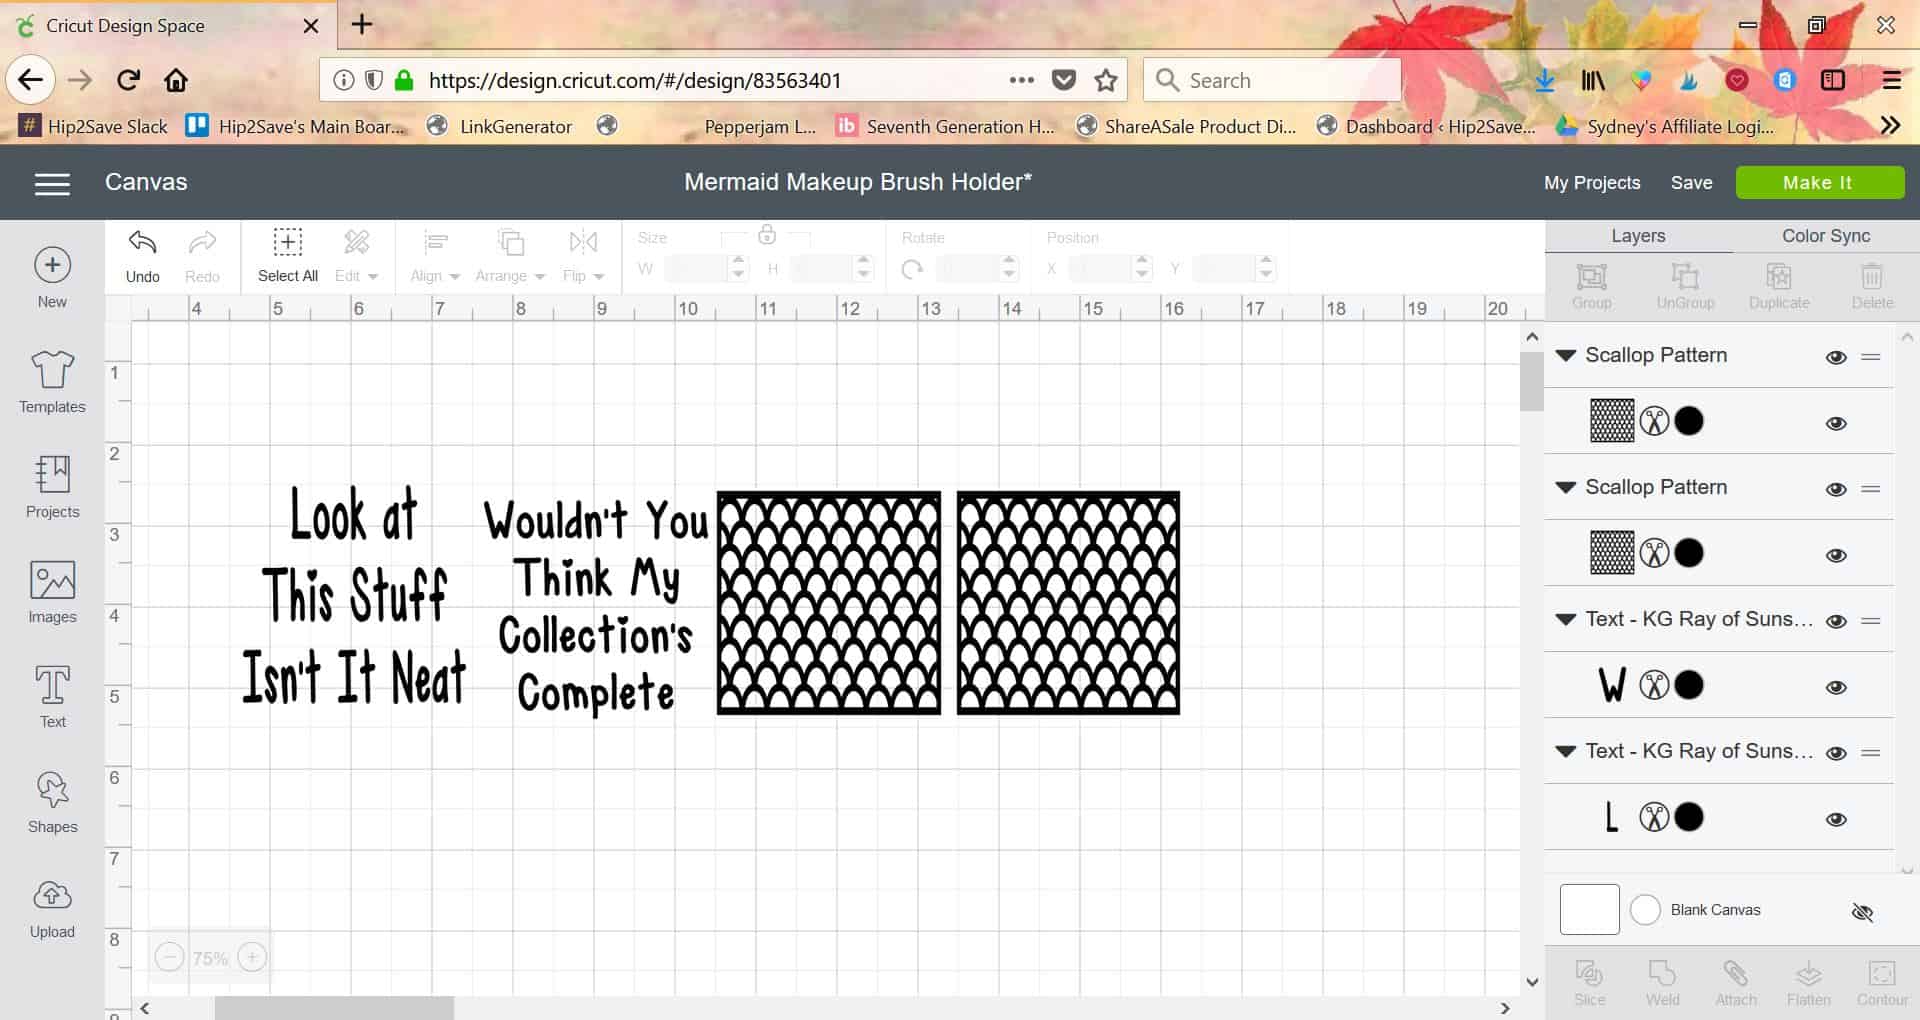
Open up this design in design space. For the text, if you want this font, you can download KG Ray Of Sunshine for free on DaFont first.
If necessary, resize your design. If your candle holder is the same as mine just go ahead and send to print.
Cut out, weed and apply transfer tape to design (this post has a great tutorial on how to easily and effectively apply, weed and apply transfer tape).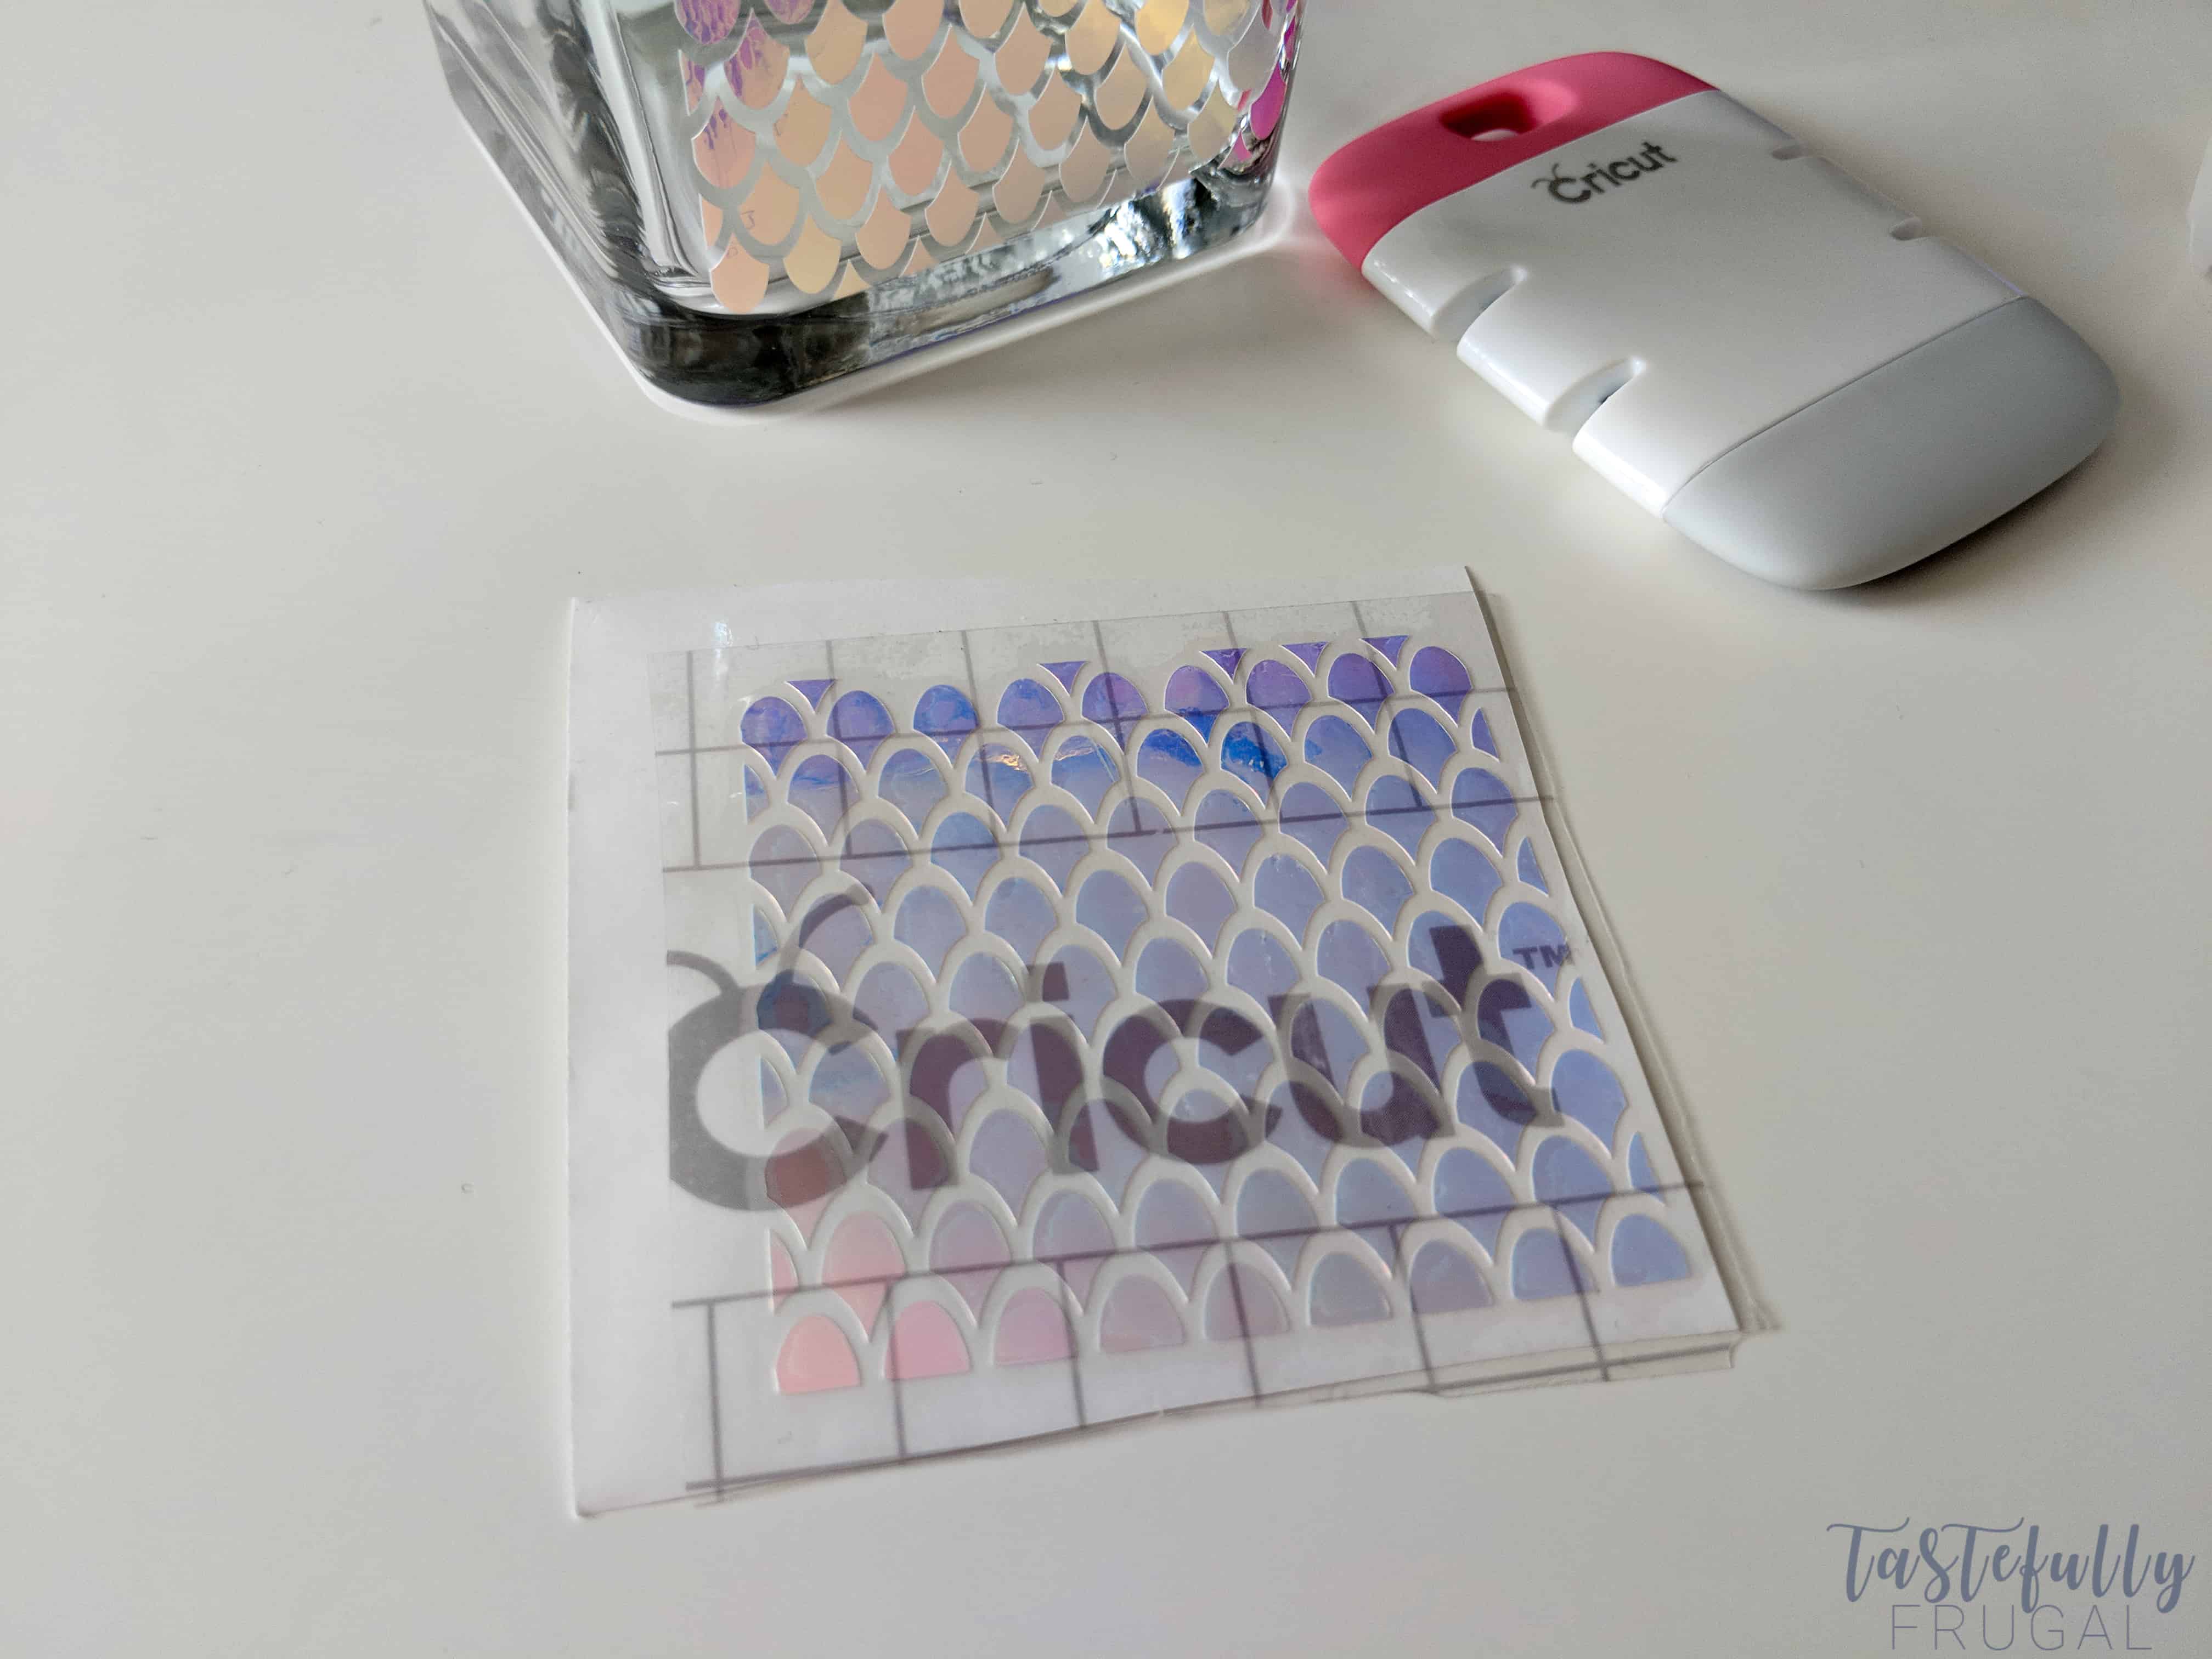
Center each design to your candle holder and firmly press down on transfer tape with the scraper tool.
 Pull up at an angle slowly to remove transfer tape (this way if something isn’t sticking you can easily put the transfer tape back down and add more pressure).
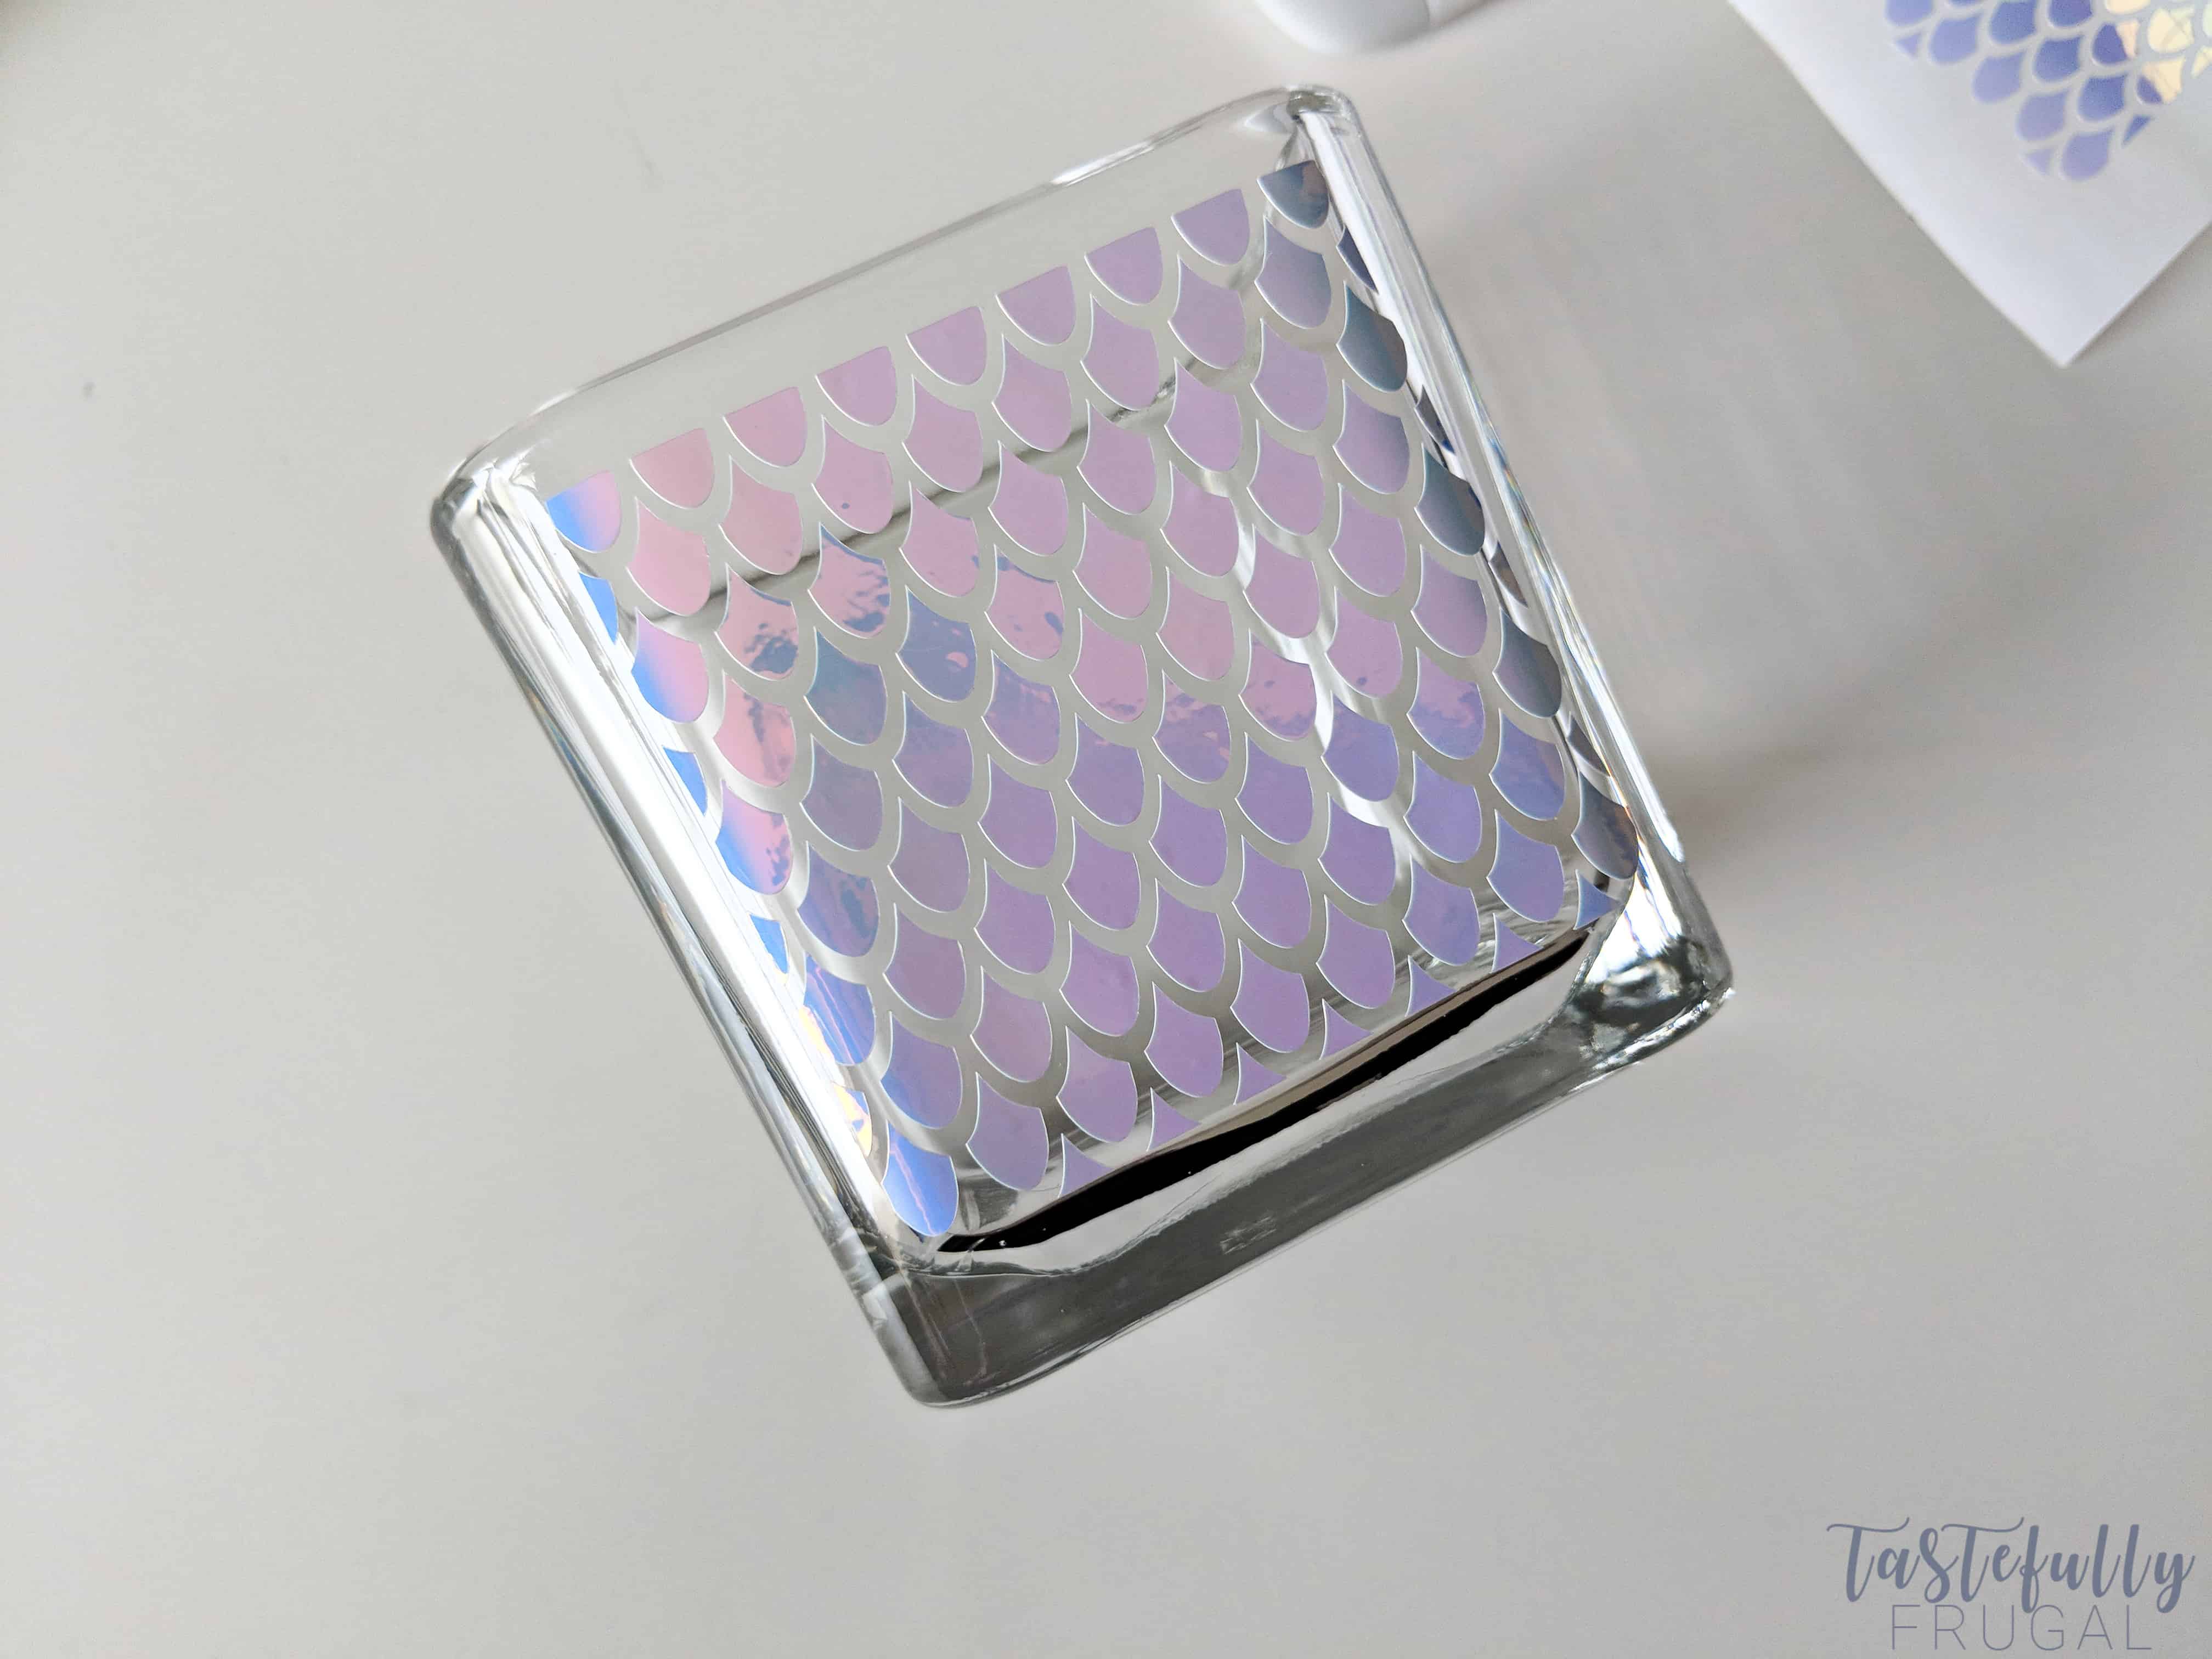
 Add stones to your jar. Add makeup brushes to your jar.
Look at this project. Isn’t it neat?! I LOVE working with Holographic Vinyl because it looks different from every angle. And, I think, it really looks like a mermaid’s tail – what do you think?!
If you’d like to check out more ways you can use your Cricut check out these posts! Need help with your Cricut? Join our Cricut Support Facebook Group!
I’m excited to join some super talented bloggers today as part of the Inspire My Creativity Link Party! The second Wednesday of every month we will be posting our projects and you can link your projects up too!
[inlinkz_linkup id=765854 mode=1]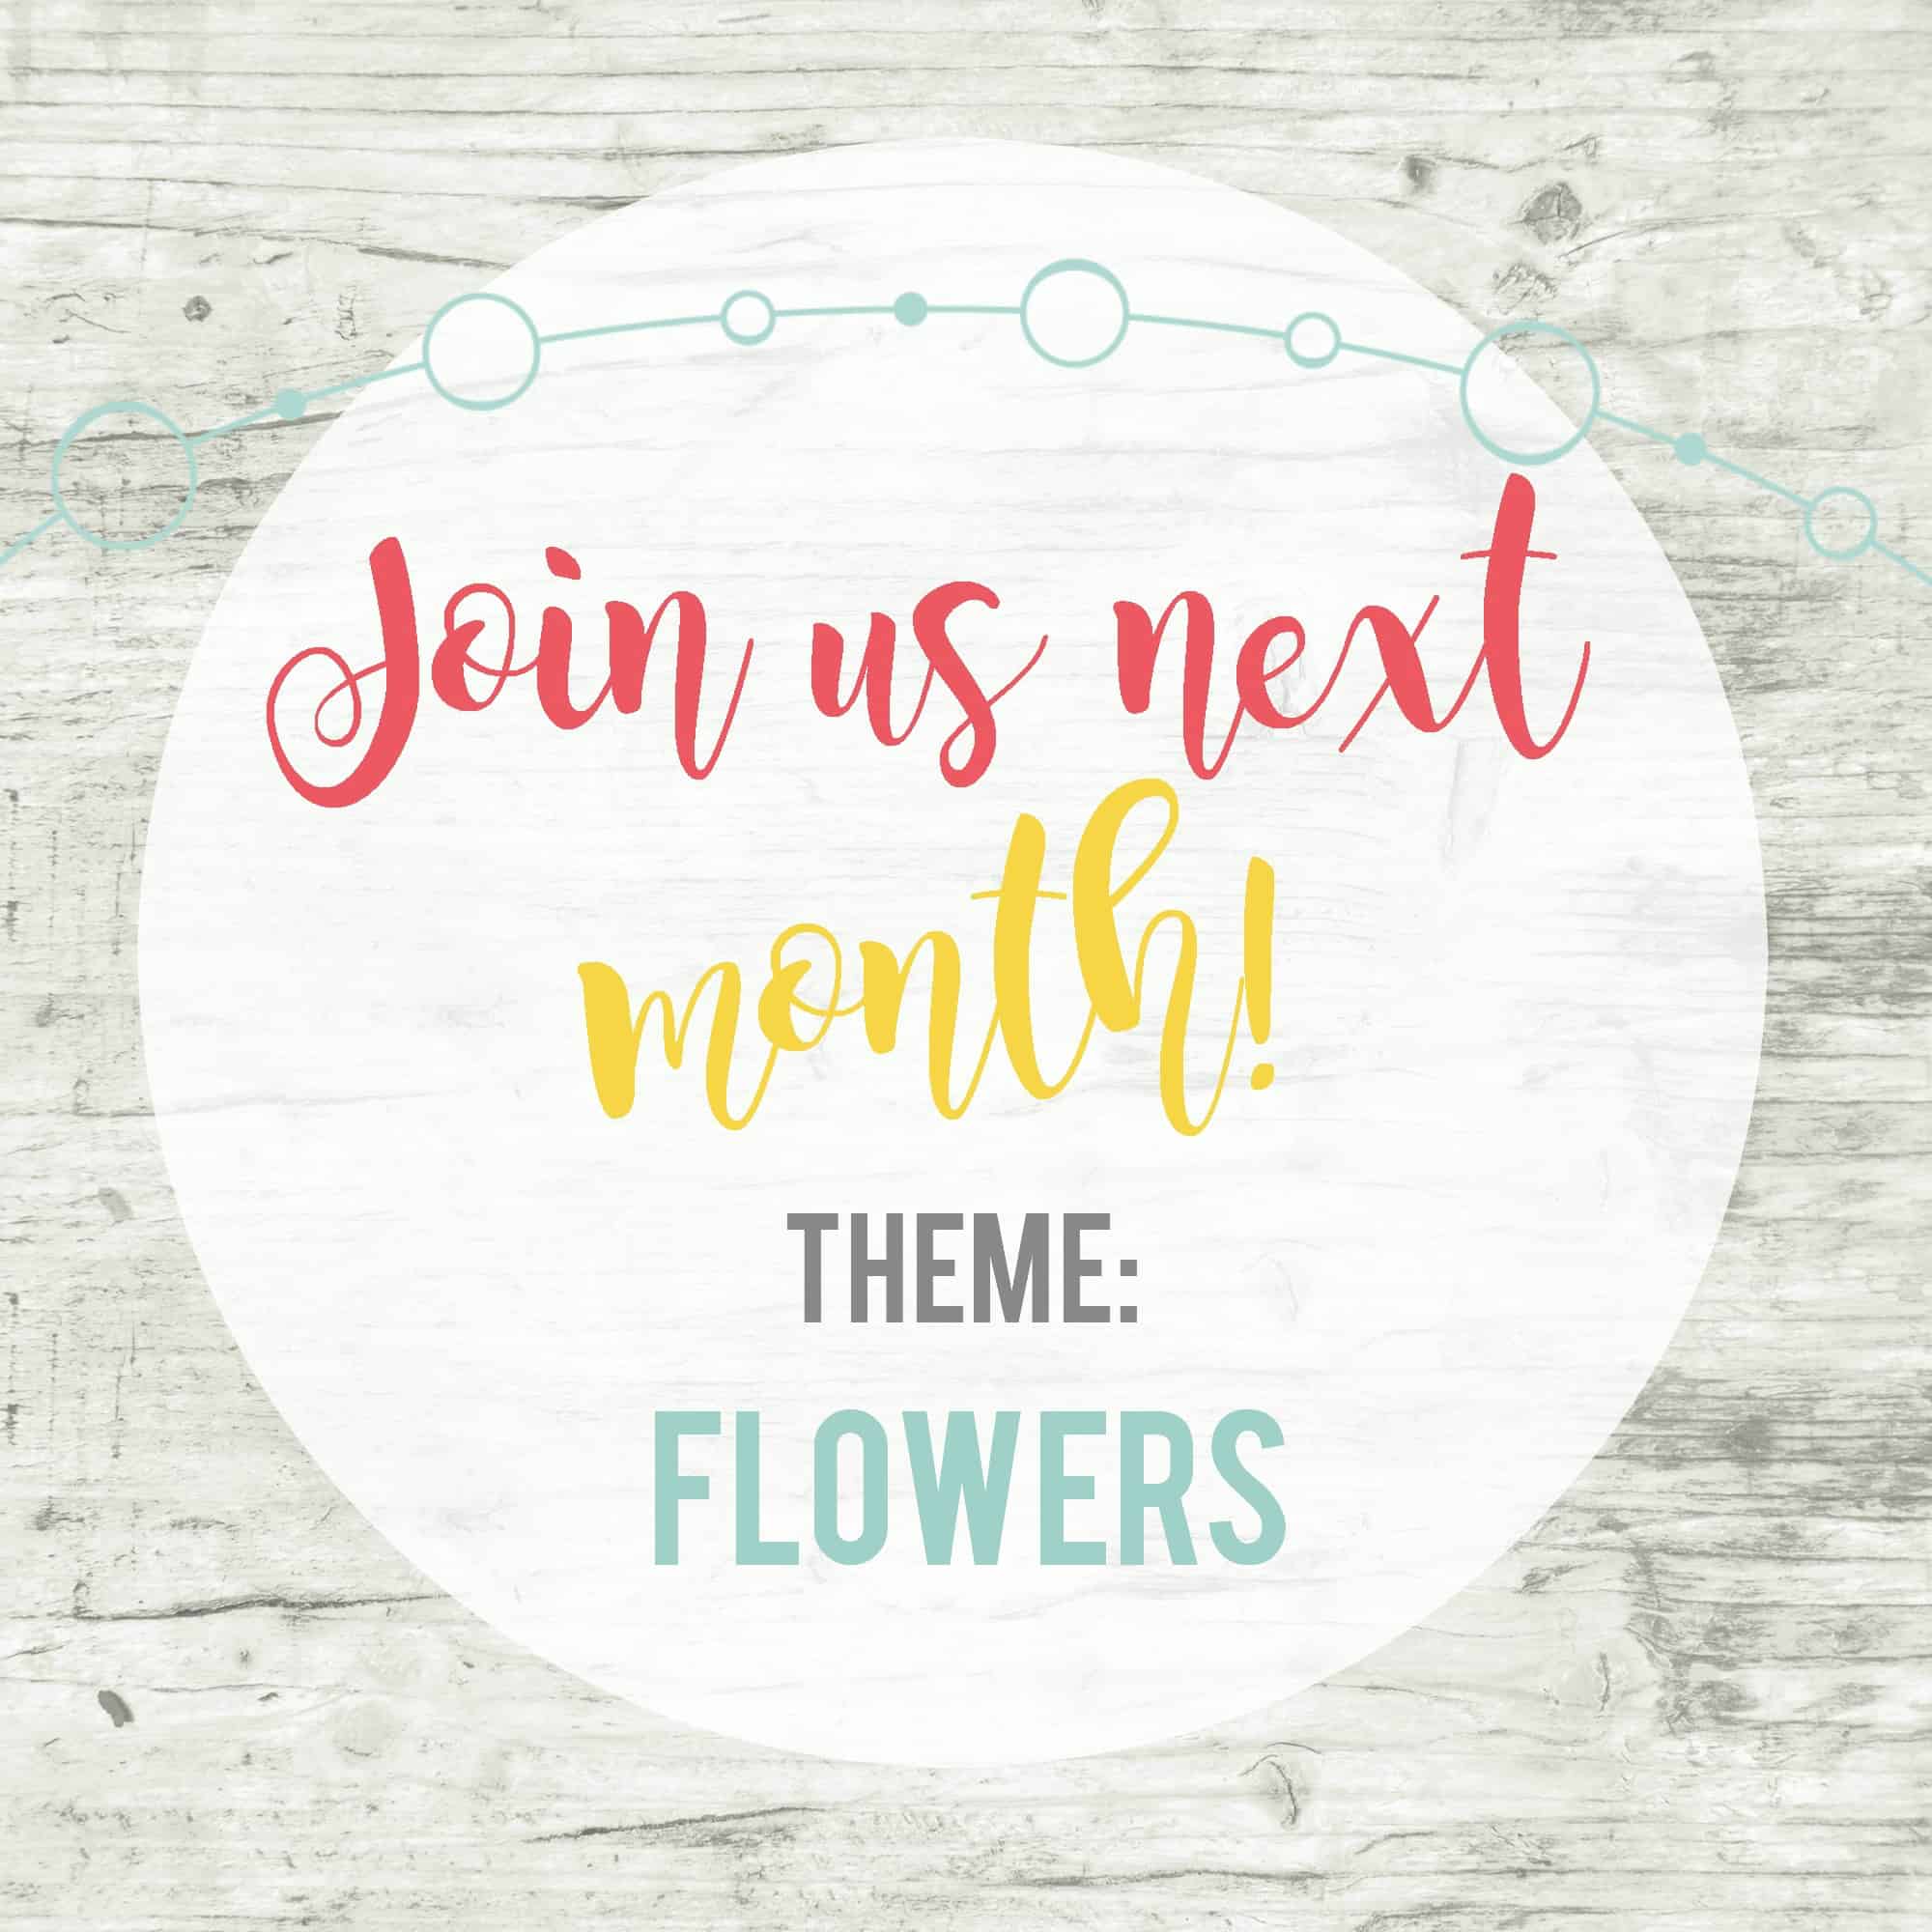
Next month’s theme is flowers! I hope you can join us on March 14th!


Victoria at DazzleWhileFrazzled says
Cute idea and great organization caddy for girls. Visiting from Inspire My Creativity party.
Julia Groves says
Oh my word my daughter (who is obsessed with all things Mermaid) would love this!
Marie Dabbs says
Those brushes and your design are absolutely adorable. That holographic vinyl is killer, too!
Christine says
What a darling idea! I love those brushes and that’s a perfect way to store them. Such a fun project for your Cricut!
Ali B says
This is such a cute idea! My daughter is getting some makeup supplies for her birthday next month and would LOVE this.
Shani | Sunshine & Munchkins says
I love everything about this! I haven’t worked with holographic vinyl yet but now I’m itching to try it out. My daughter loves all things mermaids and unicorns lately and this would be perfect.