I received a stencil from Cutting Edge Stencils for this post. As always, all opinions are mine alone.
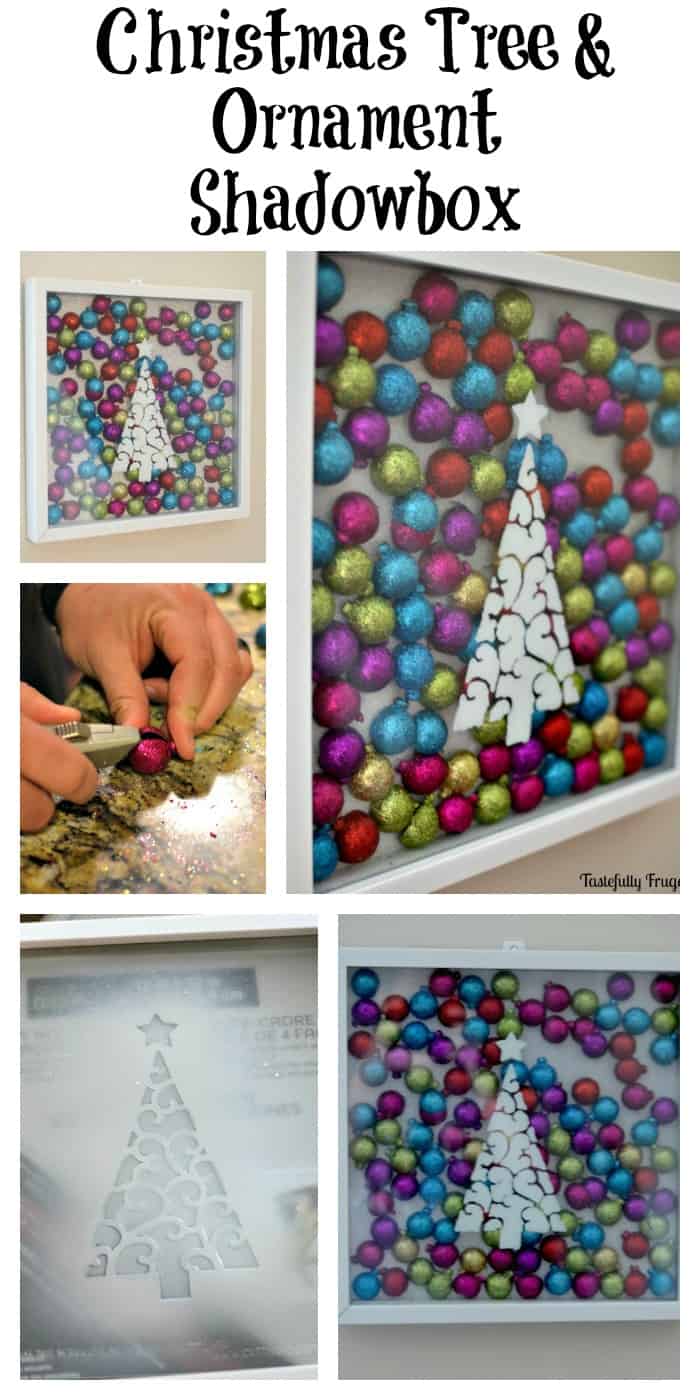
Create this bright and fun Christmas shadow box in minutes.
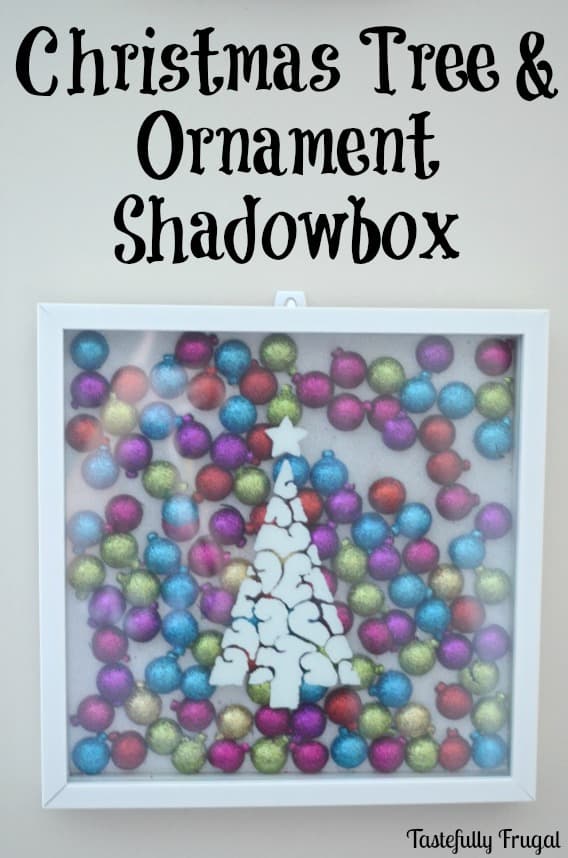
Have I ever told you that I love glitter?! I didn’t always love glitter, in fact it wasn’t until about 3 years ago that my love of glitter started. But I’m sure making up for it now! So when I saw a tube full of bright colored ornaments covered in glitter at Target for $1 I had to get them. I didn’t know what I was going to use them for but I knew I would use them!
Then my sweet friend Stephanie from Casa Watkins invited me to join her and 18 other bloggers in December’s Create and Share Challenge with Cutting Edge Stencils. I knew what to use my glitter ornaments for! I worked with Cutting Edge Stencils back in October on my Glow In The Dark Pillow and I loved how easy their stencils were to use and clean. Their Christmas collection are just as easy to use and clean and come in so many cute designs and sizes. I used the Scroll Christmas Tree in Medium for this project and I’ve already planned a few more projects with it!
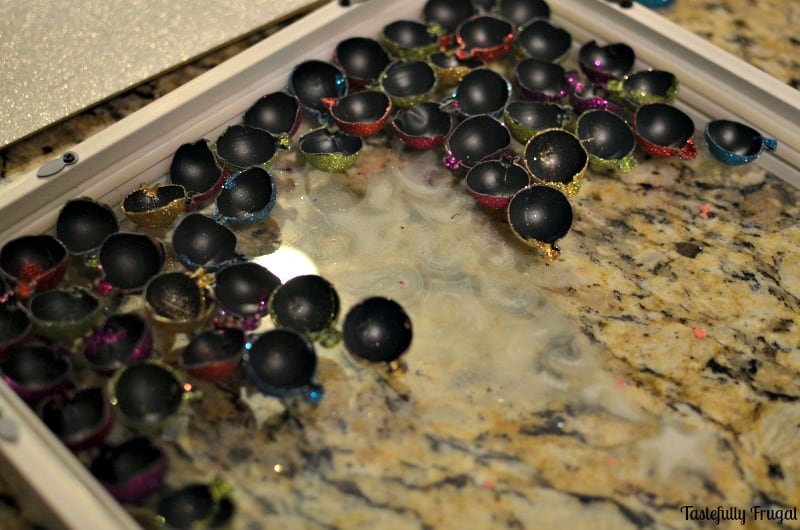
This shadow box almost didn’t happen though. When I first tried to make it the ornaments were too tall and I couldn’t add the back to it. I had all but given up hope until my husband came in with his handy dandy razor blade and got glitterfied (that’s totally a word) but cutting all the ornaments in half. Have I mentioned he’s the best. I would recommend putting down a plastic tablecloth or newspaper when you are cutting the ornaments; it will make clean up much easier!
 Supplies:
Shadowbox (I got mine at Michael’s and used a 40% off coupon)
Small ornaments (I used 4 tubes of 16 from Target)
Razor to cut ornaments
Glue or tape to attach paper to back of shadow box
Directions:
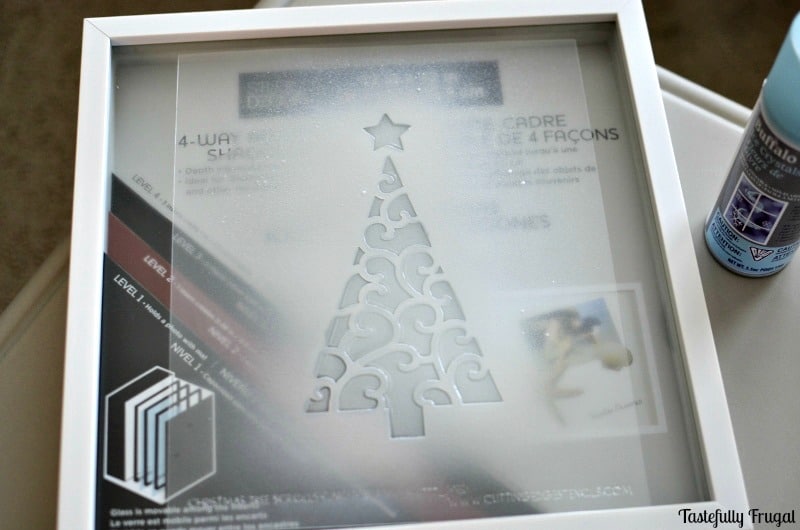 Line up stencil on glass and spray buffalo snow generously. Allow to sit for 10 minutes.
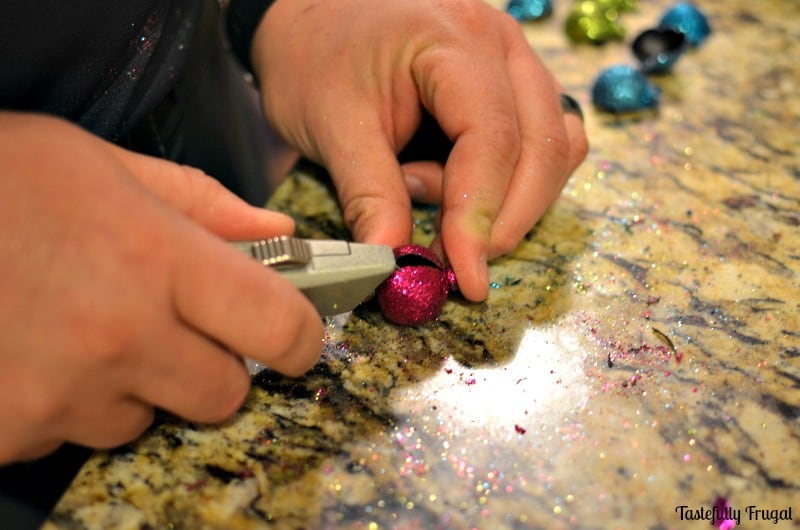 While glass is drying cut all you ornaments in half with a razor.
Take out the back of the shadow box and tape or glue scrapbook paper onto the back cover.
Remove all three shadow box layers and set aside.
Flip over glass so that the Christmas tree is on the inside (this step was also my husband’s idea, that way you don’t ruin the design if you have to dust it).
 Add ornaments sparkly side on glass to shadowbox.
Attach back and one of the three shadowbox layers.
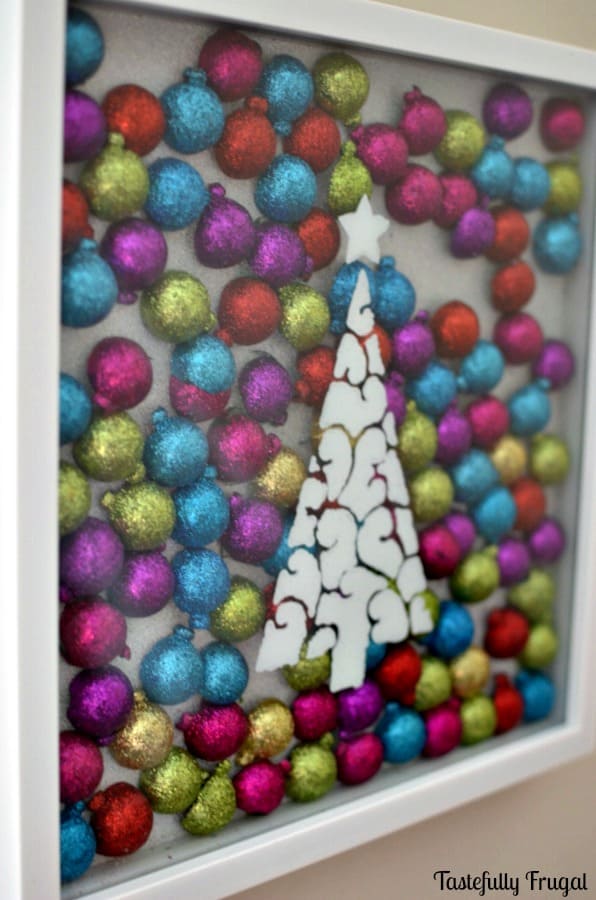 Observe your masterpiece.
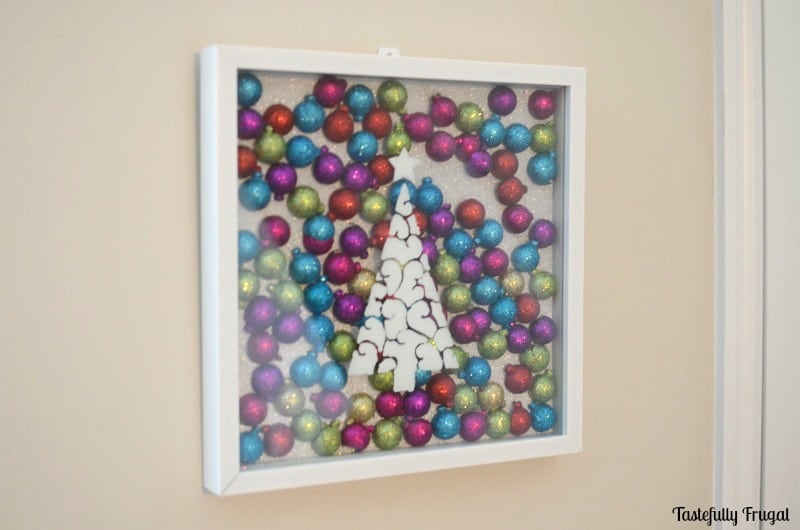
One thing I didn’t take in to account when I bought the ornaments is the rest of our Christmas decor is red and green and white. So I hung the shadow box by the front door, where we don’t have any decorations up so that way the colors don’t clash with the rest of the house. I love that I can see it every morning when I walk downstairs; it’s so bright I always start my day with a smile. It’s also a great reminder for me of how awesome my hubs really is!
Want to see what my blog buddies did with their stencils? Check out their projects below and then be sure to enter our giveaway. We are giving away 5 stencil kits valued at up to $50!
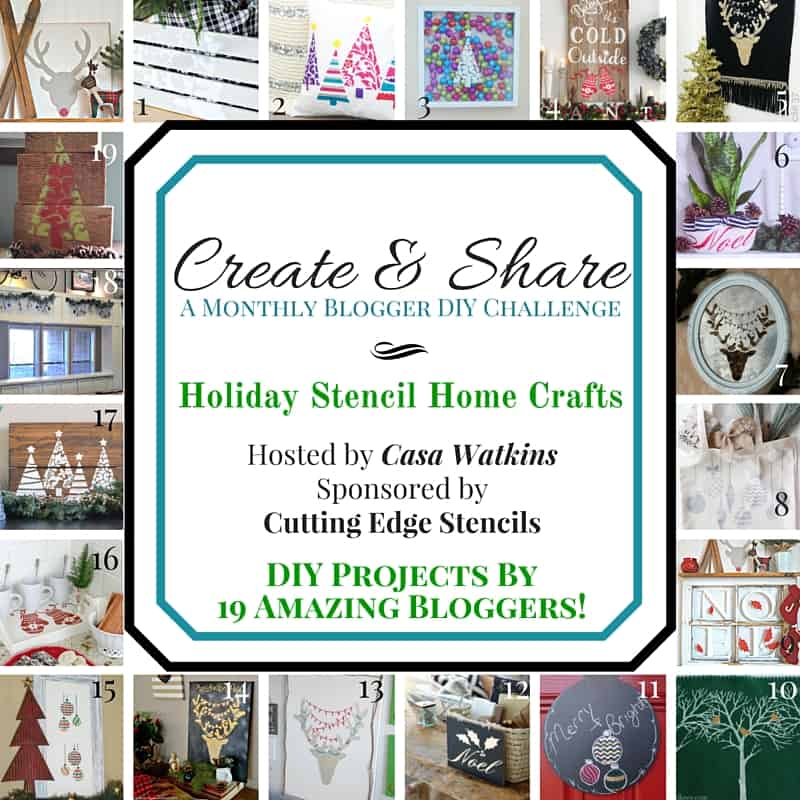
1. Shabby Grace Blog ~ Rustic Reindeer Crate // 2. Refashionably Late ~ Christmas Pillow // 3. Tastefully Frugal ~ Christmas Tree Ornament Shadow Box // 4. Pocketful of Posies ~ Reclaimed Holiday Wall Art // 5. Domicile 37 ~ Edgy Reindeer Tapestry // 6. Casa Watkins ~ Noel Stenciled Planter Basket // 7. Creatively Homespun ~ DIY Rusty Reindeer Wall Art // 8. Around the Watts House ~ Holiday Tote Bag // 9. Penny Love Projects ~ Window Wall Rack // 10. Flourish and Knot ~ Stenciled Table Runner // 11. Old House To New Home ~ DIY Chalkboard Merry and Bright Sign // 12. Up To Date Interiors ~ Noel Basket // 13. Our House Now A Home ~ Rustic Reindeer Canvas Wall Art // 14. The House Down The Lane ~ Reindeer Wall Art with Lights // 15. Green with Decor ~Christmas Craft with Stencil and Frame // 16. Pretty Practical Home ~ DIY Hot Cocoa Tray // 17. A Shade of Teal ~ DIY Christmas Tree Glitter Sign // 18. Uncookie Cutter ~ Hanging Ornament Boards // 19. One Mile Home Style ~ DIY Stenciled Scrap Wood Holiday Art


Iris Watts says
Now THAT is a SMART idea! I love shadow boxes, but this really never crossed my mind. It looks great!!
Sara says
This is NEAT! What a great idea and your hubby rocks!!!!
Tiffany says
Hi, Sydney ~ I love, love, love this project! How creative to use a shadow box. :0) And I totally believe that glitterfied is a word. :0) I always enjoy when my husband helps me out on a project. I think it makes it much more satisfying for both of us. Excellent job!
April R - UncookieCutter says
Sydney, this is GENIUS! I love it, so unique. What a great take on the project, pinning!
Aliza B says
I love how this turned out Sydney. I have wanted to try a shadow box craft and this might be perfect!
Cat @ Pocketful of Posies says
Sydney, This is so cute and I love glitter too by the way! I am pinning your idea!
Cat
Ruthie says
Sydney this is so adorable! I love how creative this is and what a fun decorative piece for your home!
Katy says
I love shadow boxes, what a great idea!
JESSICA says
Honestly, this is such a cool idea and the colors are really FUN!
Stephanie @ Casa Watkins says
This is amazing Sydney!! I love it. Can be as wall art or a great gift!! Very creative. 🙂 pinning and sharing
Sarah says
What a unique idea! I love how colourful and sparkly it turned out!
Kathy says
This is so unique!! Great colors.
Creatively Homespun says
This really turned out great!!! I really love this unique idea!!! The great part is that the readers can fill the box with all sorts of stuff to create their own!! I loooove it! The Christmas balls give it such a fun look. 🙂 The colors are bangin’! I’m so excited to see how fast this challenge is growing! I’m so glad you’re a part of it!! xo!
Kaitlyn says
This is so cute! I like how it’s bright and festive. What a great way to use leftover ornaments! I always have more than I know what to do with it.