Learn how to create custom shirts with your Cricut Machine and Cricut Design Space.
One of the most common questions I get asked when people are considering getting a Cricut machine is ‘Can I make custom shirts with it?’. Followed up by ‘Which machine do I need to make custom shirts?’. I’m happy to say that you can make custom shirts with ANY of the Cricut Explore machines or the Cricut Maker. And it’s super easy to do!
How to make custom t-shirts with Cricut
When you are wanting to make custom t-shirts, onesies, tote bags or whatever, you have two options when it comes to the design. You can upload a design you already have on your computer or you can create a design in Cricut Design Space. Both options are easy to do and both have their pros and cons.
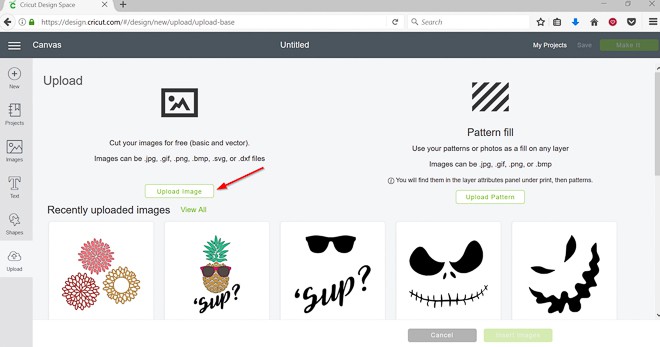
Uploading a custom design into Design Space
This is probably the easier of the two options if you already have a design in mind of what you want to put on your shirt. You can get SVG or JPG images from several different places (like LoveSVG.com, Etsy, DesignBundles, etc.) and upload them directly to Cricut Design Space. This post gives you a step by step tutorial on how to upload custom designs. The two downsides to uploading images into Design Space are:
- You are limited on the changes you can make.
- You can not share your project publicly. Only designs that have all Cricut fonts, images, shapes, etc. are shareable.
Creating a custom design in Design Space
This is my favorite of the two options because there are SO many possibilities when it comes to your designs here. AND if you have a custom file you uploaded to Design Space, you can make additions to it in Design Space too! There are hundreds of Cricut fonts and images available and the best part is you can share them all! If you create a design that just uses Cricut fonts, images, designs, etc. you can copy the link to your Design Space canvas and share it with your friends and family so they can easily recreate your project too!
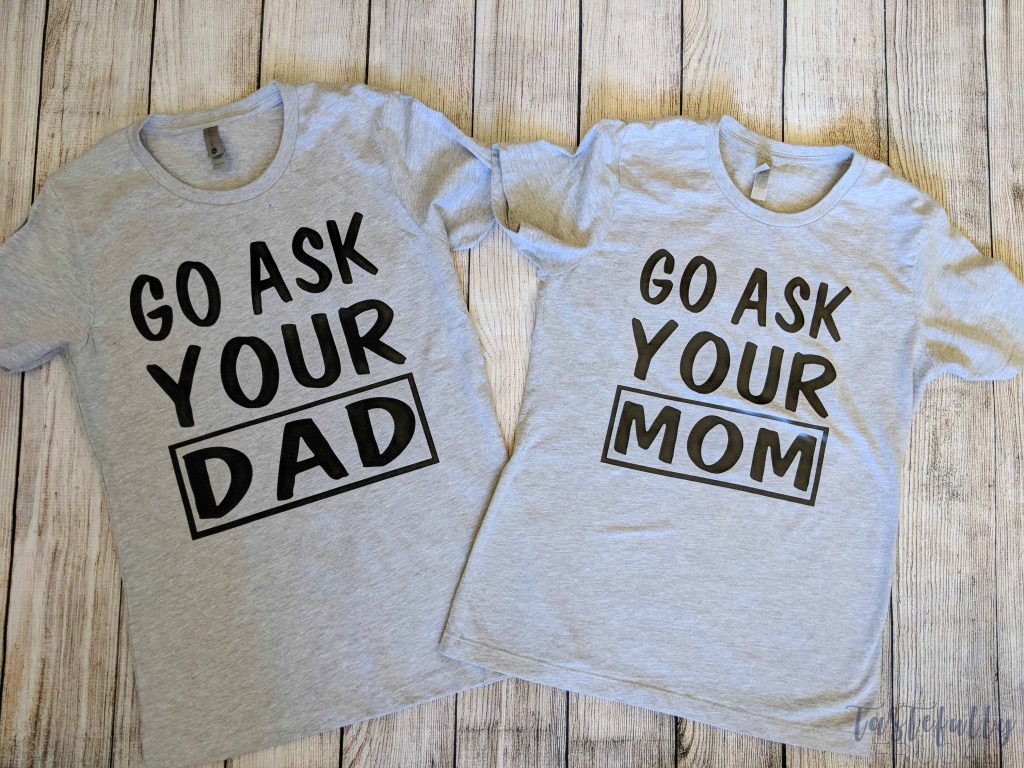
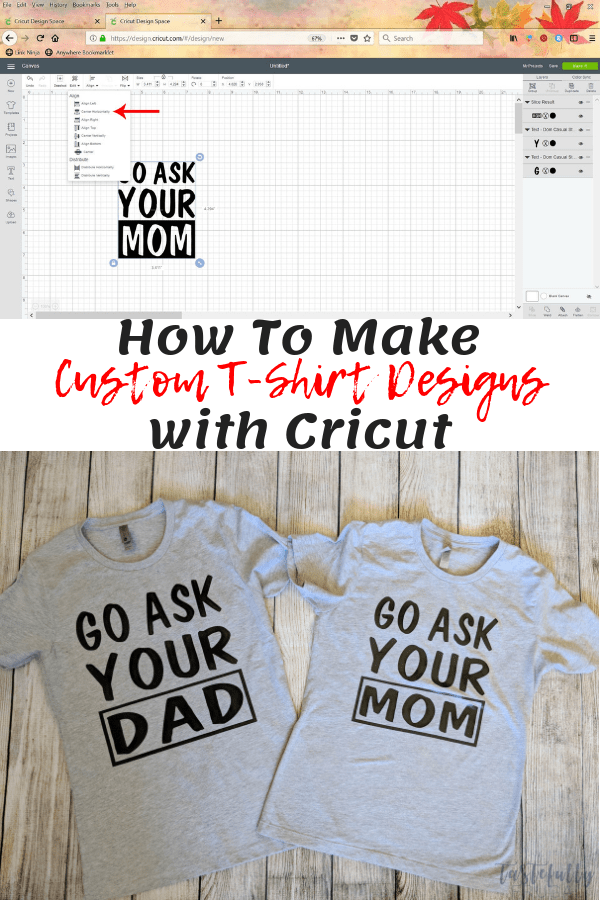
The designs for these shirts is one I created in Design Space and it was SO easy to make! I’ll show you below the step-by-step tutorial of how I made it, but if you want to just make the shirts you can open the Design Space canvas here.
SUPPLIES:
Black Iron-On Vinyl (I used SportFlex Iron-On for my shirt because I’m a little bustier and it stretches around my chest without ruining the design)
Grey Shirts (I love the Next Level Apparel Brand)
Cricut Maker or Explore Machine
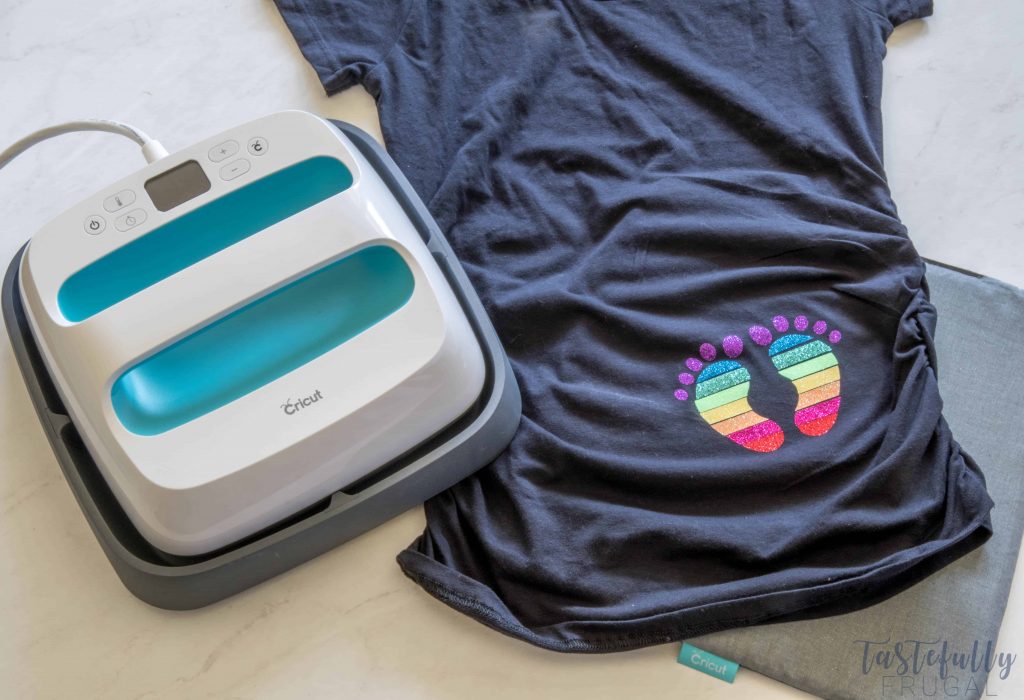
EasyPress/EasyPress 2 (or heat press or iron to apply iron-on vinyl). You can read why I prefer my EasyPress over Heat Press here.
EasyPress Mat (if you don’t have one of these you can use a towel instead)
When ordering from Cricut.com make sure to use promo code TFRUGAL to get 10% off and score FREE shipping!
DIRECTIONS (Scroll down to bottom to see the video):
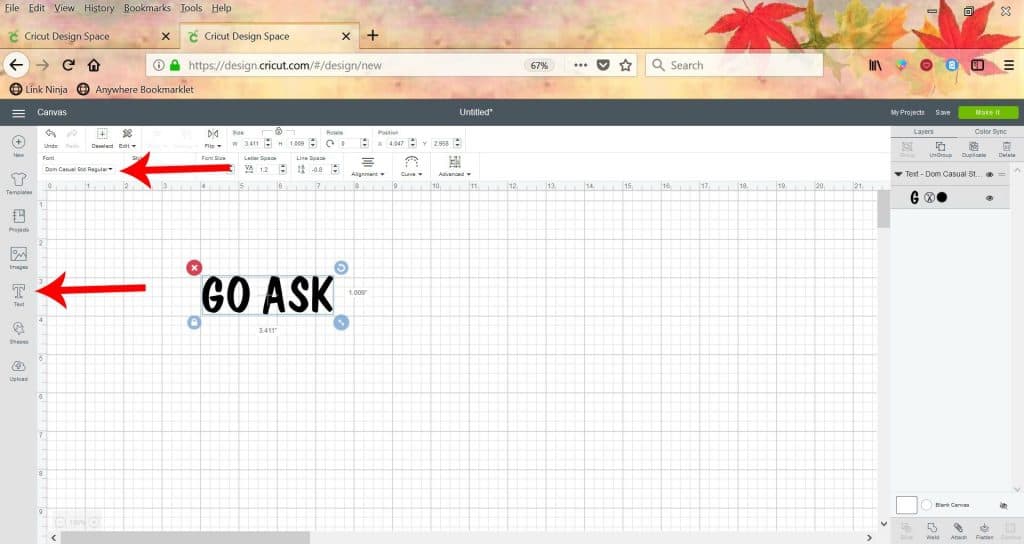
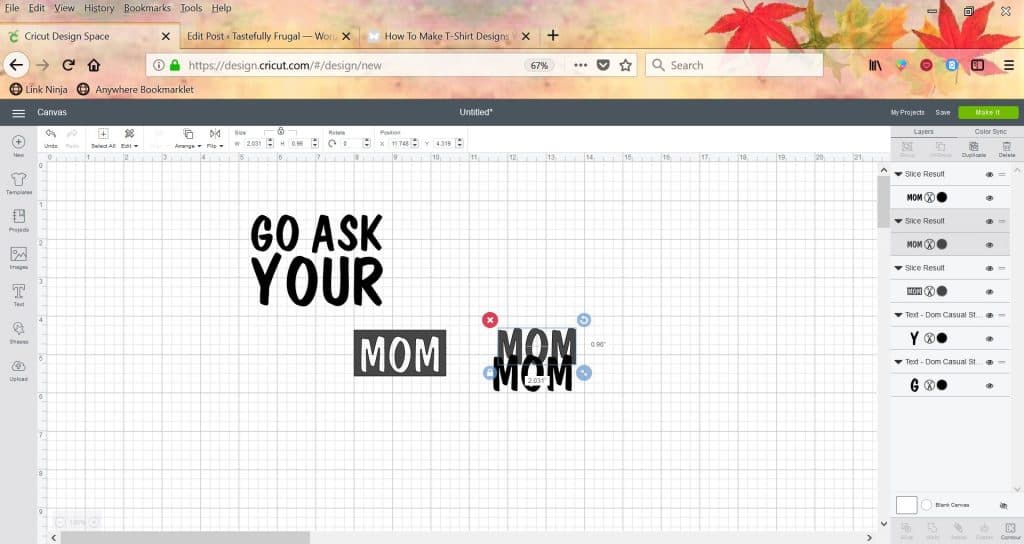
Open Design Space and select text and type your first line (Go Ask). You can play around with the fonts and see which ones you like best here. I used Dom Casual here.
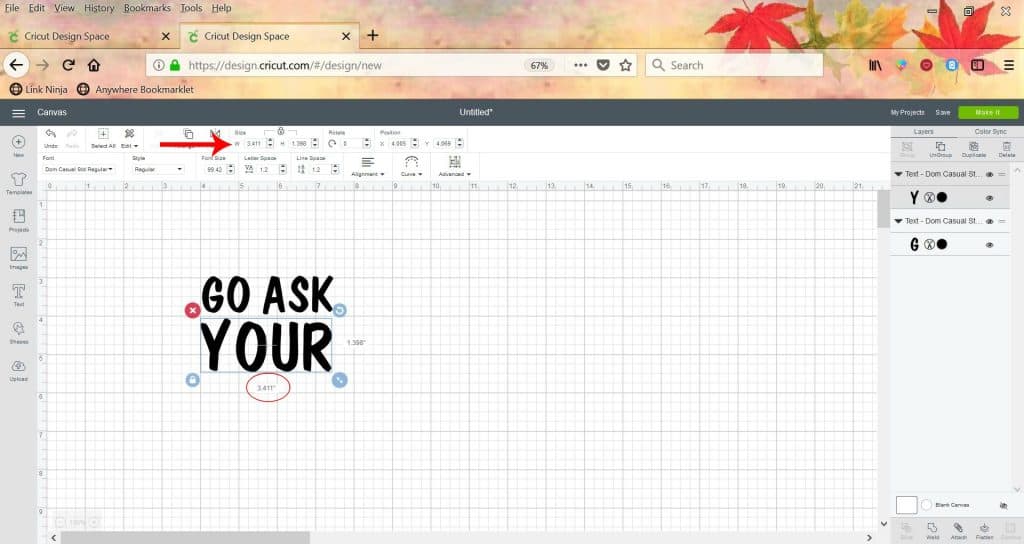
Add a second text box and type the second line (Your). Make this text box the same width as the first line.
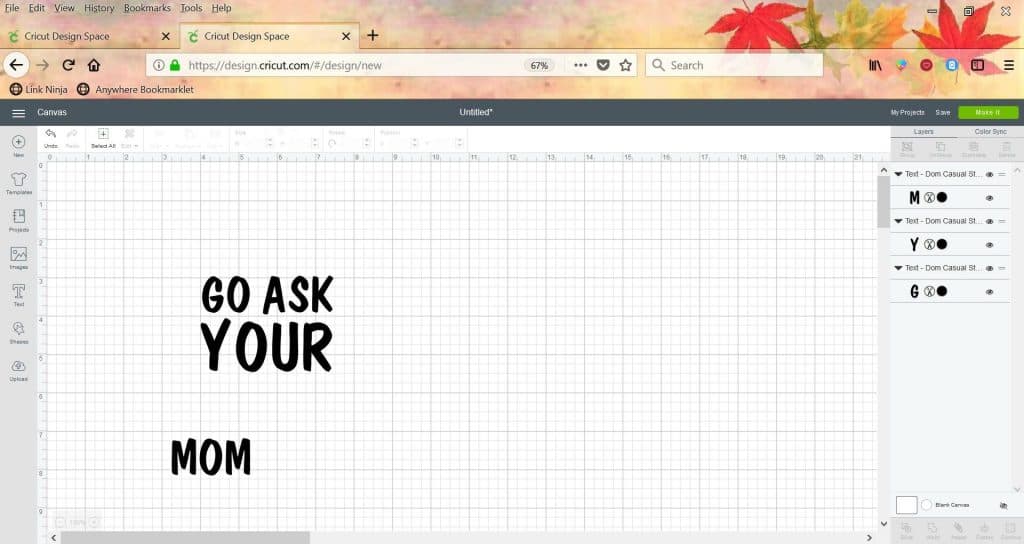
Next you’ll want to create a new text box and type the name (Mom or Dad).
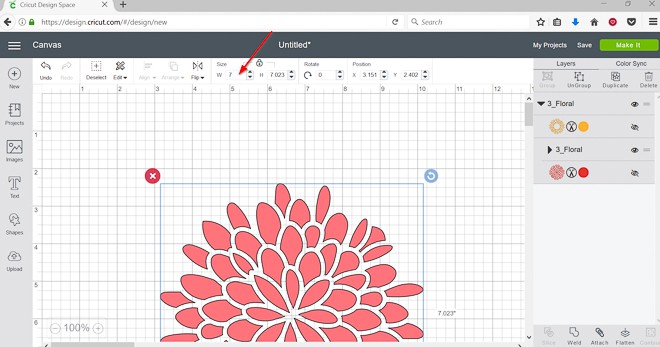
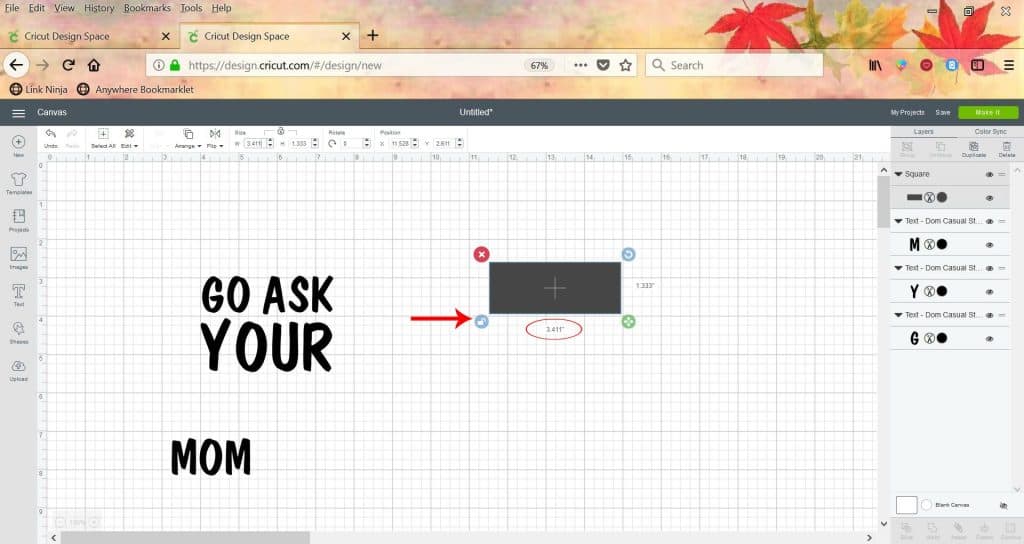
Add a square to the canvas and make it a rectangle by clicking the lock to make the dimensions change on their own. If you don’t do this step whenever you make one side bigger or smaller the other side will change too to remain a square.
Change the width of the rectangle to be the same size as the first two lines and add the name then slice it.
Remove the two layers so you just have the name inside the rectangle.
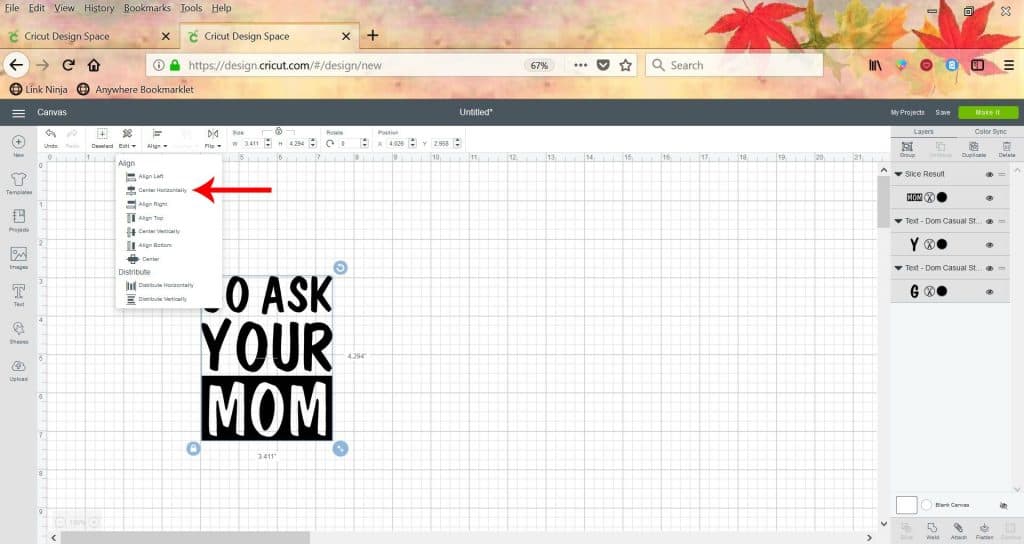
Line up the rectangle with the first two lines and align horizontally.
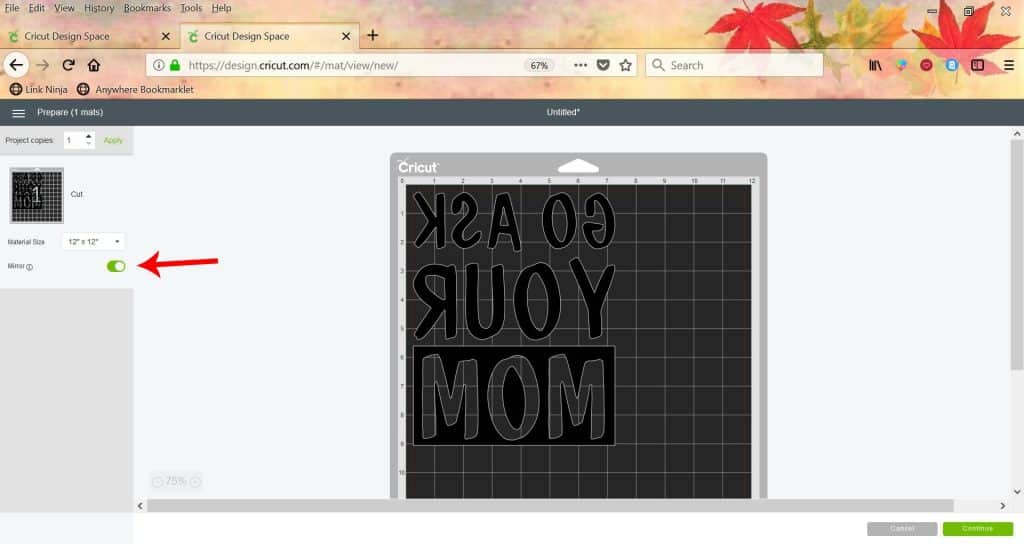
Attach your image and send to mat to cut. *** MAKE SURE TO MIRROR YOUR IMAGE***
Weed excess vinyl. For this design you are going to want to leave the vinyl on the rectangle and take out the letters for the name (Mom or Dad).
Preheat EasyPress to 340°F and 30 seconds.
Preheat shirt for 10 seconds and line up design to make sure it’s centered on the shirt.
Press for 30 seconds on the front and 15 seconds on the back.
Slowly remove the plastic backing at an angle starting in the bottom left corner.
Have you made custom shirts with your Cricut before? I’d love to see the designs you make! If you’d like to check out more ways you can use your Cricut check out these posts! Need help with your Cricut? Join our Cricut Support Facebook Group!
This is a sponsored conversation written by me on behalf of Cricut. The opinions and text are all mine.


Ana( Aby ) Hernandez says
Very informative.
So far I have been using my regular iron, and no problem, but I am thinking in getting
the easy press.
Sydney says
Thanks so much for commenting Ana! You will LOVE working with an EasyPress. I started with an iron as well and I have to tell you my arms and wrists sure loved not having to press designs for 5-10 minutes lol Let me know if you have any questions on the EasyPress 🙂
Penelope Smith says
Creating a custom shirt does seem really tricky. I liked that you showed how to format works on a shirt. It seems like it might be easier and less time consuming if you get an expert to make the shirts for you.
Tsport says
These t-shirts look so cute. I really like these t-shirts design ideas and I would like to make them for my son. Thanks for sharing.
Sydney says
You can use ANY shirt with iron-on. If you are using infusible ink, your shirts need to be atleast 90% polyester!