Make a stencil with your Cricut Explore Air and use it to make your own doormat in minutes.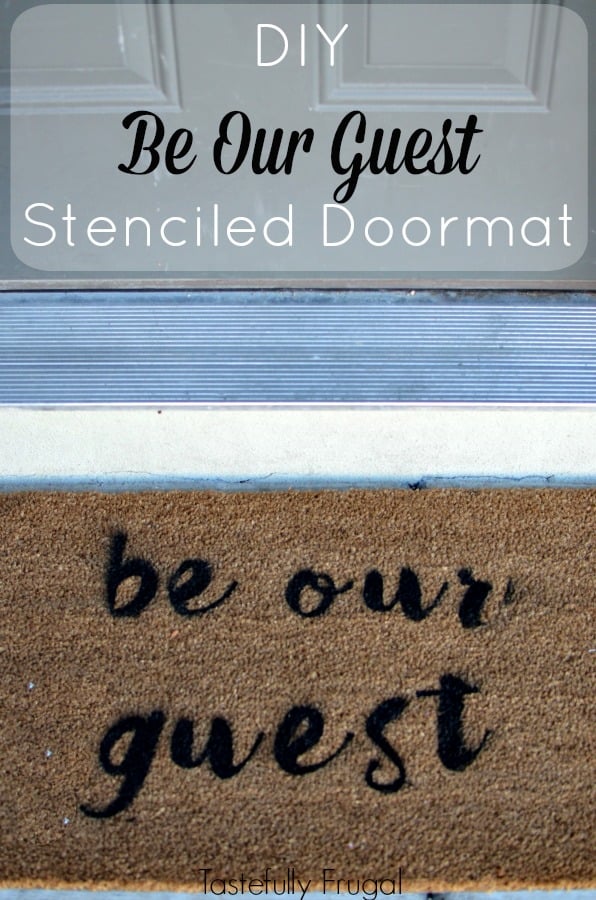
I, along with most girls who grew up in the 90’s, can not wait for Friday! My favorite Disney princess is coming to life in the live action Beauty and The Beast. I’m not the only one in my family excited about the movie. We bought Mahle the animated version on Blu-Ray for Christmas and it is her favorite movie. Her brothers love it too! In anticipation of the new movie’s release we have gone a little Belle-crazy (tune in Thursday to see how you can make your own shirt inspired by songs from the movie)!
When I was looking up Beauty and The Beast movie times last week I saw an ad for a Be Our Guest Doormat. It was super cute but I really didn’t want to pay $40 for a doormat. So I did what any normal woman on a budget would do… I went to Target! I picked up a plain doormat for $9 and headed home.
The hardest part of this whole process was waiting for the paint to dry. You can work up your design in Cricut Design Space in under 5 minutes (or use my design by clicking here) and get your mat prepped to paint in less than 5 minutes. If you want to make your own design for a doormat let me show you how easy it is!
Open your design studio and add a rectangle the size of your doormat. To do this click ADD SHAPE and select square. Then click on the lock button to make the size and height both adjustable. 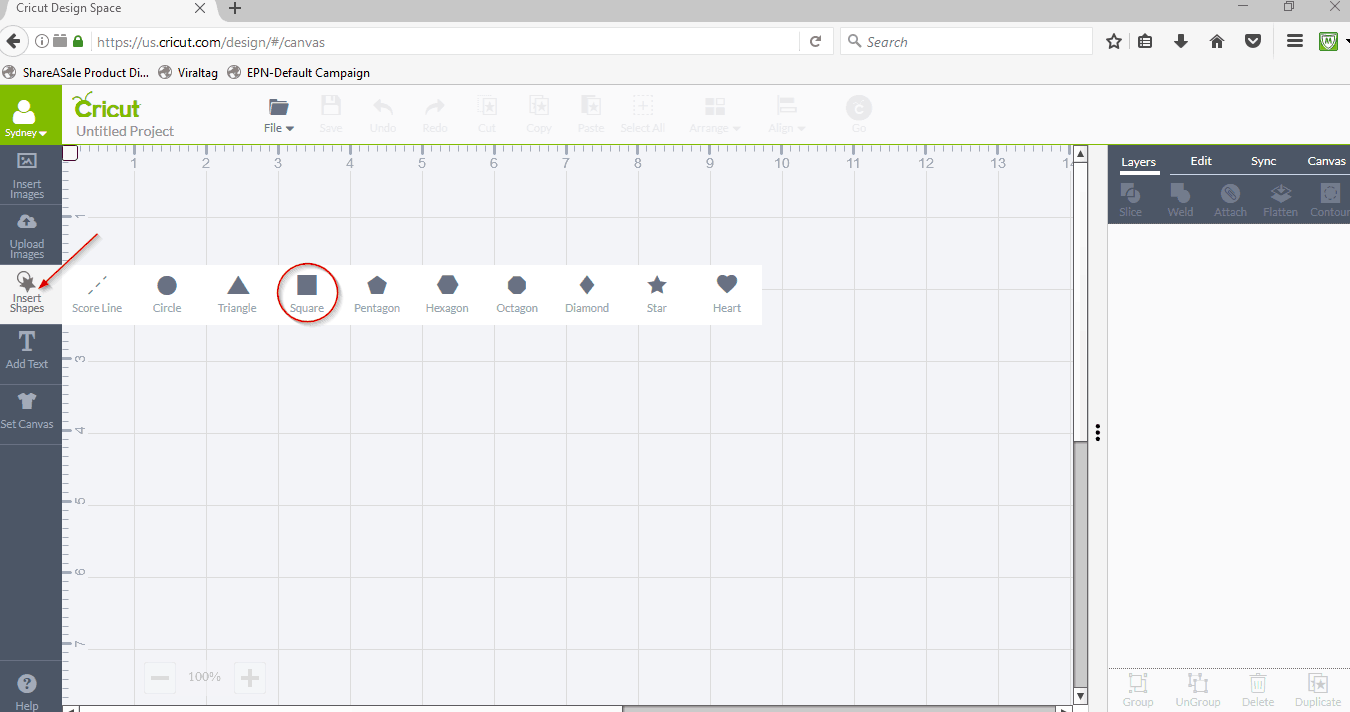
Next, click the EDIT tab and change the width and height to the size of your mat.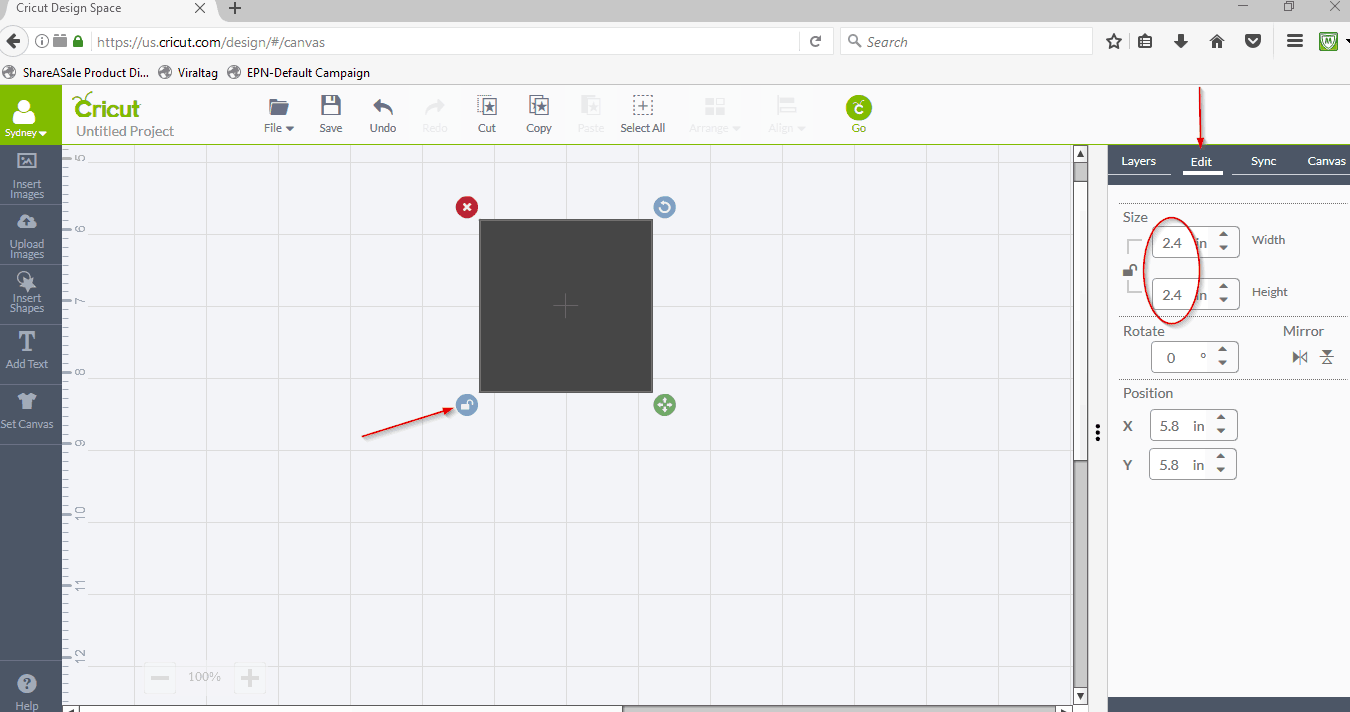
Change the color of your mat to white so you can easily see the letters as you add them.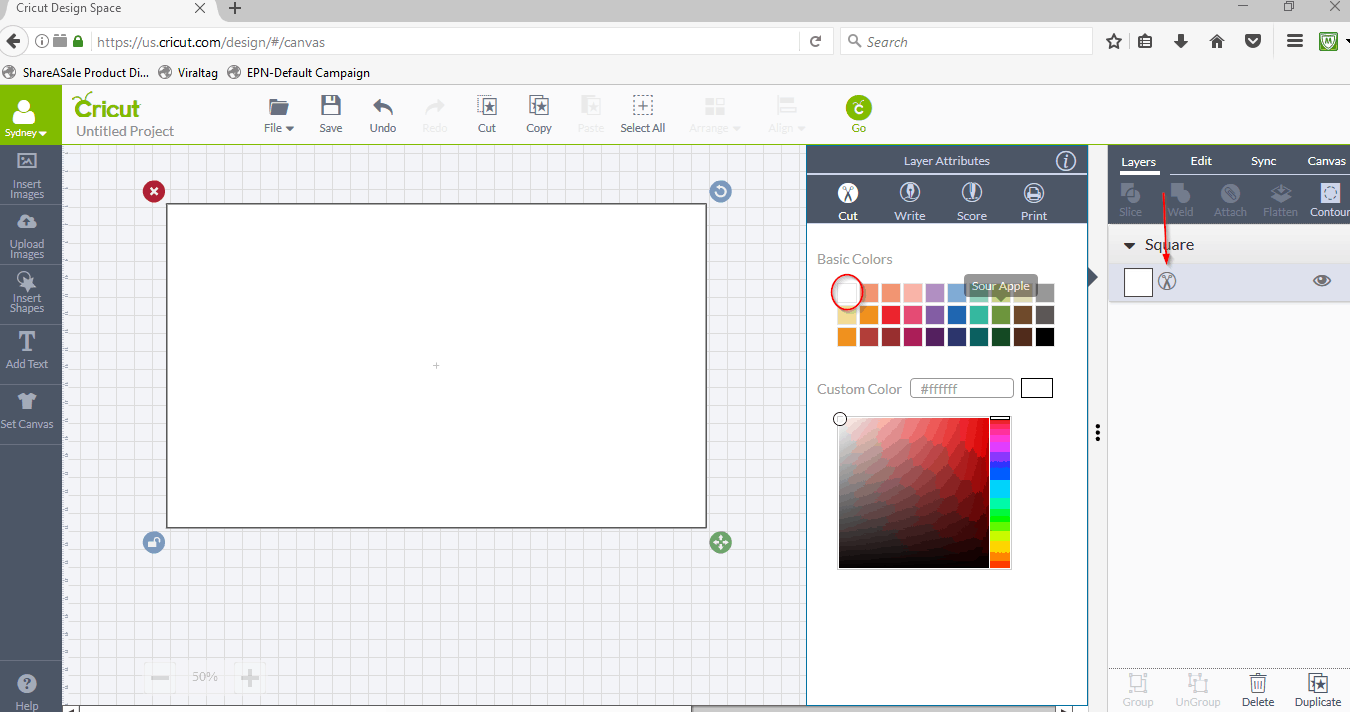
Add your text by selecting ADD TEXT and typing what you want to be on your mat.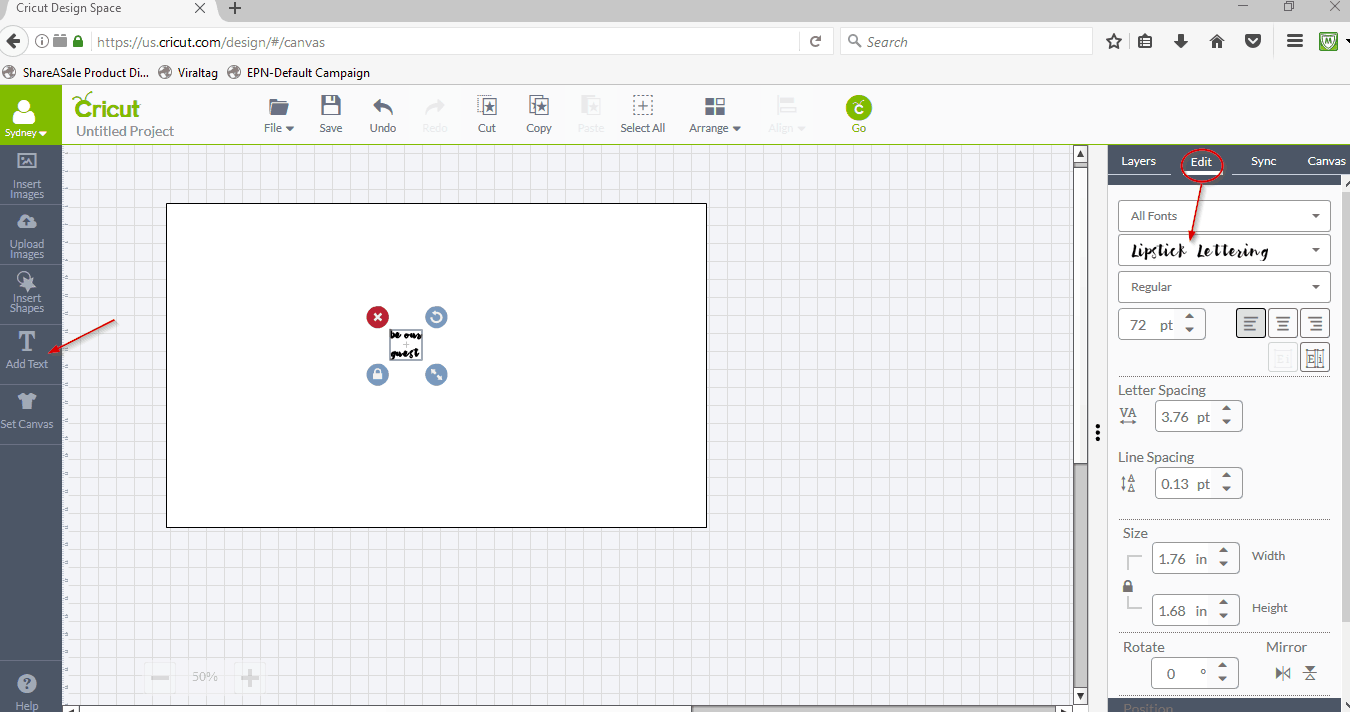
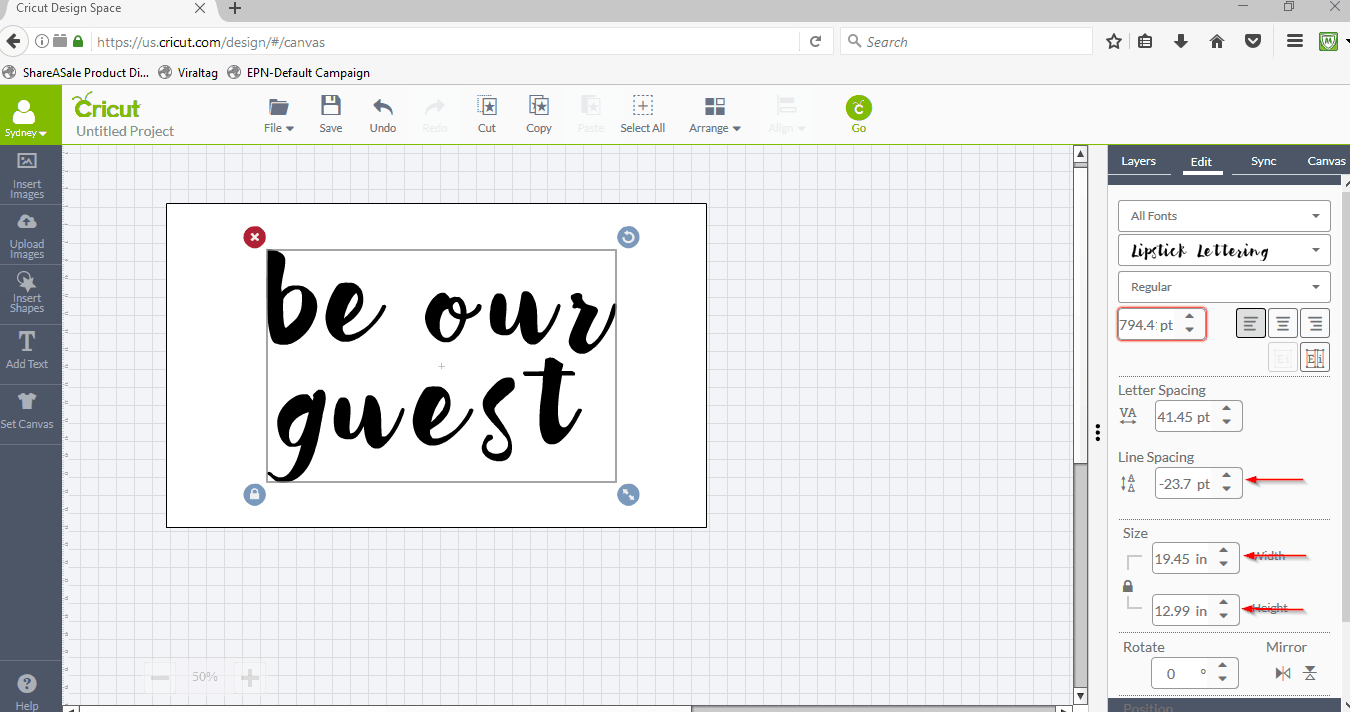
Next click the EDIT tab and change the font to whatever font you wish. The font I used was lipstick lettering. In this tab you can also change the space in between the lines and the size of the words.
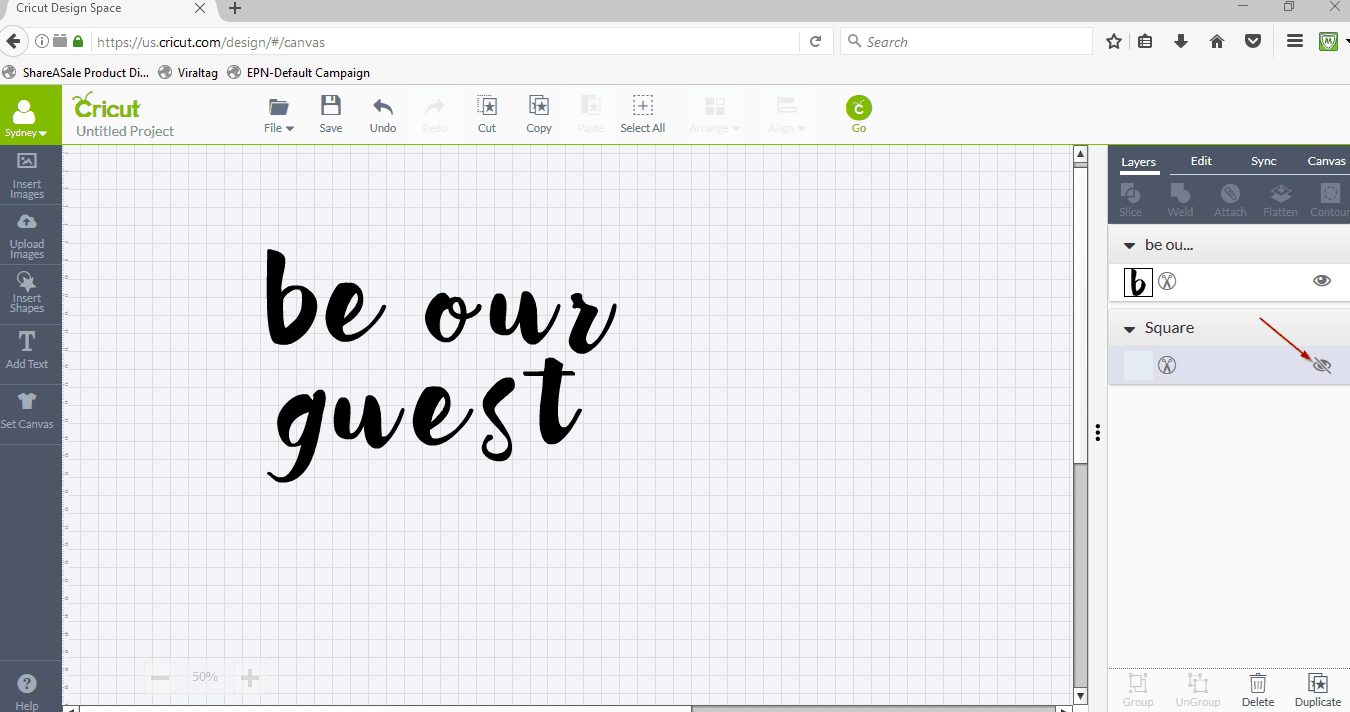
 Lastly, go back into the LAYERS tab and click the eye next to the square to make it not visible. Now you are ready to make your stencil!
You can use contact paper, vinyl, poster board or even an old cutting mat for your stencil. I had some old cheap vinyl I bought at a craft store when I first started making projects. It was taking up space in my vinyl drawer so I decided to use that. When you are weeding make sure to remove the letters, not the background, the opposite of what you usually do when working with vinyl.
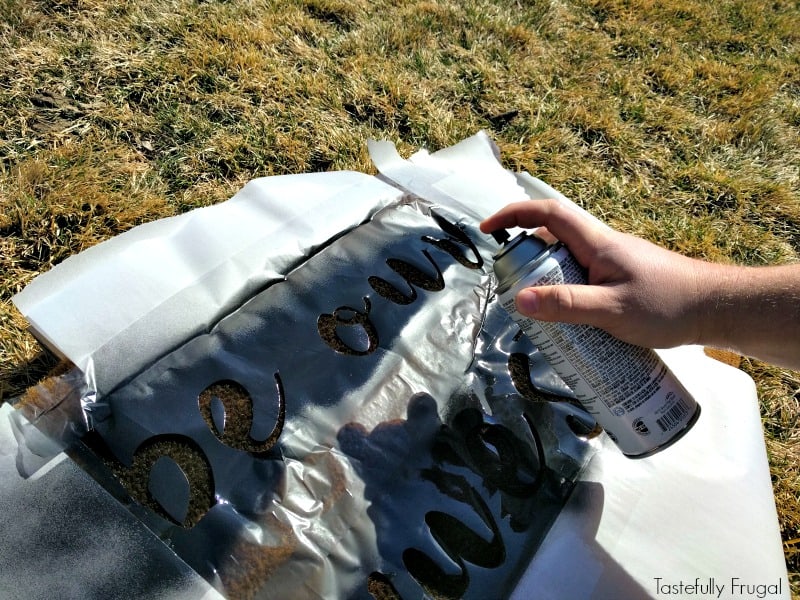 Lay your stencil on your mat and make sure you like the placement. Use newspaper (or parchment paper if you don’t have newspaper) to cover the parts of the mat you don’t want paint getting on. In a left to right motion evenly spray paint across your stencil. You may want to go back and do a second coat right after to make sure you’ve got a good solid color. Remove the parchment paper and stencil right away and let dry for 24 hours before using.

I love using my Cricut for projects around the house and just this project alone I saved over $30 compared to if I would have bought the doormat from a seller. Plus I get total control over the design process. What DIY projects could a Cricut Explore Air help you with around your home? Use code LOVECRICUT to get 10% off your order and FREE shipping now through the end of March. You can get the Explore Air for only $179 or a bundle with the Explore Air and supplies for $197!
Check out a few of the other projects I’ve used my Explore Air on:
This is a sponsored conversation written by me on behalf of Cricut. The opinions and text are all mine.







Becky Blad says
This is so cool! I just know my boys would think it’s so cool if we let them choose a saying for this. What a fun idea!
Mary says
This is a great idea!