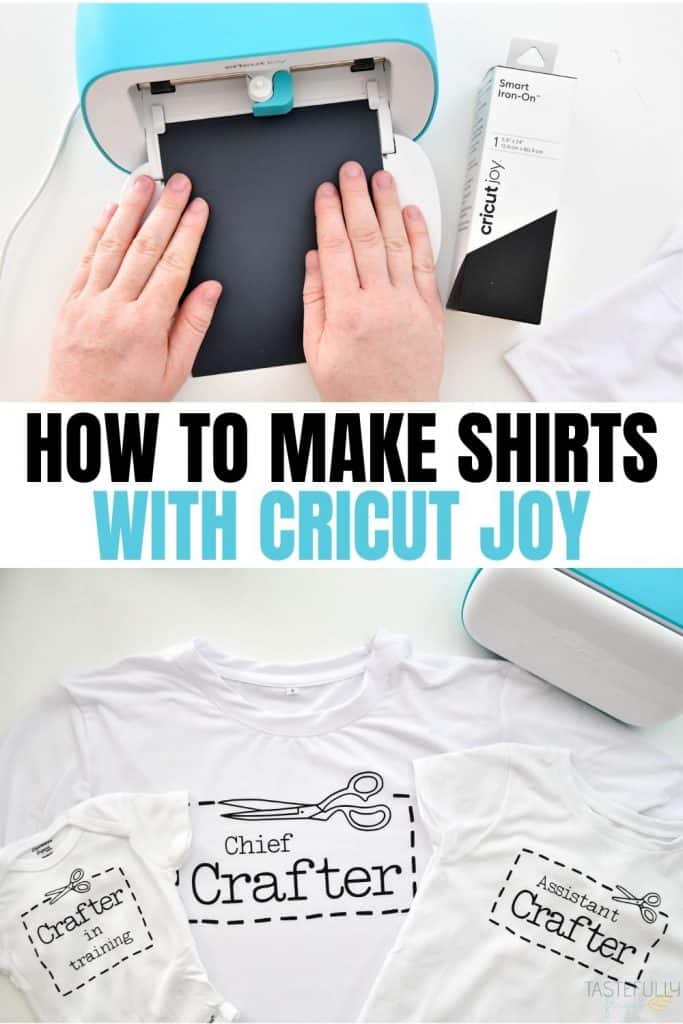
Learn how to design, size and how to make shirts with Cricut Joy. I’ll show you in this tutorial how to apply iron-on vinyl with the EasyPress 2, EasyPress Mini AND a household iron.

One of the most commonly asked questions I get asked in our Cricut Joy Help Group is if it’s possible to make adult sized shirts with the Joy and if so how do you do it?! Just because there is a size restriction to the width you can cut on the Cricut Joy (the largest design you can cut is 4.5″x48″), it doesn’t mean you can’t still make large projects. It just means you need to rearrange your design to make it fit within those size constraints.
In this tutorial I’ll be using the contour tool in Design Space to adjust the size of our design to fit to be cut on the Joy. These Crafter designs were pre-made designs in Design Space so you can easily recreate them too! If you want to create all three designs (the Chief, Assistant and Crafter in Training), click this link to open up the Design Space Canvas with all three designs sized for both the correct shirt sizes as well as to be cut by the Joy.
Applying Iron-On Vinyl Three Ways
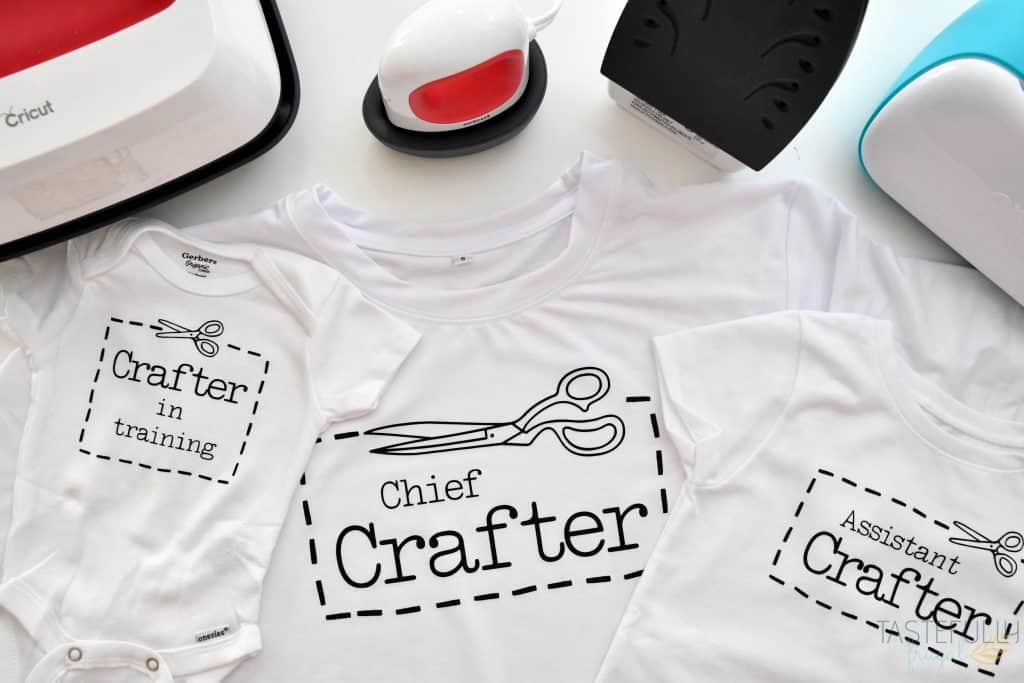
Another commonly asked question I get is ‘How do I get professional looking shirts without a heat press?’. So in this tutorial I’ll be sharing tips on using not only the EasyPress 2 but also the EasyPress Mini AND a household iron to get lasting results on your iron-on projects!
SUPPLIES:
- Shirts/Onesies – for this project I used an Mens Small Shirt, 3T Toddler Shirt and NB onesie
- Smart Iron-On in Black – You’ll need two boxes for this project.
- Cricut Joy
- Scissors and Weeding Tool
- EasyPress 2 9×9 and Mat OR
- EasyPress Mini and Mat OR
- Household Iron-on and Towel
If you’re going to be ordering Cricut supplies and you’re shopping on Cricut.com, use code SAVE21 to save 10% and get FREE shipping on all $50+ orders. That’s on top of the 10% discount Cricut Access members get automatically! Learn more about Cricut Access here.
How To Size Designs in Design Space for Large Cricut Joy Projects
The first thing you want to do when you’re resizing your designs is see what parts of your design need to be resized. It may need to be every part of the design, or in this case, only one part of the design needs to be resized.
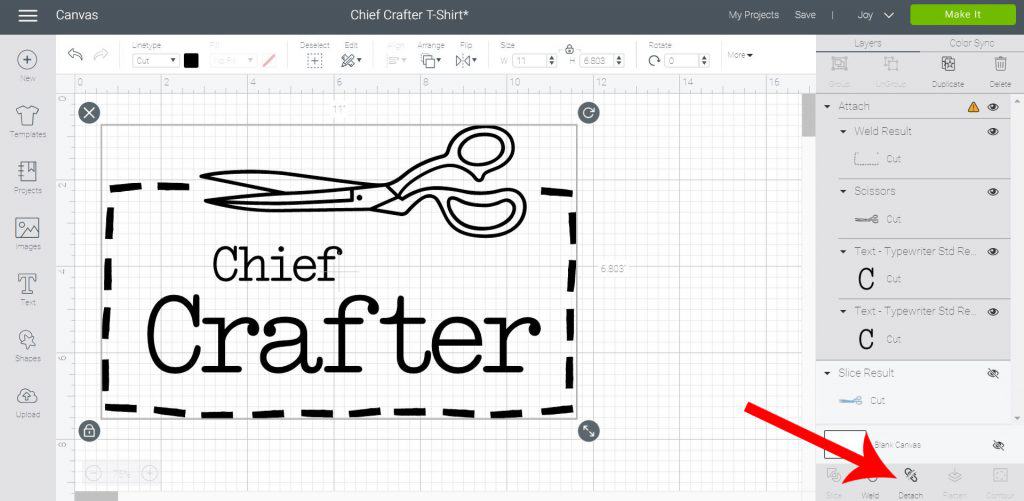
Next, if your design is attached, detach it so you can adjust the layers you need.
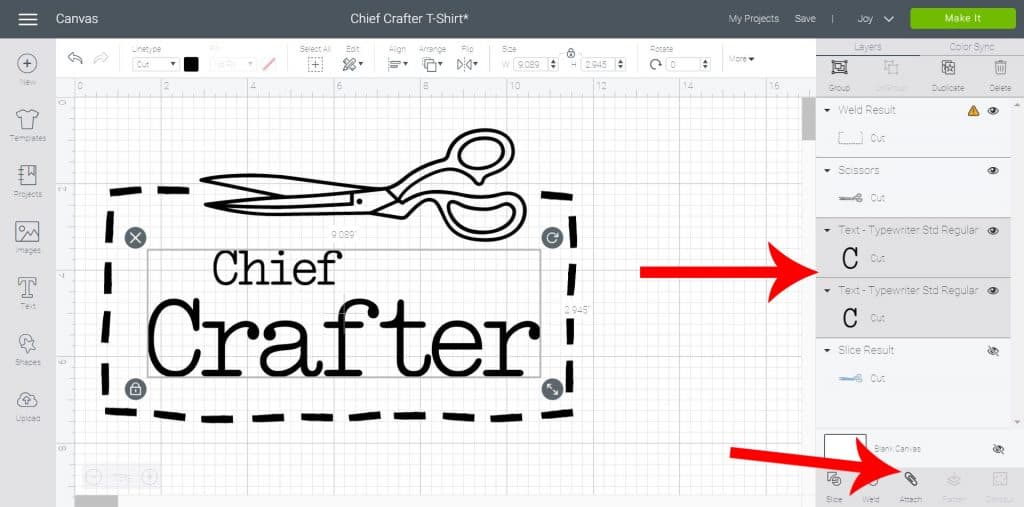
Since both the words CHIEF and CRAFTER are not giving us error messages, select these two layers and attach them.
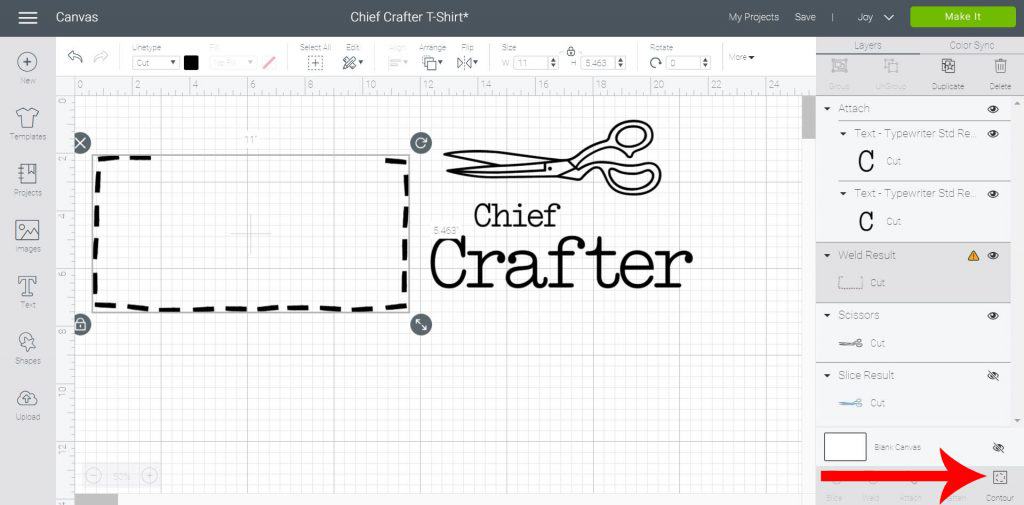
The only layer left that is giving us an error message is the dotted line surround. To make this fit for the Joy we are going to cut it in three sections. The easiest way to do this is with the CONTOUR tool. The contour tool allows you to remove parts of a design quickly and easily without having to slice.
How To Use The Contour Tool in Design Space
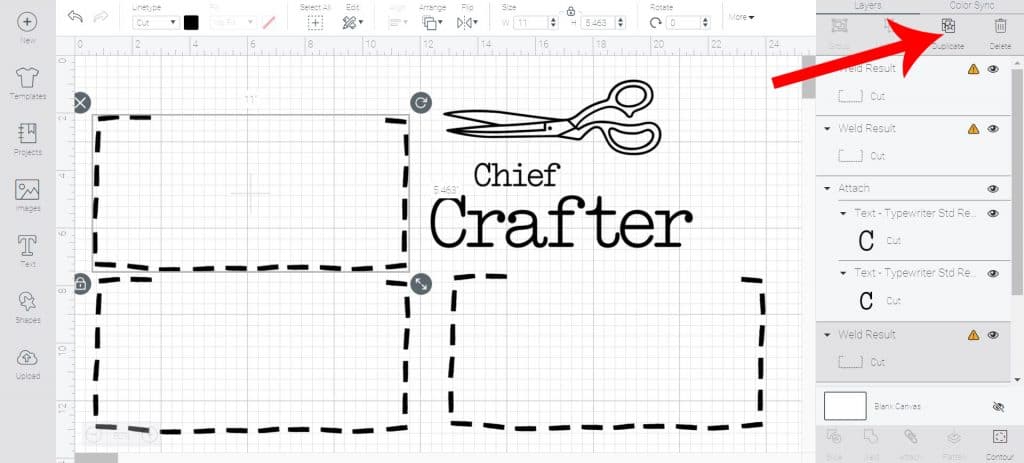
The first thing we want to do is make 2 duplicates of our design (so we have 3 copies of the design).

Next we’ll start removing the unnecessary pieces with the contour tool. To do this, select your first design and then click CONTOUR in the bottom right menu.
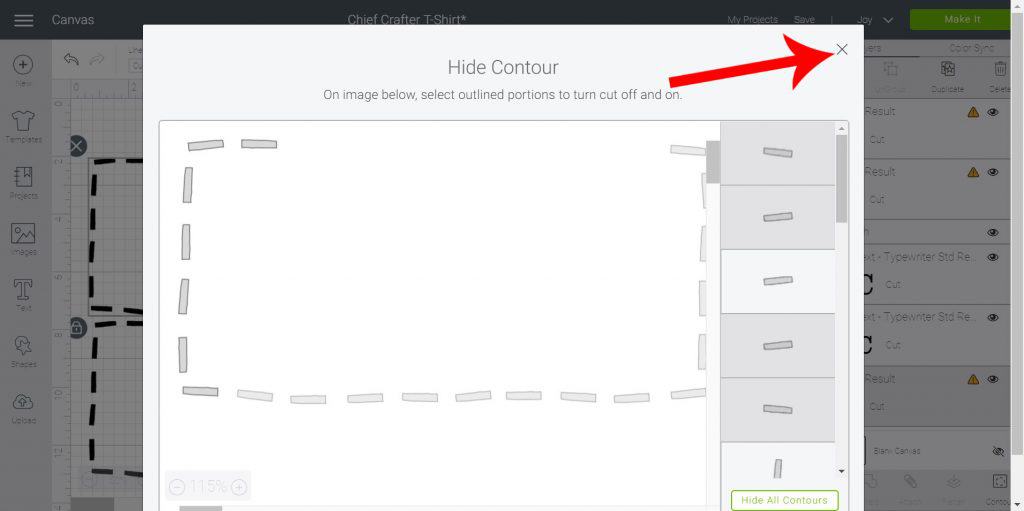
Wait for the design to load in the contour window and click the parts of the design you want hidden. Once you have only the parts highlighted you want to keep, in this case it’s the right side line with one horizontal line on the top and bottom, click the x in the top of the contour window and you’ll see the design on your canvas only has the selected layers.

Repeat the last two steps with the other pieces, only removing the parts you don’t need.
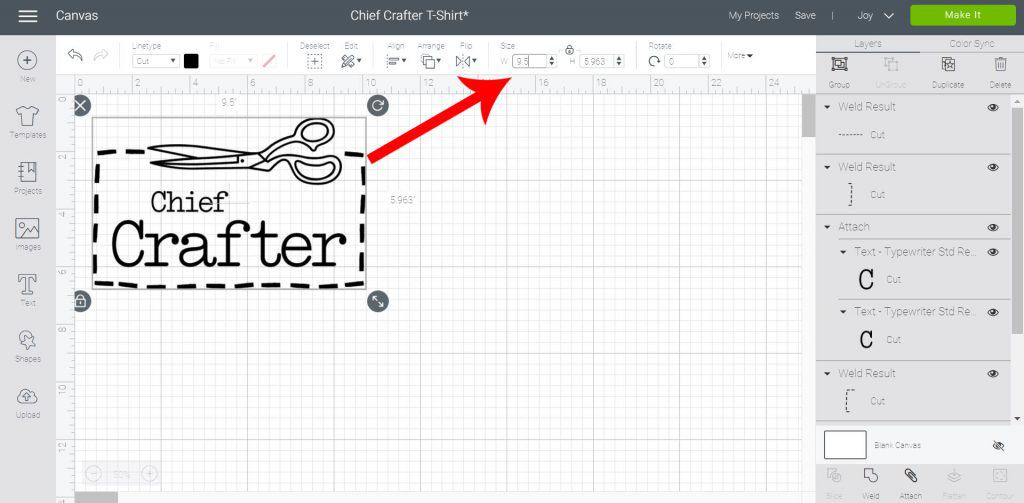
Once you have all three pieces contoured down to where you want them, line them back up with the scissors and text and size the entire design to fit your shirt. For this shirt I did 9.5″ wide. ***NOTE do NOT attach design or it will be too large to fit on the Joy again. We want it to cut in 5 different pieces.
How To Copy and Paste Designs On To One Canvas
Next we want to get the Assistant Crafter and Crafter in Training Designs on to the same canvas so we can cut it all together.
Open a new window by clicking FILE in the top left corner and then NEW WINDOW.

Go to PROJECTS and search Chief Crafter.
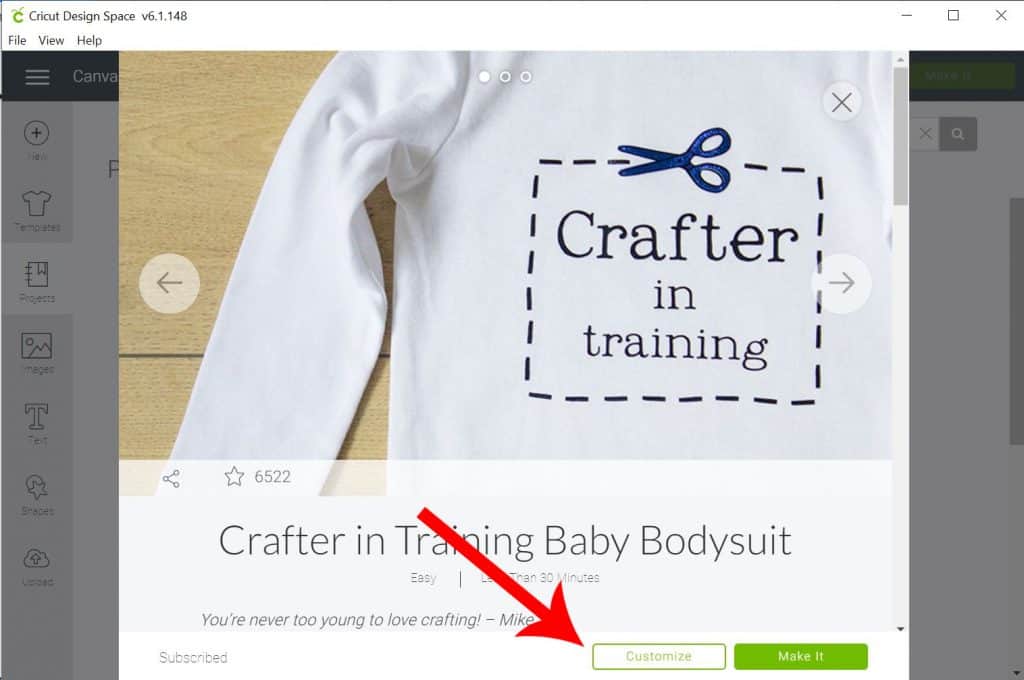
Open the Crafter in Training design and click customize.
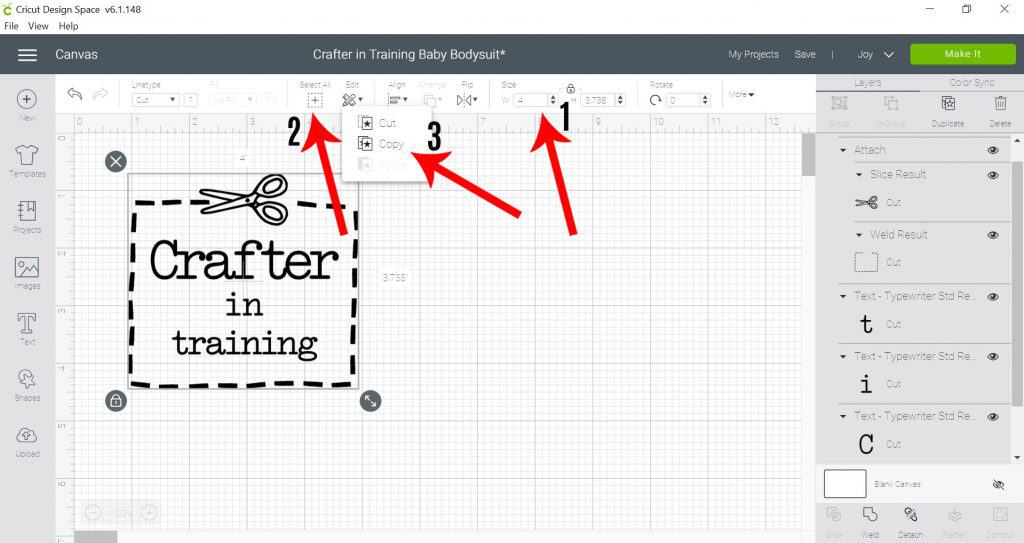
Change the size of the design to 4″ wide and then click SELECT ALL.
Under the EDIT tab click COPY.
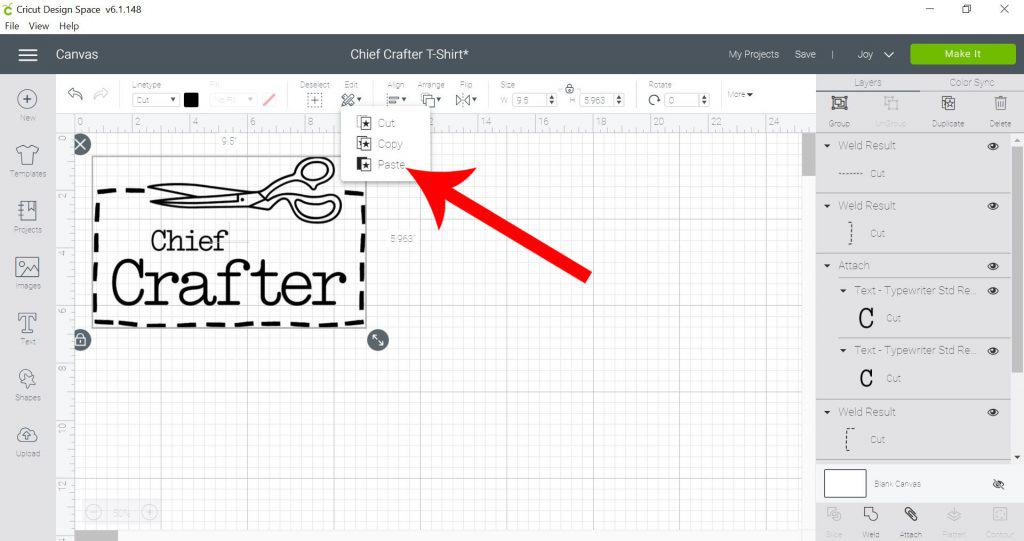
Go back to your original canvas with the Chief Crafter design and click the EDIT tab and then PASTE. This will bring the design on to the same canvas.
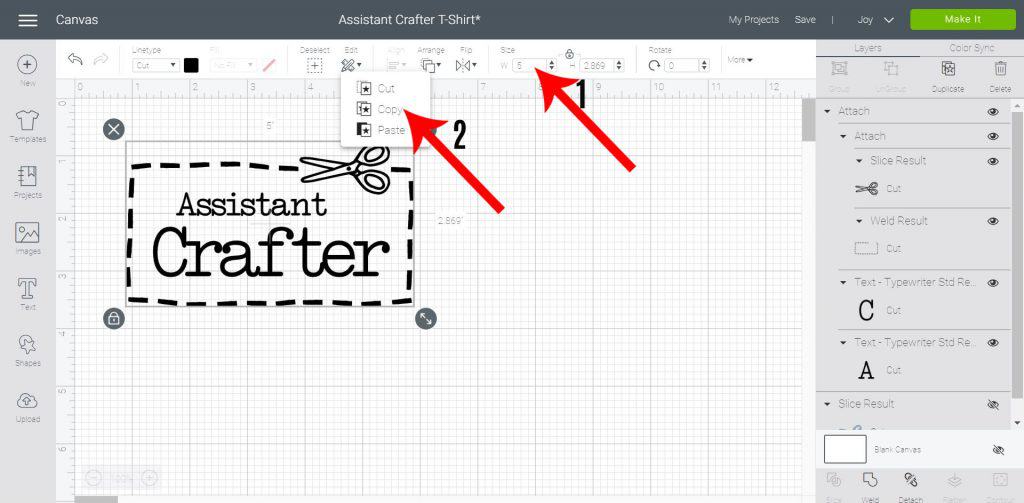
Repeat previous 4 steps with the Assistant Crafter design. NOTE – Change Assistant Crafter design to 5″ wide.
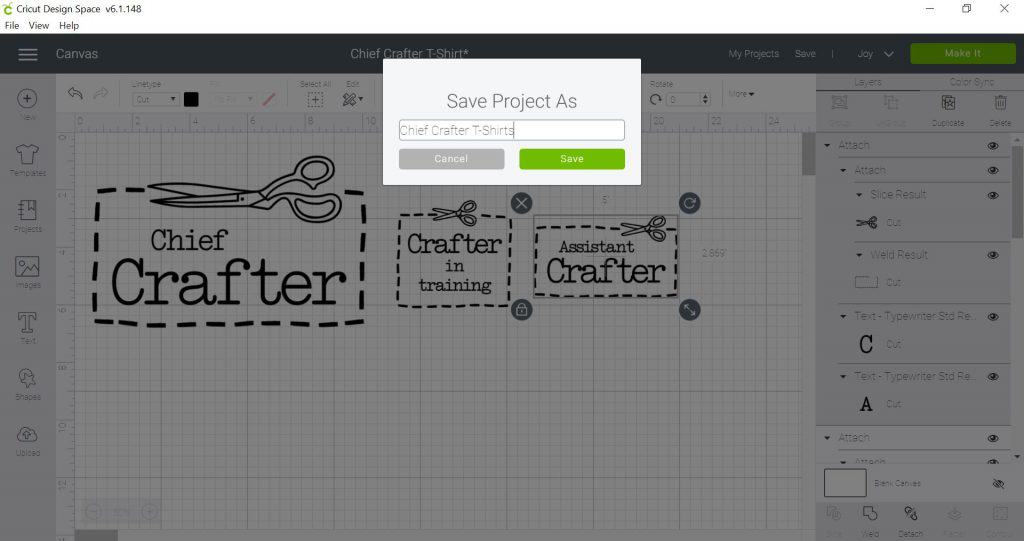
Save your project at this point, just in case something happens to your internet connection or computer.
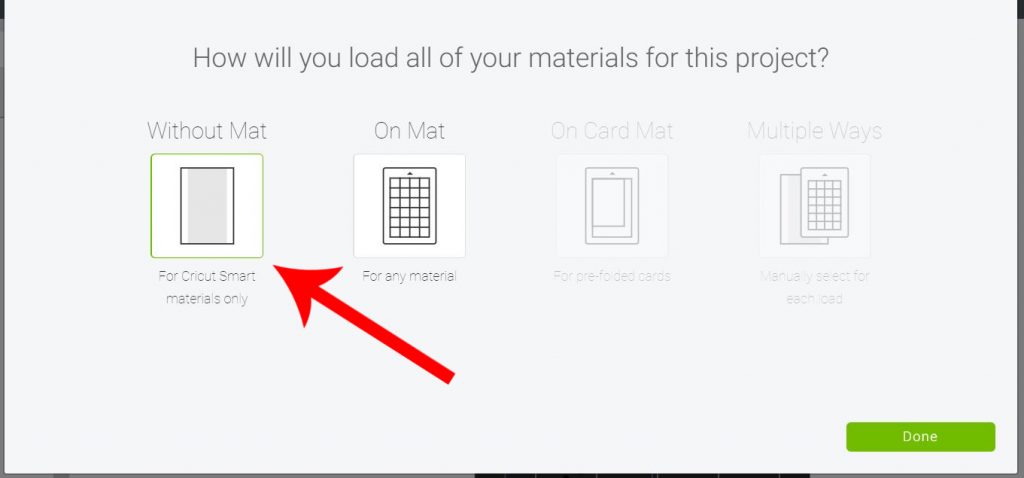
Click Make It and then select WITHOUT MAT for your cutting preference.
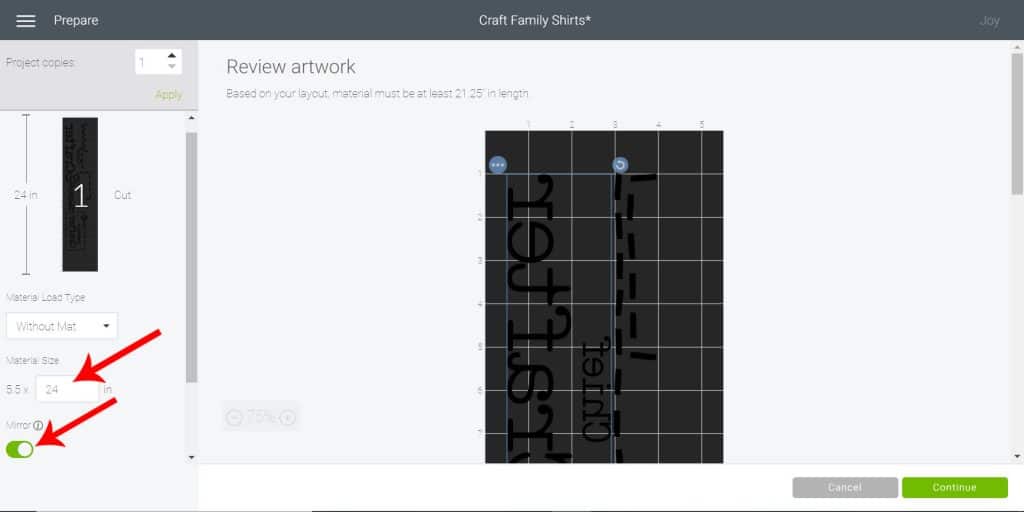
Change the size of the material to 5.5″ x 24″ (that’s the longest Smart Iron-On comes in) and MIRROR both mats. Click CONTINUE.
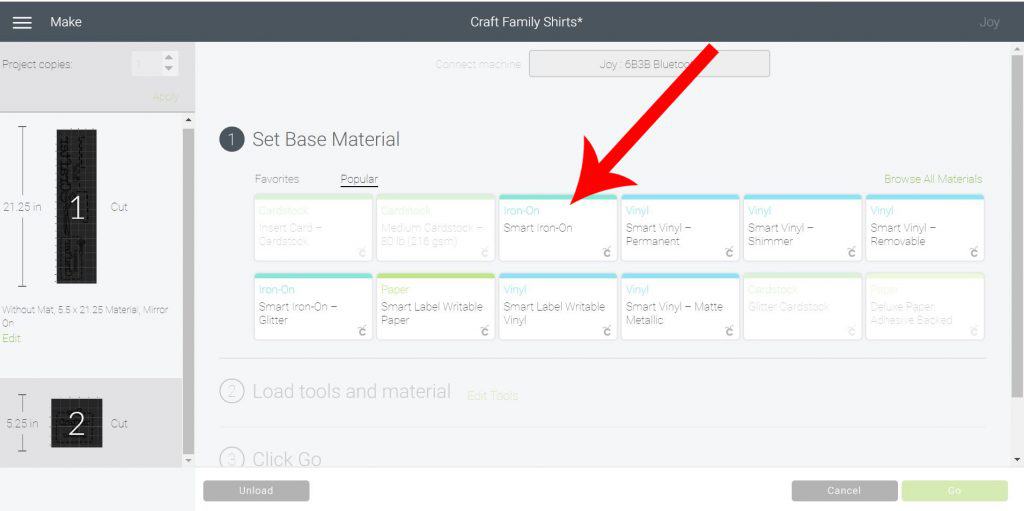
Connect your machine and select Smart Iron-On under materials. Follow the onscreen prompts for loading and starting to cut with your Joy.
How To Cut Iron-On Vinyl with Cricut Joy

Make sure your iron-on vinyl is shiny side down and load your smart iron-on underneath the feeder tabs. NOTE – ONLY load your iron-on when you are prompted to in Design Space and when the light on top of your Joy is blinking.
The Joy will measure your iron-on to make sure it’s long enough before giving you the option in Design Space to start the cut. Once the Joy has measured your iron-on the GREEN GO button in Design Space will light up in the bottom right corner. Click this to begin the cut.
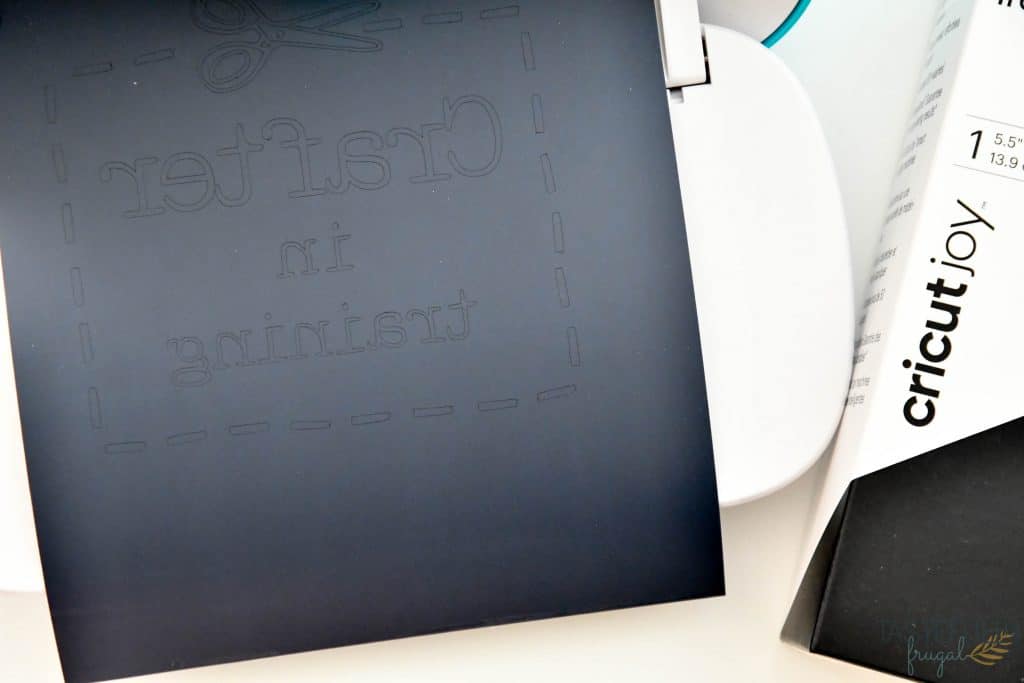
Once your designs are cut you’ll have a window in Design Space pop up that says UNLOAD. Click the UNLOAD button to remove your iron-on from the Joy.
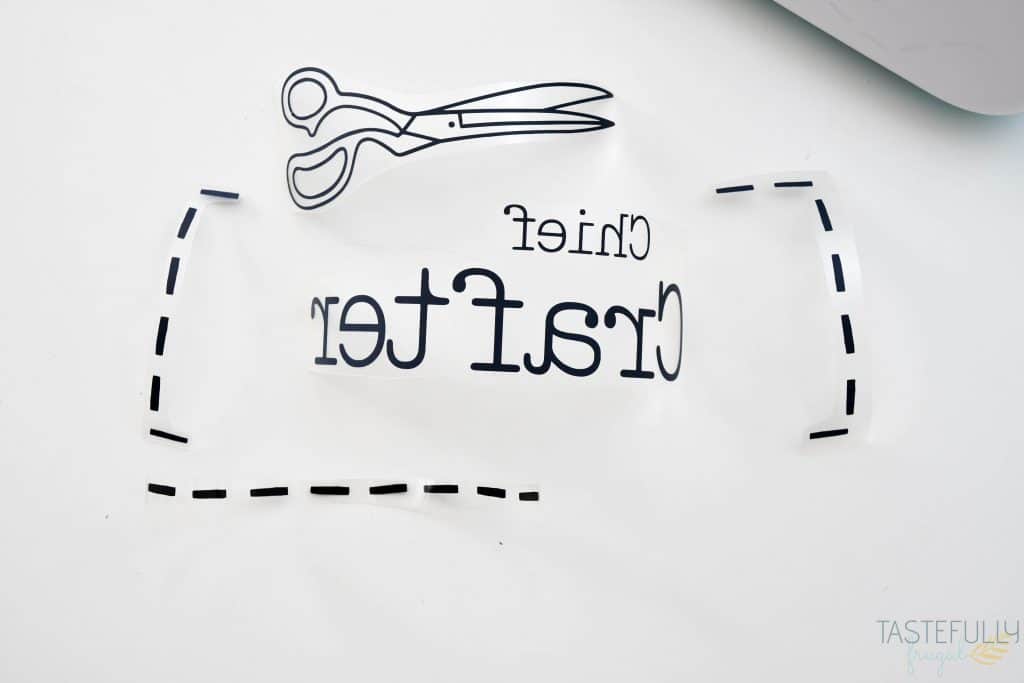
Cut your pieces out and weed excess vinyl.
How To Line Up Iron-On Vinyl Pieces and Apply With EasyPress 2
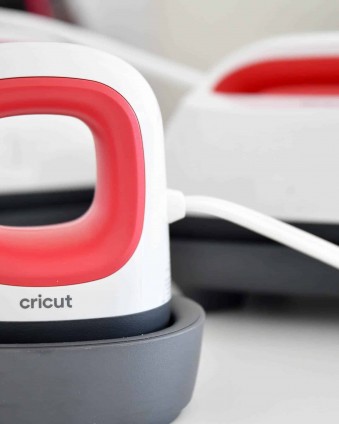
Preheat your EasyPress 2 to 315F and 30sec. If you’re not using a cotton or polyester shirt, or if you don’t have an EasyPress mat, check the recommended heat settings from Cricut on this guide.
Once EasyPress 2 has reached heat, lay your shirt on top of the EasyPress mat and preheat for 5-10sec.
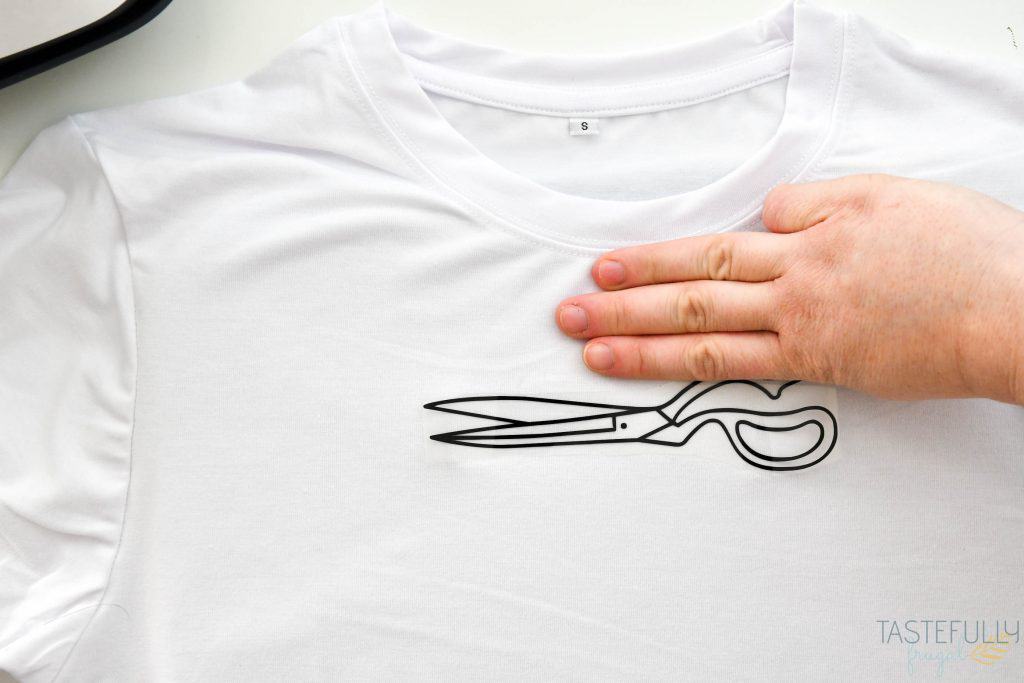
Start lining your design pieces up. Start with the scissors. For adult shirts I have found if the design starts about 3 finger widths from the neckline it fits perfect.
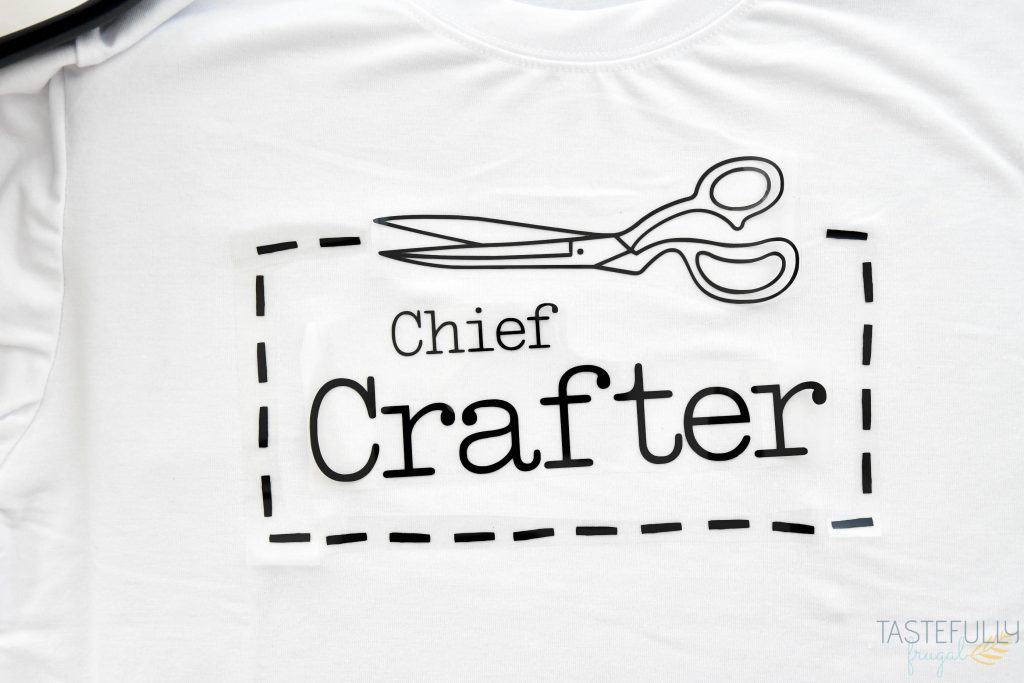
Once you have the scissors placed, add the text and then each individual piece of the frame. Measure the distance from the corner of the frames to the side seams of the shirt to make sure the design is centered.
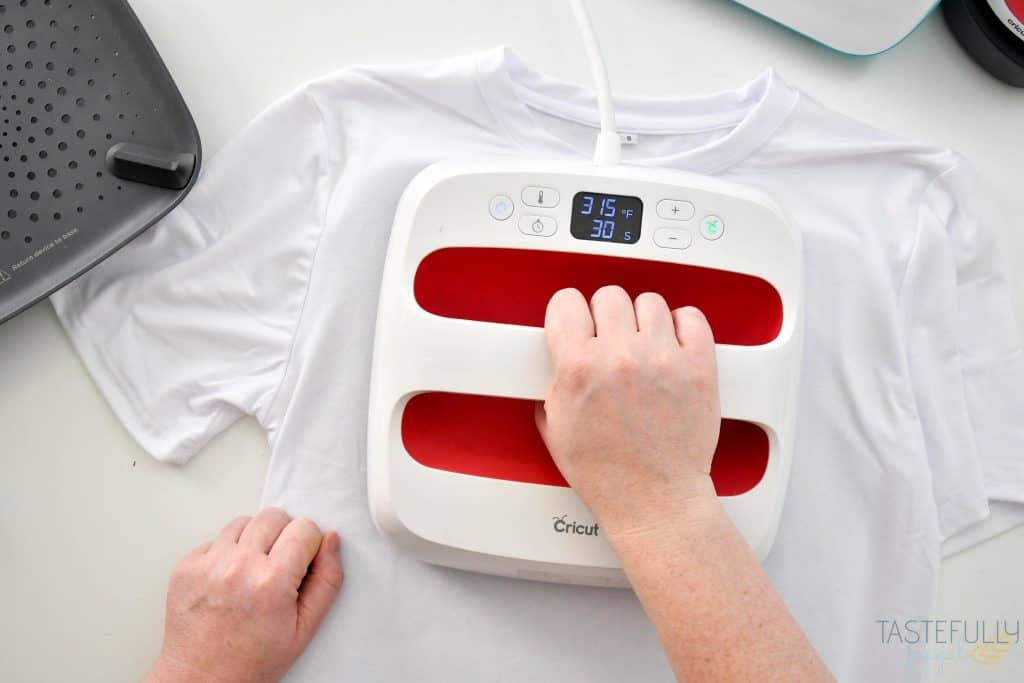
Put your EasyPress directly on your design and press with medium pressure for 30 seconds. Because this design is wider than 9″ I did it in 2 sections pressing both for 30 seconds.
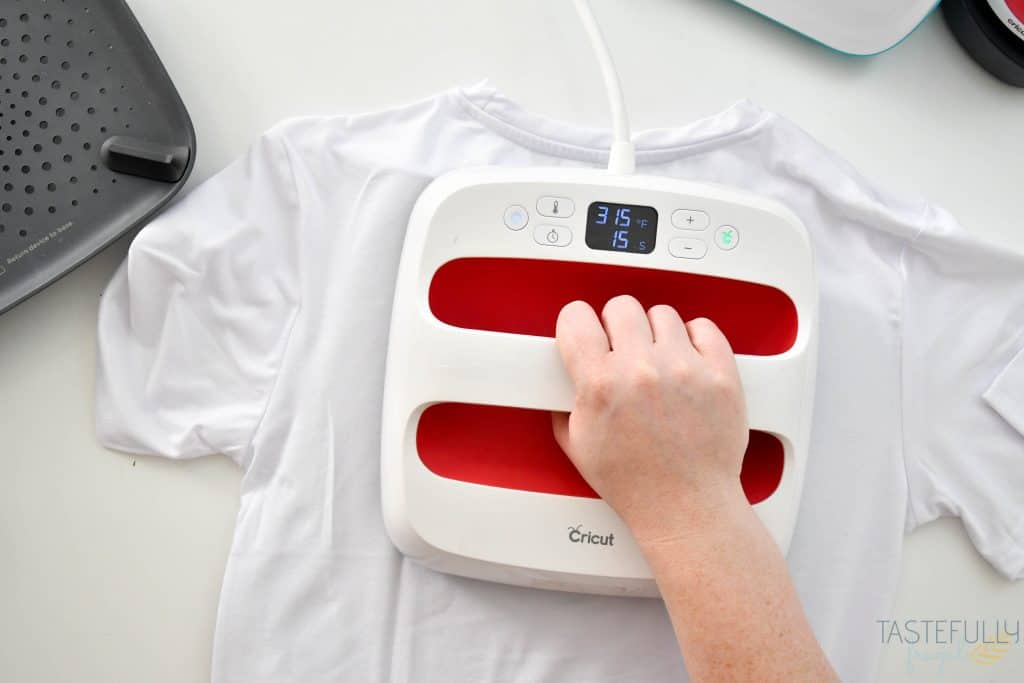
Flip shirt over and press on the back with medium pressure for 15 seconds. Allow iron-on to completely cool before peeling (about 1-2 mins).
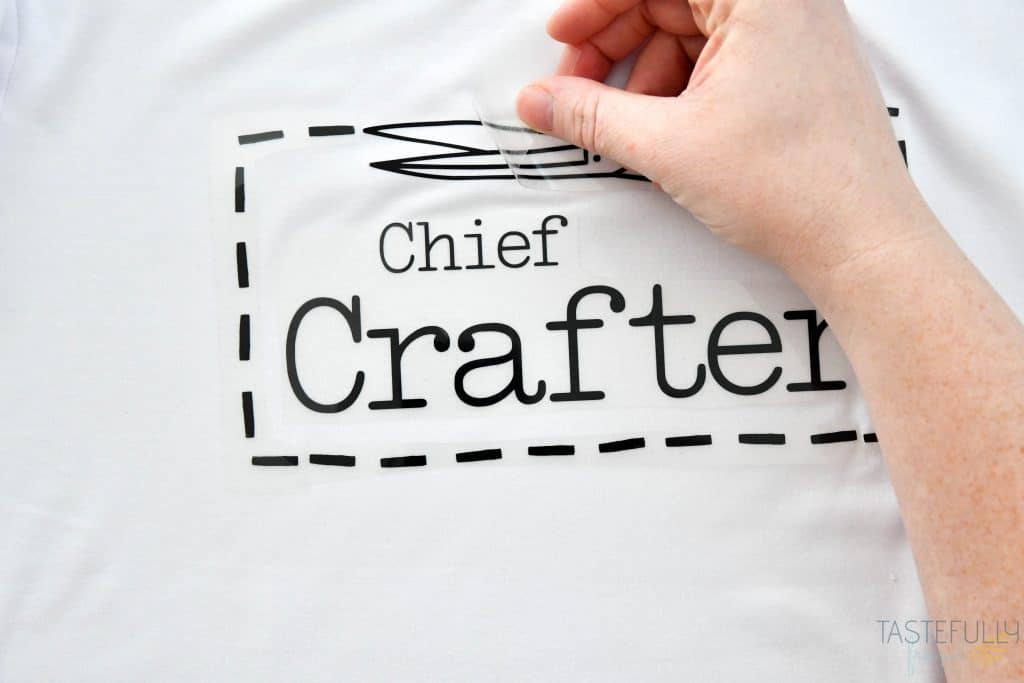
Starting in the top left corner, slowly peel away plastic backing from shirt.
How To Apply Iron-On Vinyl with EasyPress Mini
I really like using the EasyPress Mini for onesies, shoes, hats, makeup bags and really anything that has an awkward position, seam or zipper in the way. Using a larger EasyPress or heat press for these types of projects can result in peeling because often times the seams (or zippers) don’t allow the heat source to make full contact with the iron-on vinyl.
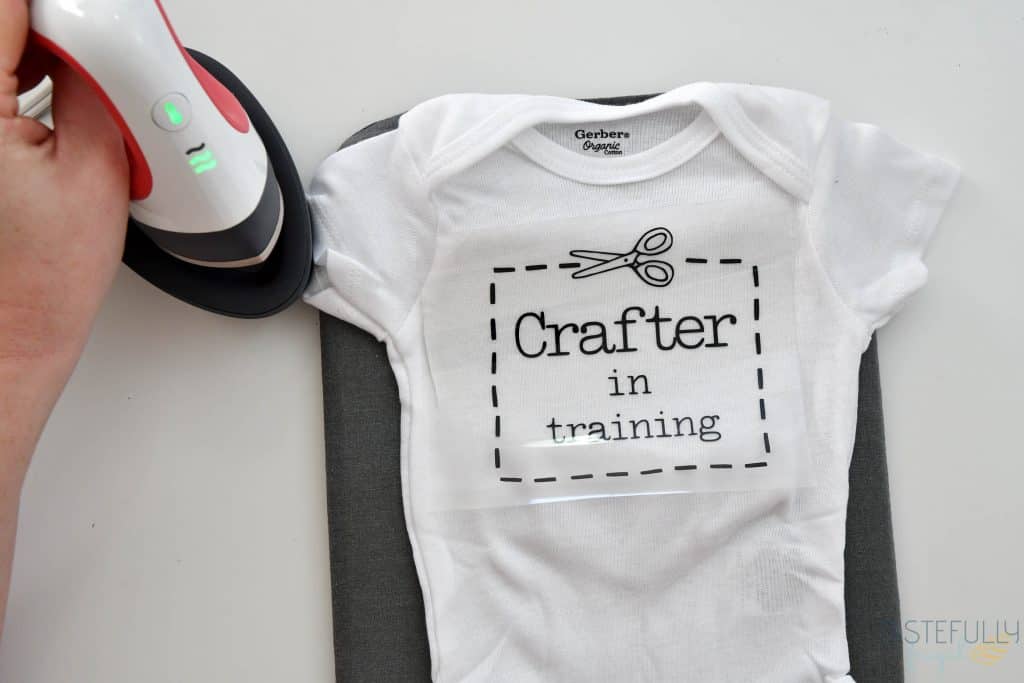
Turn your EasyPress Mini on and click the power button twice so that two lines are lit up orange. Wait for EasyPress mini to come up to temperature. You’ll know it’s up to temperature when you hear the beep and the orange lights turn green.
Place your onesie on the EasyPress mat and preheat the front for 5-10 sec.
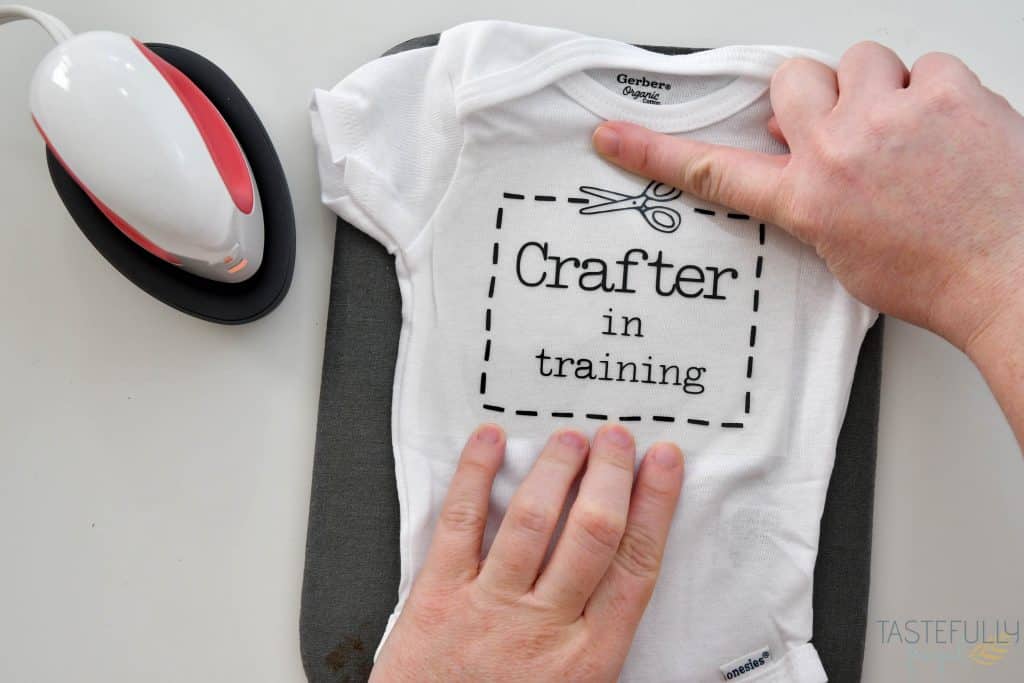
Line your design up 1 finger from the neckline and measure the sides to make sure it’s centered.
With medium pressure and constant motions press your iron-on vinyl with the EasyPress mini for 25-30 seconds. Turn onesie over and press again with constant motion for another 15 seconds.
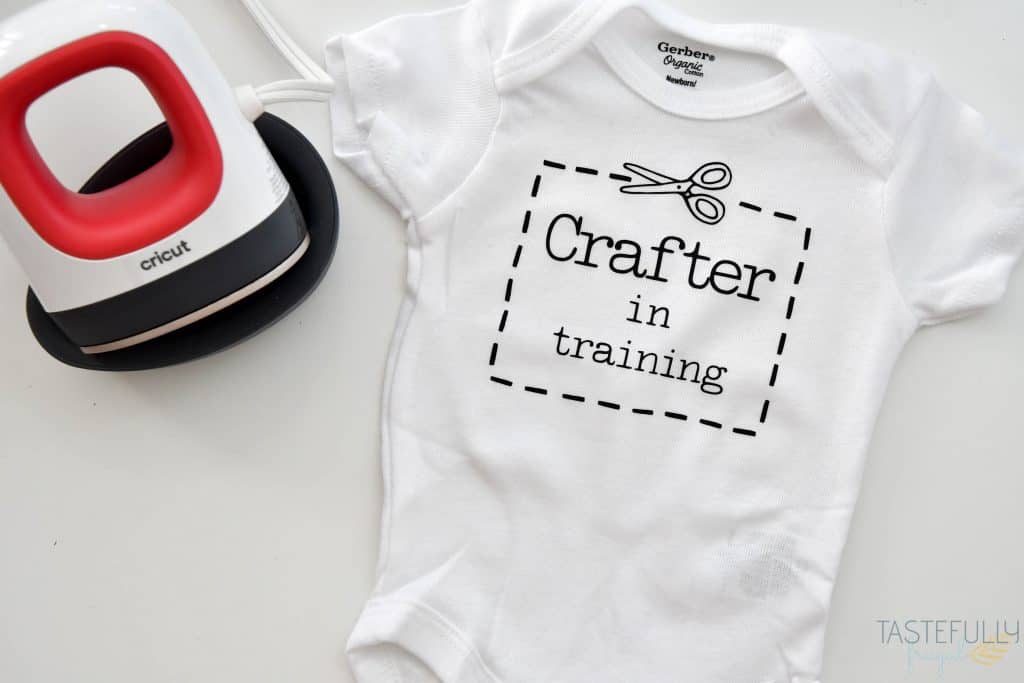
Allow iron-on to completely cool before peeling (about 1-2 mins). Starting in the top left corner, slowly peel away plastic backing from shirt.
How To Apply Iron-On Vinyl With Iron
Before we get started with this part of the tutorial I want to share a few quick tips to get the most out of your iron-on projects when you’re using a household iron.
- Always press on a hard surface. You can use your counters or dining room table but DO NOT press on an ironing board. You need to have firm pressure underneath your project to get your iron-on to stick completely.
- If you don’t have an EasyPress mat, fold up a towel and put it underneath your shirt. This will allow the heat from the iron to stay in your shirt and not get into your counter or table or whatever you’re pressing on.
- Turn your iron to the COTTON setting. I used my iron for over a year before I got a Heat Press and found the cotton setting gave the best heat for applying iron-on vinyl.
- Like the EasyPress Mini, use firm pressure and move your iron around your project. Because household irons don’t hold heat like an EasyPress or heat press does and because the heat is warmer in the center of the iron, you want to move it around to make sure every part of your design is getting the heat it needs.
Once you plug your iron in, turn the setting to COTTON and give it 1-2 minutes to heat up.
Lay your shirt on top of a towel and preheat for 5-10 seconds.
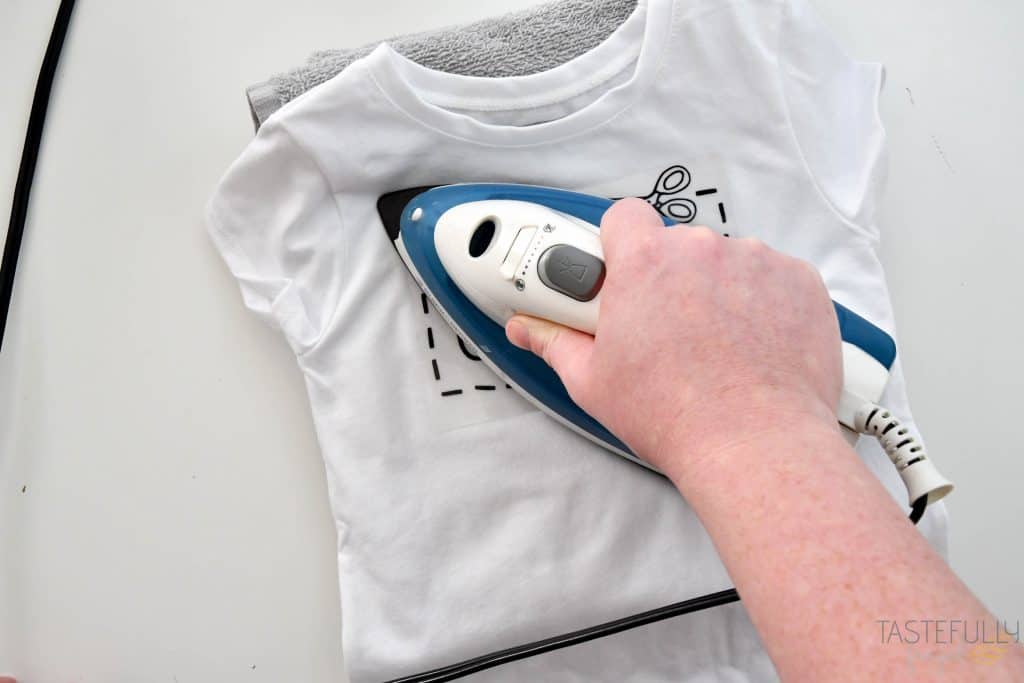
Using firm pressure, move your iron around your design for 30-45 seconds. Turn shirt over and move iron around design through the back for 20-30 seconds.
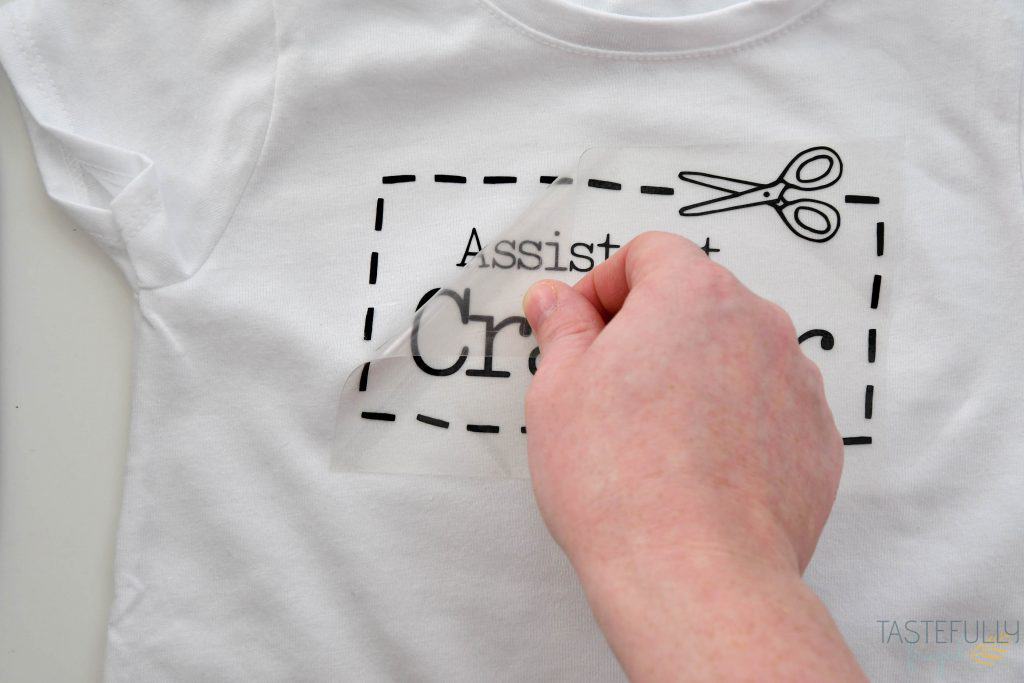
Allow iron-on to completely cool before peeling (about 1-2 mins). Starting in the top left corner, slowly peel away plastic backing from shirt.
How To Make Shirts With Cricut Joy
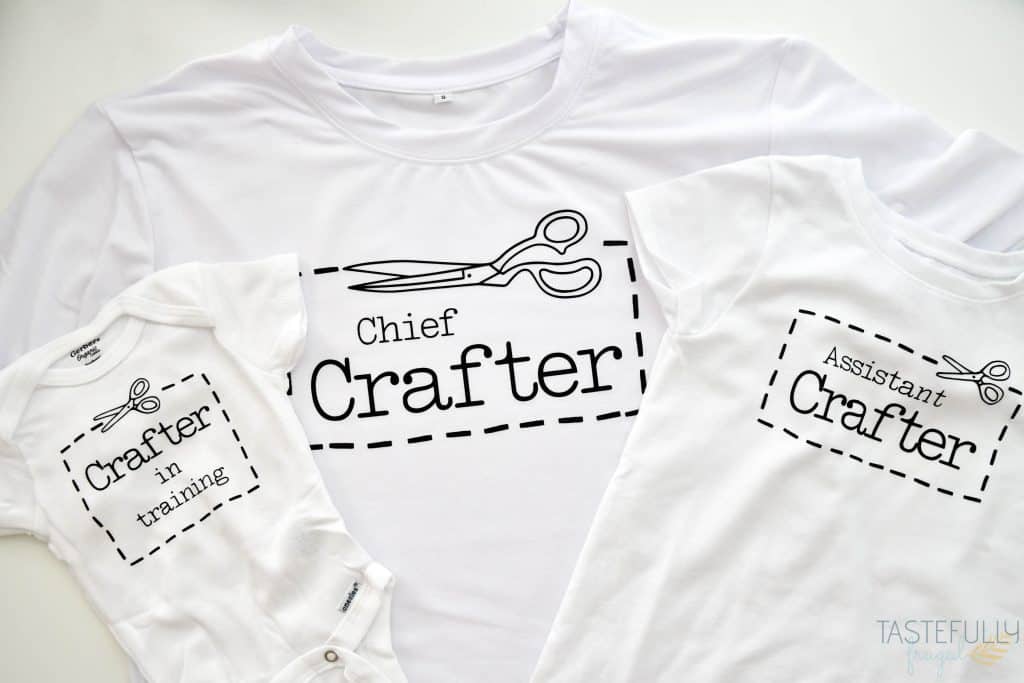
I know this was a whole lot of information but if you made it to this point you are ready to start making shirts like a pro! No matter what type of heat source you have, you can definitely get quality made shirts when you use the right techniques.
In terms of care instructions, I always wait at least 24 hours before wearing shirts. Wash them with like colors in cool water and tumble dry low (or lay flat to dry).
If you have any questions I didn’t answer, please leave them in the comments below and I’ll get back to you as soon as I can. Make sure to subscribe to my YouTube channel to check out all the video tutorials. For more Cricut projects and tutorials, check out these posts. For tips, tricks and immediate help, be sure to join our FREE Cricut Support Group.


Tracy Hotrum says
Thank you. I am knew to this and really appreciated the video.
Yolanda says
Thank you for sharing- I was wondering if you could make T-shirts with the joy .
Amanda says
I appreciate your tutorial. I would be happy to try this DIY. Thanks and keep sharing.