What is Cricut Foil Transfer Kit? Learn all about it, how to use it and get some fun and easy project inspiration below.
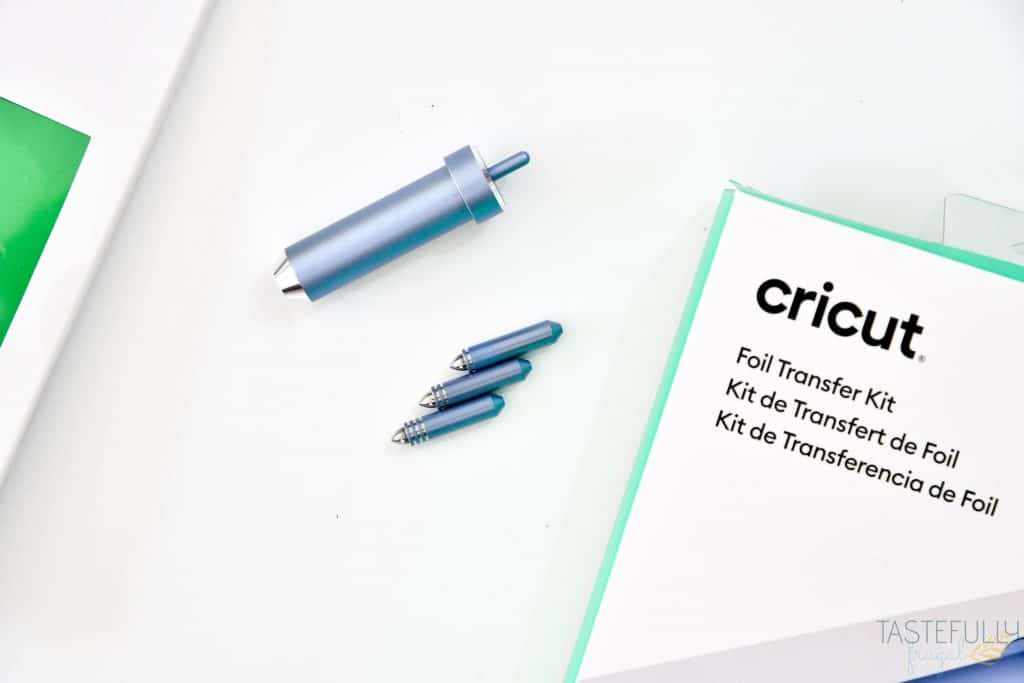
Earlier today Cricut announced over on their YouTube channel a new, amazing tool that can be used with the Cricut Maker AND Explore Air Machines! The Cricut Foil Transfer Kit is a 3-in-1 tool that allows you to quickly and easily add a splash of sparkle and shine to your projects. It really does take simple projects, like cupcake toppers or gift bags, to the next level!
If you’re on Pinterest, Instagram, or online anywhere really, you’ve probably seen over the last few years the trend of adding foil to designs. Not only the method bright and shiny but it’s really fairly easy to do too, with the right tools! In the past the tools needed to get this foil look could break your Cricut machine and void the warranty if used on a Cricut machine. Now with the Foil Transfer Kit, you can get that same look a lot easier and without having to worry about breaking your machine.
What makes the Cricut Foil Transfer Kit different from other foil systems?
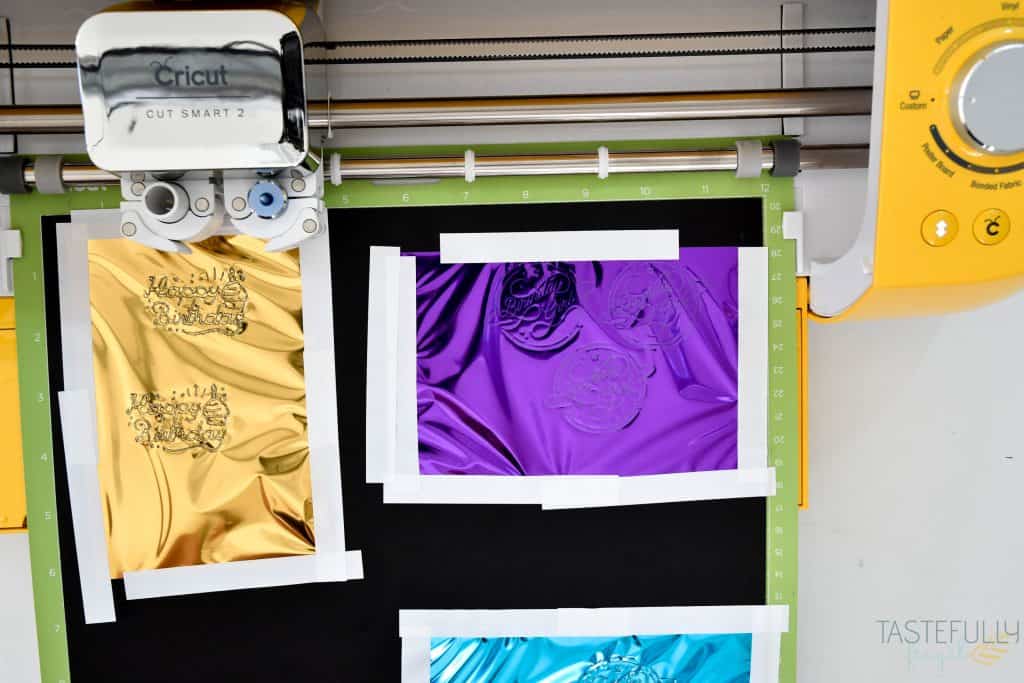
The biggest difference is the way the foil is transferred to your project. Other tools or machines use heat to attach the foil to the base. With the Cricut Foil Transfer Kit, all you need is pressure from your Cricut machine to get the bright and shiny foil finish. Because the Cricut Foil Tips don’t use heat you can not use other brand foil sheets with the Cricut Foil Kit (because those sheets require heat to work).
The Cricut Foil Transfer Kit is also fully integrated into Cricut Design Space. You can easily change a cut or draw line to a foil line in the LINETYPE menu. Currently the foil option is only available on the desktop app, so make sure you are on your computer when creating your foil projects.
When and where can I buy the Foil Transfer Kit?
Want to know the best news ever?! You can buy the Foil Transfer Kit, and foil sheets, RIGHT NOW on Cricut.com! The foil transfer kit and foil sheets will be available in retail stores worldwide starting 9/28!
When you’re shopping on Cricut.com, use code SAVE10 to save 10% and get FREE shipping on all $50+ orders. That’s on top of the 10% discount Cricut Access members get automatically! Learn more about Cricut Access here.
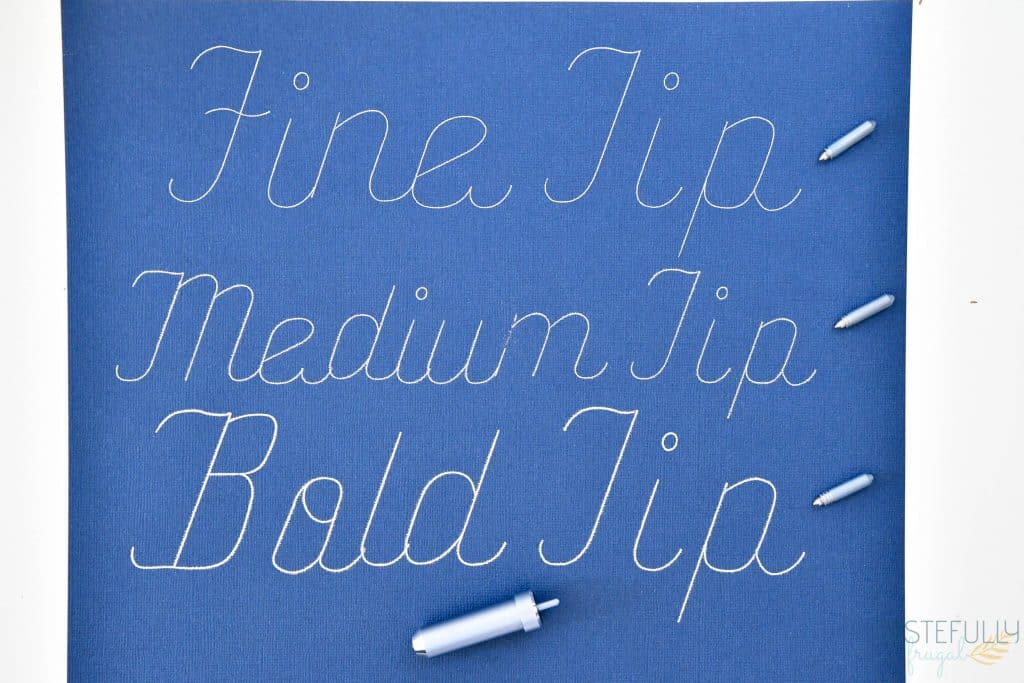
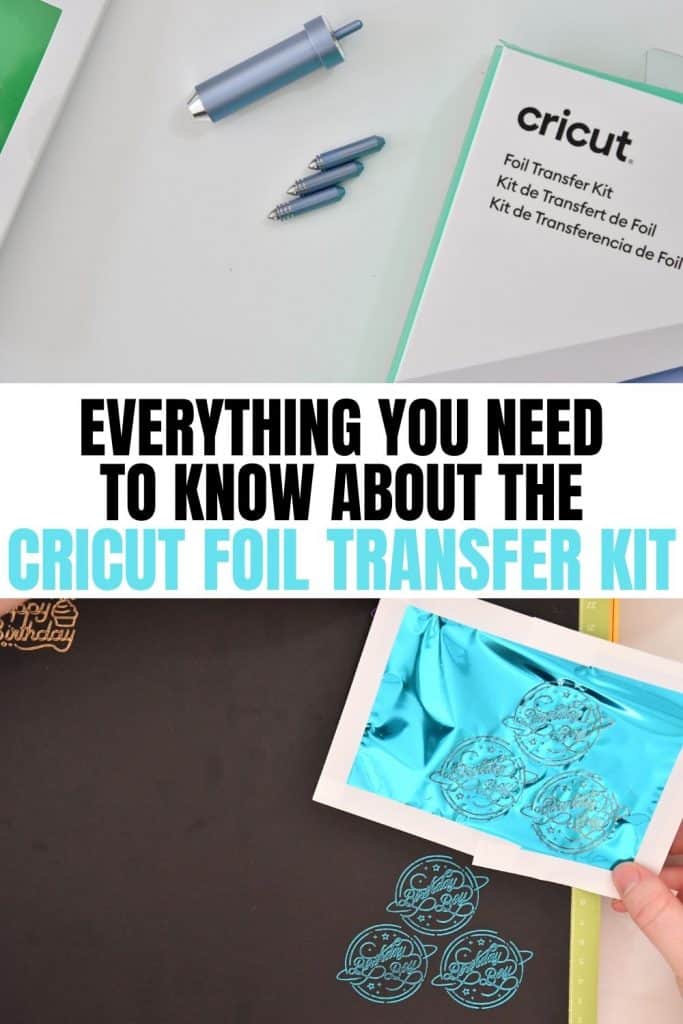
The foil transfer kit comes with the housing and three different tips, a fine tip, medium tip and bold tip. You can see the difference of the three tips in the picture above. The foil transfer kit also comes with 12 4”x6” sheets (six silver and six gold) and adhesive tape to tape your foil to your base.
What colors and sizes of foil are available?
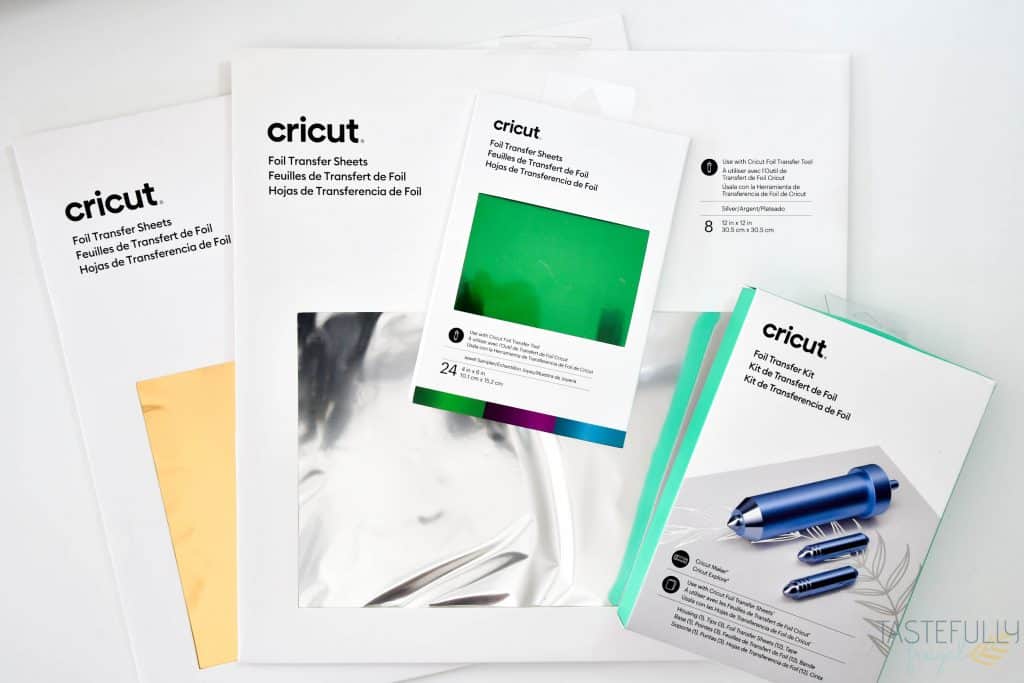
Currently there are 2 different sizes of foil sheets available, 4”x6” and 12”x12”. As I mentioned earlier, your foil transfer kit comes with 12 4”x6” sheets (six silver and six gold). You can also buy the Jewel Sampler which is a 24 pack of 4”x6” sheets in emerald green, purple and aqua. 8 packs of 12”x12” sheets are available in silver or gold. Each pack come with all the adhesive you need to attach your foil sheets to your bases (cardstock, paper etc.)
What designs can the Foil Transfer Kit make?
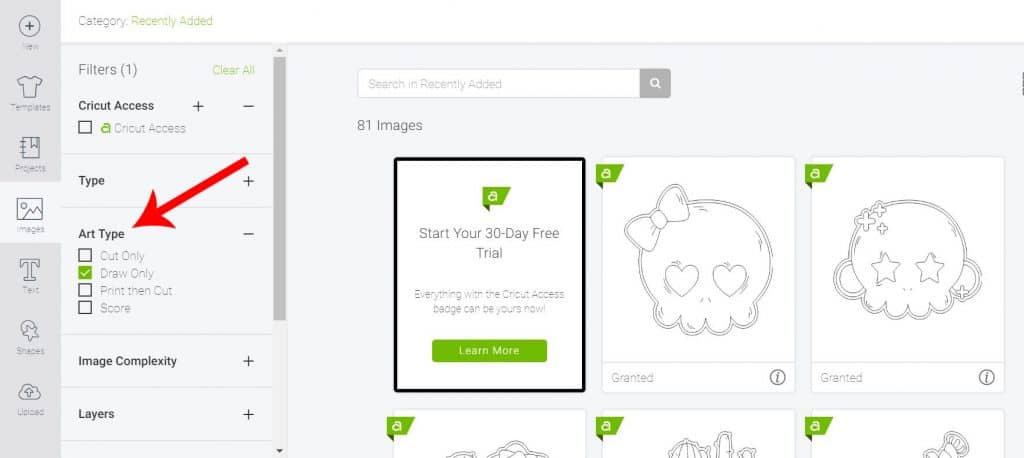
Just like all Cricut tools, the design possibilities for the Foil Transfer Kit are endless! There are designs that do work better with the foil transfer kit though. Designs that have a draw type, and fonts that have a writing type, work best with the foil tips. You can filter these designs in Design Space by selecting DRAW ONLY in the Art Type menu. Cricut has been adding hundreds, if not thousands, of new draw only designs that are perfect for foil designs!
What materials can I use with it?
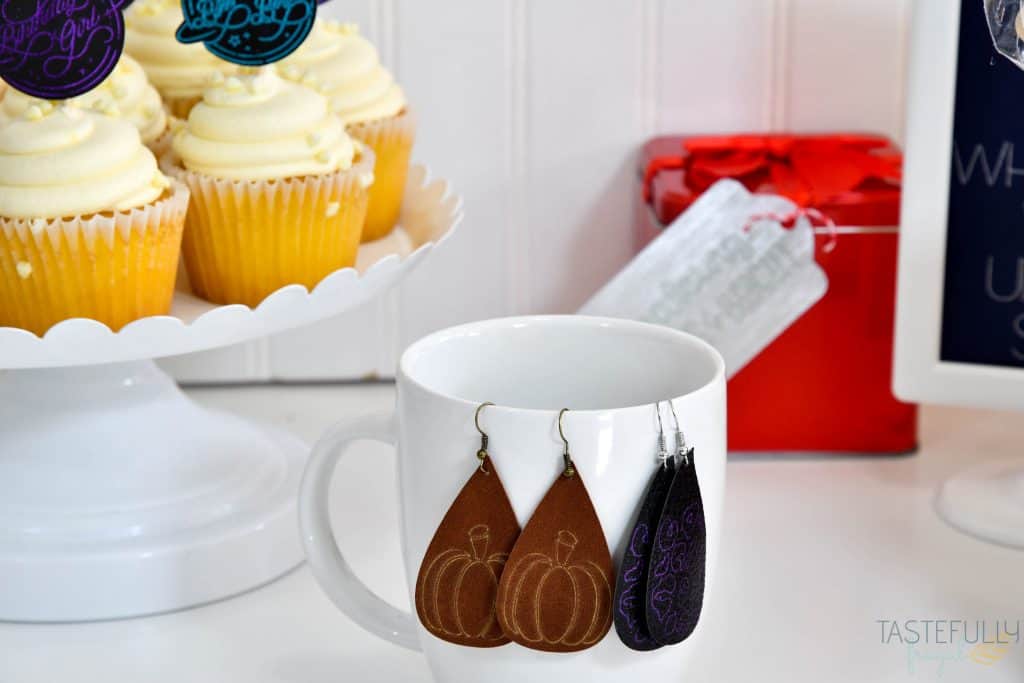
There are currently over a dozen different materials approved to be used with the foil transfer kit. Everything from paper to cardstock, printable sticker paper, even faux leather and vellum can be used. New materials are always being tested and will be added once they are found to be fully compatible with the foil tips.
What can I make with it?
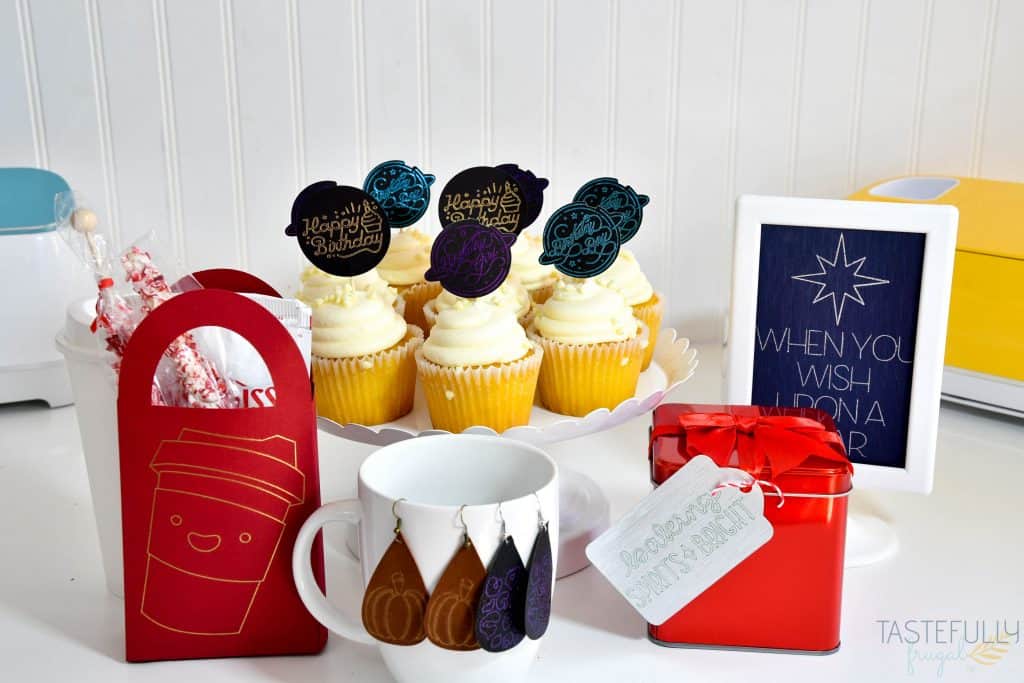
The only limit here is your imagination! I created these five fun projects in less than an hour total and they are all super easy for beginners to make. I’ll share with you step by step below how to make the cupcake toppers and gift box and will have full tutorials for the rest of the projects coming in the next few weeks too!
How does the Foil Transfer Kit work?
The foil transfer kit is one of the EASIEST tools to use. There are a few things I’ve learned through trial and error that make creating with the foil transfer kit even easier:
- Cardstock and paper are the EASIEST materials to use with the foil transfer kit. I suggest making a few projects with these bases to get the hang of lining the foil sheets up as well as taping the sheets down and determining what tip to use before moving on to other materials.
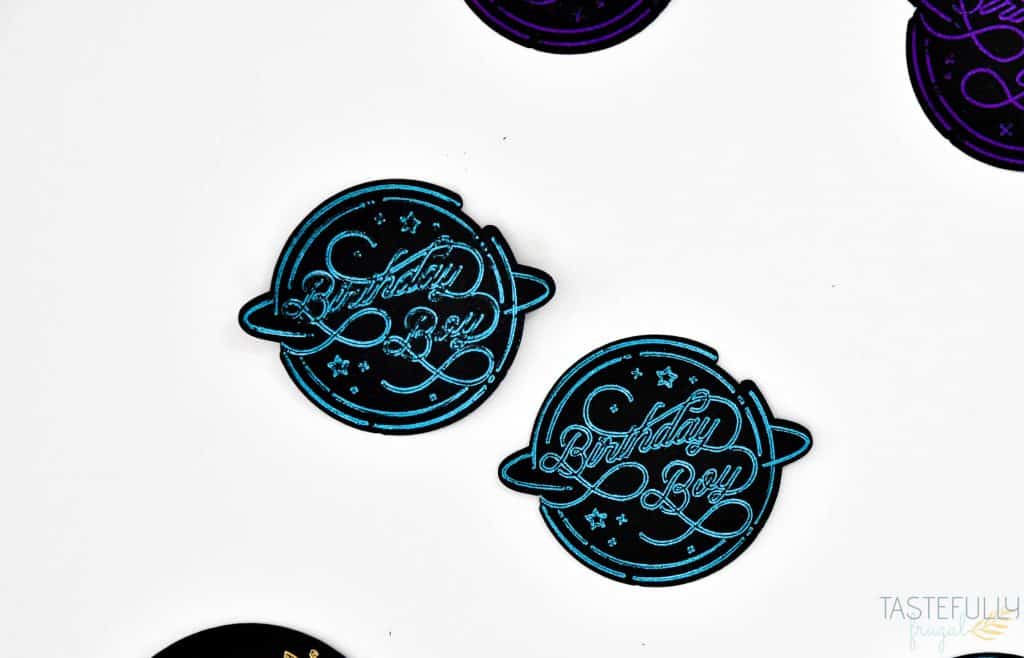
- If you’re doing a smaller design, use the fine tip. You CAN use the medium or bold tip, but I’ve found sometimes the thicker tips rip the foil when doing a small (like smaller than 2”) project.
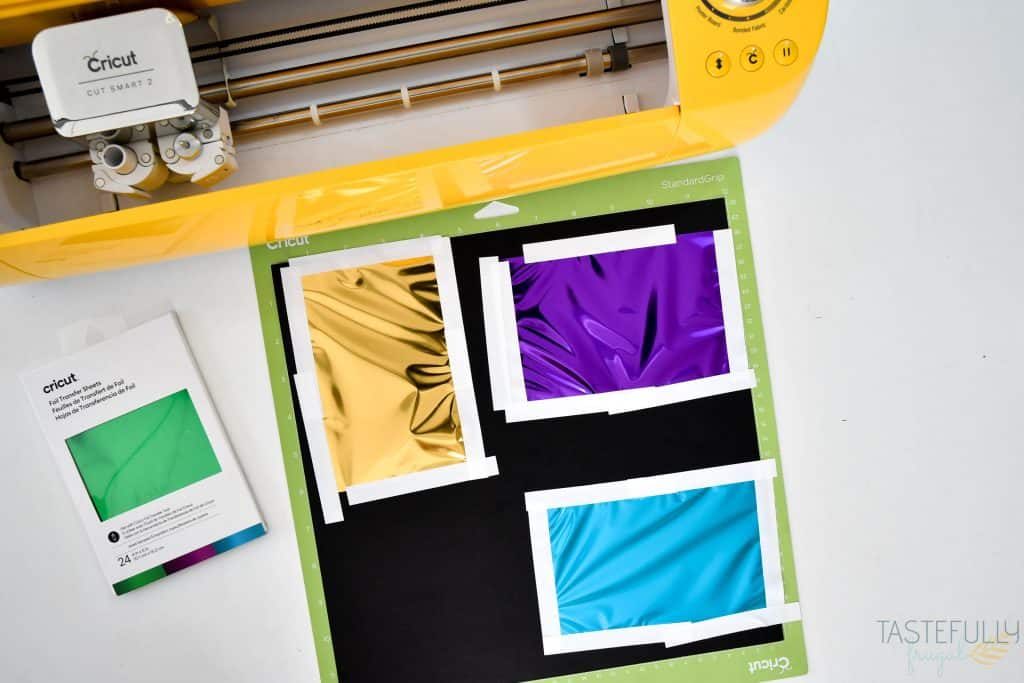
- Line up your projects on the preview mat in Design Space AND on your mat to make sure your foil is placed correctly and tape isn’t covering it.
- If tape is covering the foil when it is being pressed you may not get a full color transfer through to your base.
- Make sure your foil is secured down REALLY well. I often double up the tape along the long edges to make sure it’s secure.
- Move the star wheels BEFORE you put your foil sheets on the mat so they don’t ruin your foil or designs.

- DO NOT remove your mat in between steps. This will cancel the cut and will not allow you to finish your project. When you are changing tips or removing the foil, do this while your cutting mat is still loaded into the machine.
Easy Project Tutorial For Explore Air 2
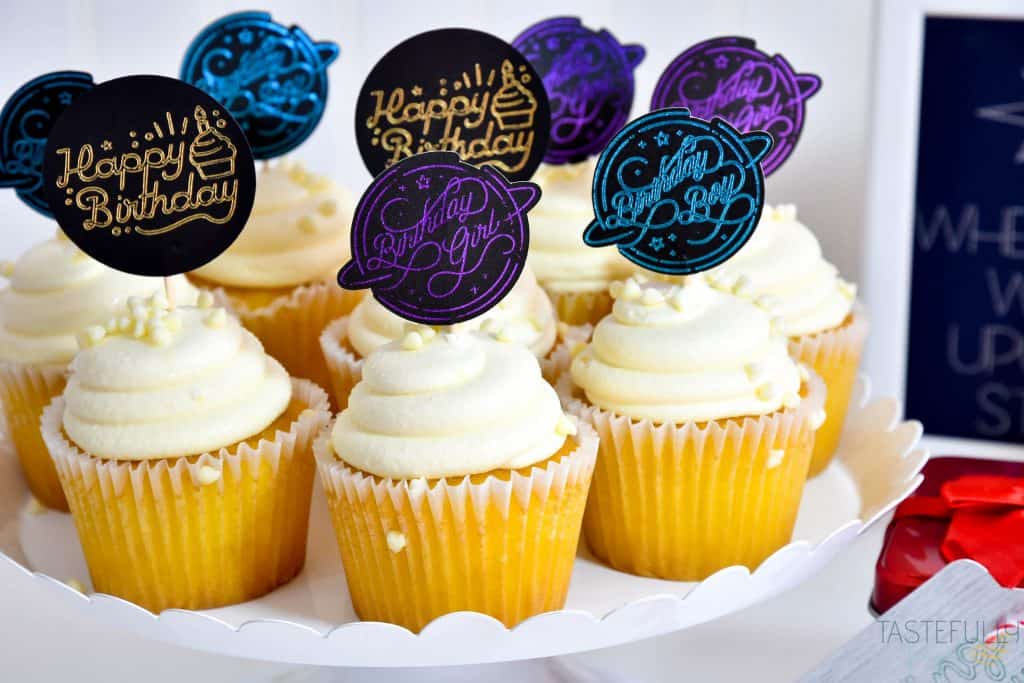
Want to jump into some projects?! Let’s get started! The first project we are going to make are these bright and colorful cupcake toppers. This part of the tutorial will show you not only how to use the foil transfer kit and sheets, but also how to do multiple colors on one project.
- In Design Space go to images and search ART TYPE, DRAW ONLY. Find the Birthday Boy, Girl and Happy Birthday designs and click insert.
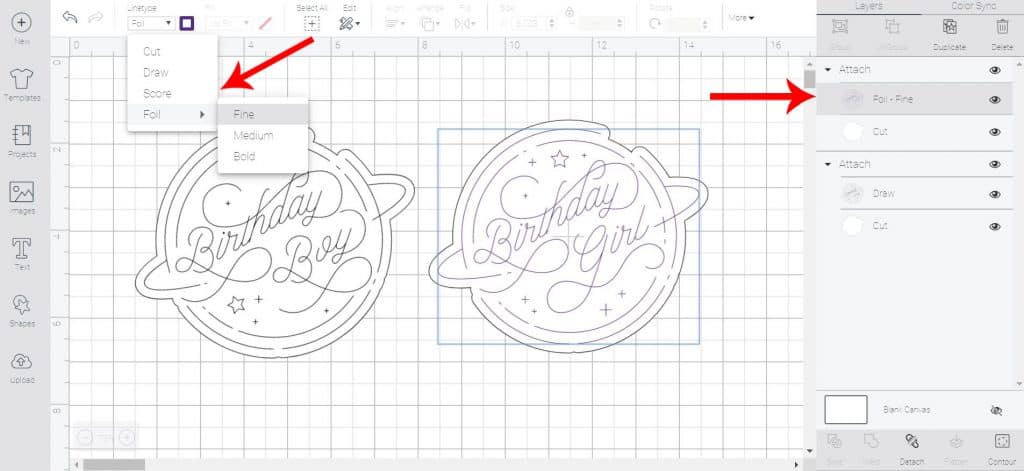
- In the LINETYPE menu, change the linetype for the first layer from DRAW to FOIL. I did fine for the Birthday Boy and Girl and Medium for Happy Birthday.
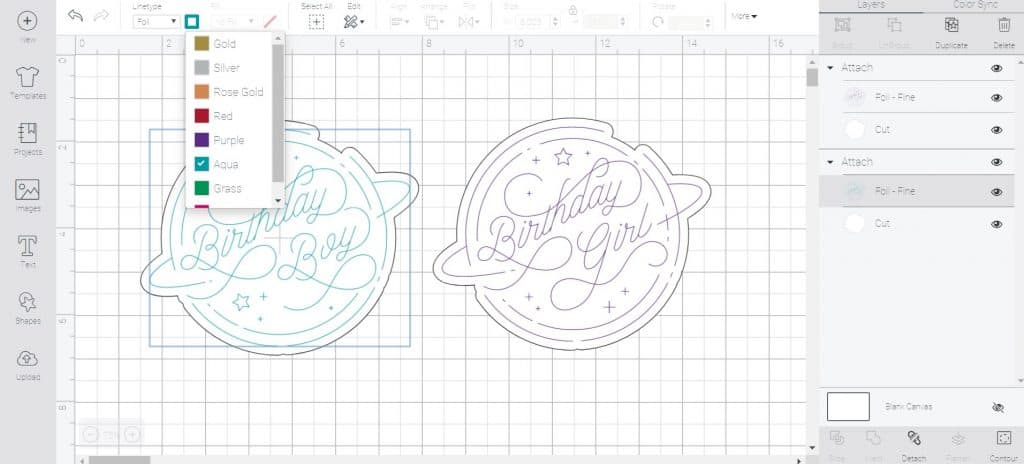
- Make sure to change the color you want each design to be in the box next to LINETYPE as well.
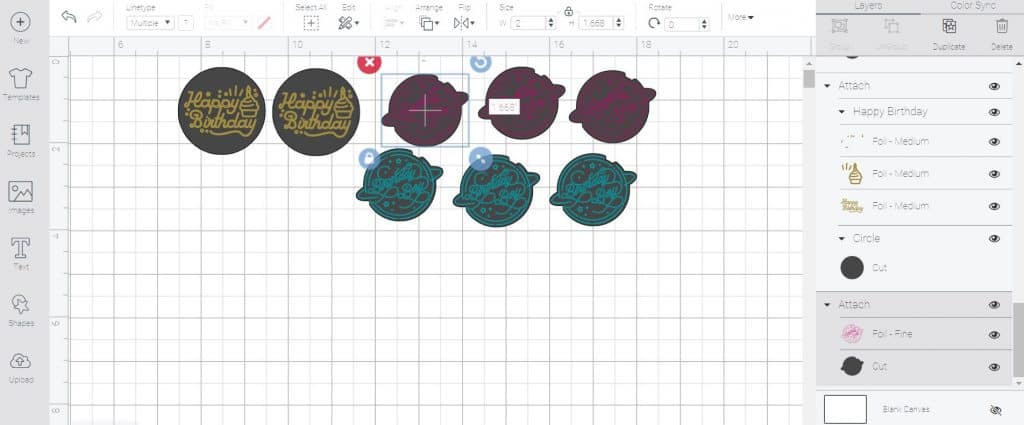
- Change the size of your design (I’ve found 2″ wide is perfect size for cupcake toppers) and duplicate each design as many times as you need.
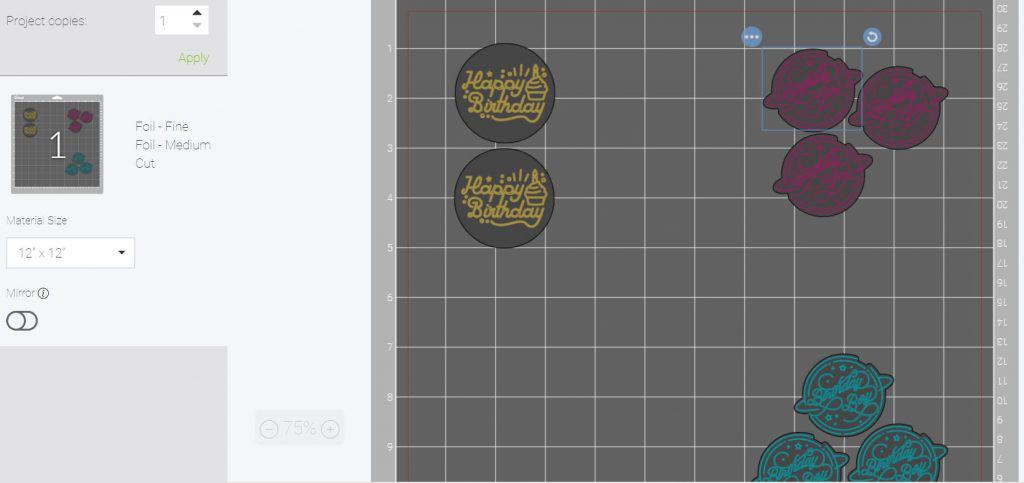
- Click MAKE IT. On the preview screen move your designs on the mat so that you can put three different pieces of foil down without overlap. Make sure to leave ATLEAST ¼” on each side for the tape.
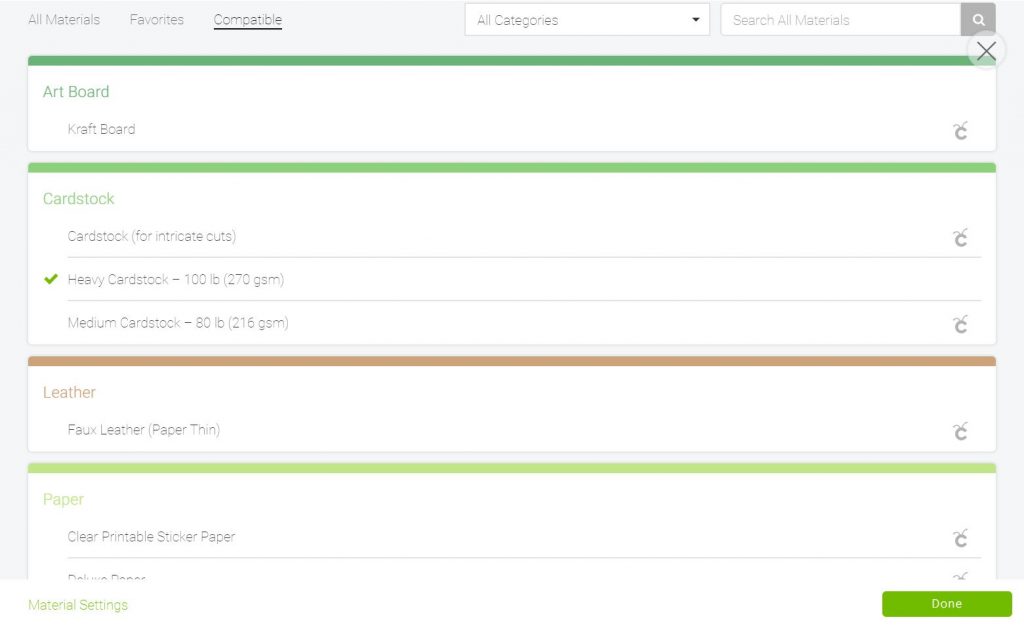
- Click CONTINUE. Select your machine and then HEAVY CARDSTOCK from the drop down menu.
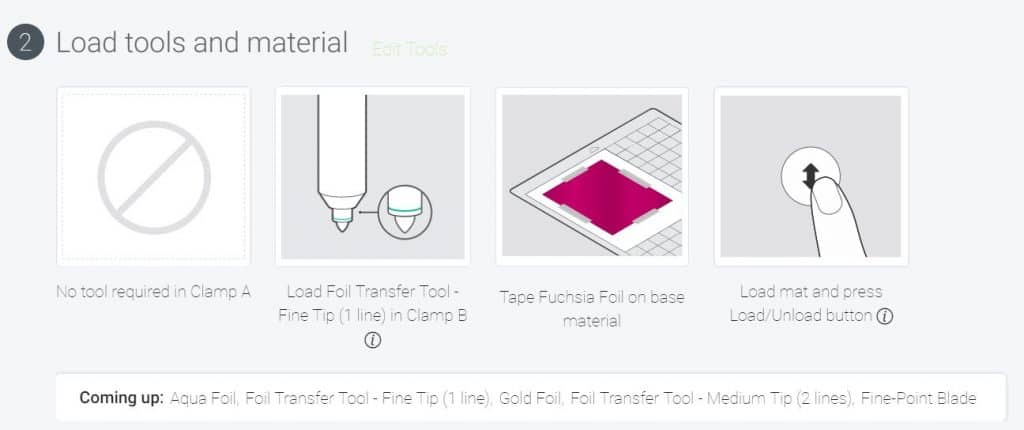
- The next section will prompt you to which tip to put into your blade first.

- Put your cardstock on the your StandardGrip mat and then line up foil sheets so they align with the preview in Design Space. Use provided tape to tape down all 4 sides.
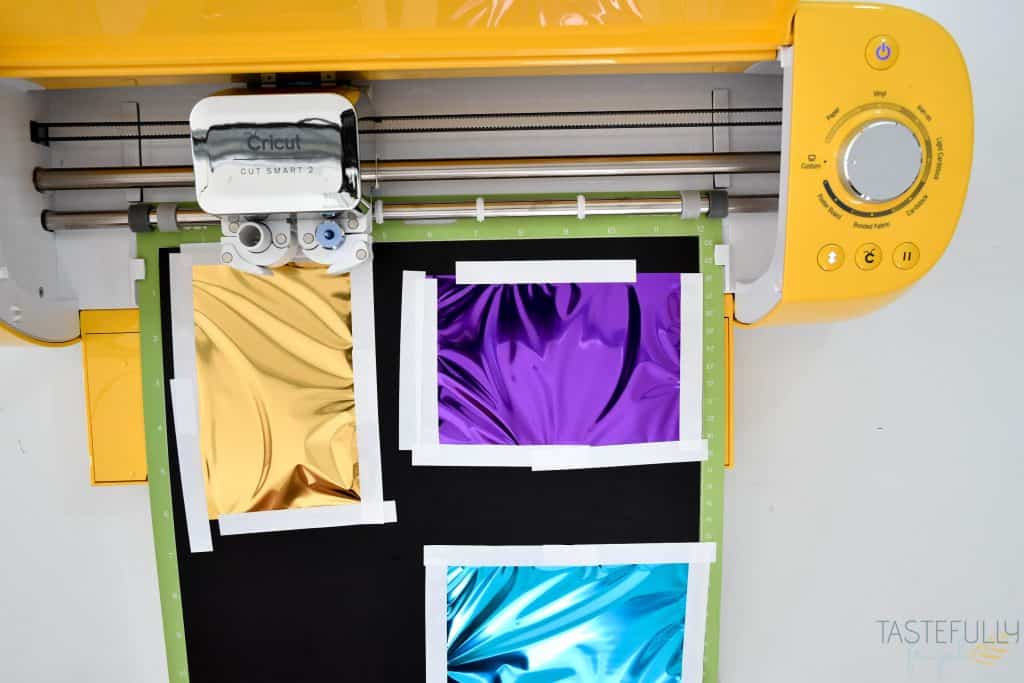
- Load mat into machine and load foil tip into the A clamp. Press the flashing C button when prompted.
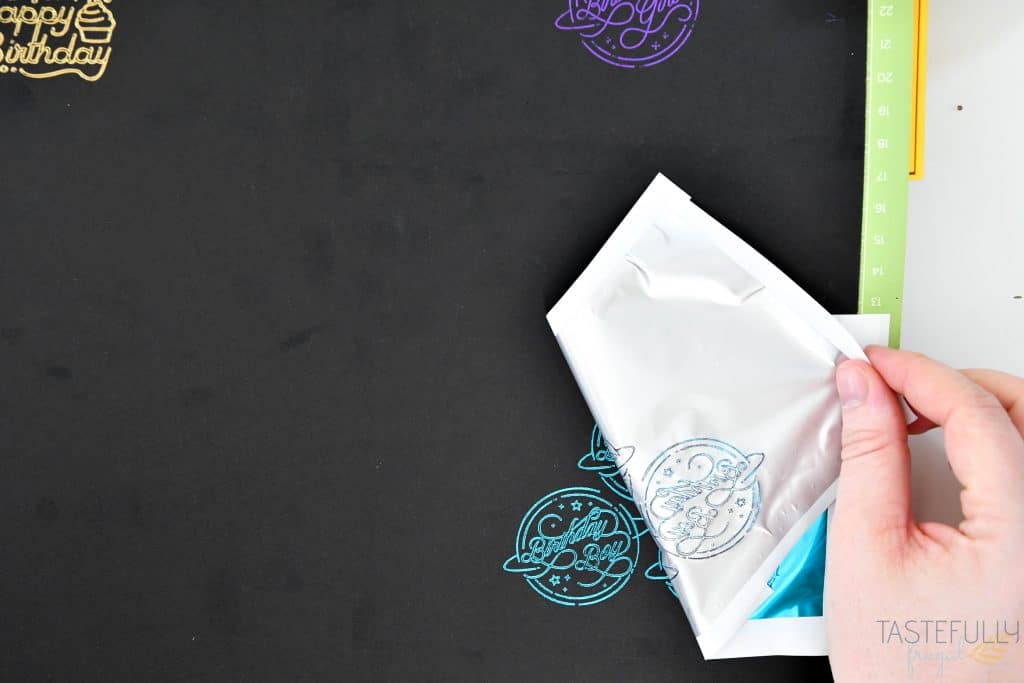
- When all the designs have been pressed with the foil tip, remove the foil sheets from the cardstock ***REMEMBER DO NOT REMOVE THE MAT FROM YOUR MACHINE***
- Replace foil tip with fine point blade and press the flashing C button to cut out design.
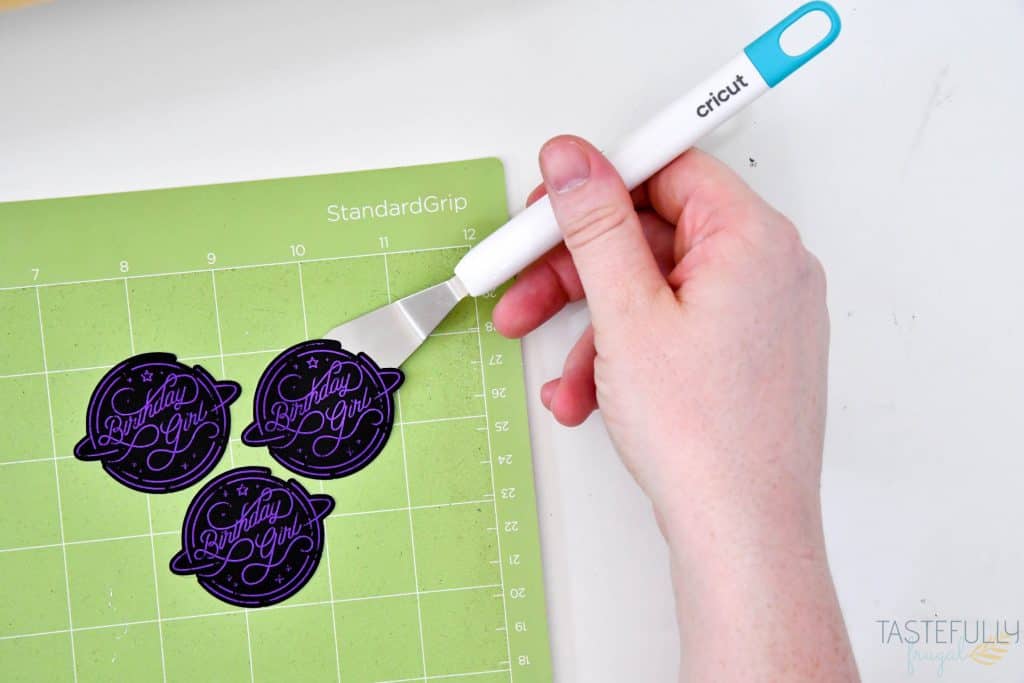
- Use spatula tool to remove cupcake toppers from mat.
What do you different with a Maker?
Next, let’s do a project on the Maker that uses the scoring wheel! If you are using another Maker tool, like the scoring wheel, you will be prompted in Design Space to load that Maker tool first and have it score, emboss etc. BEFORE you load your foil transfer sheet on to your base.
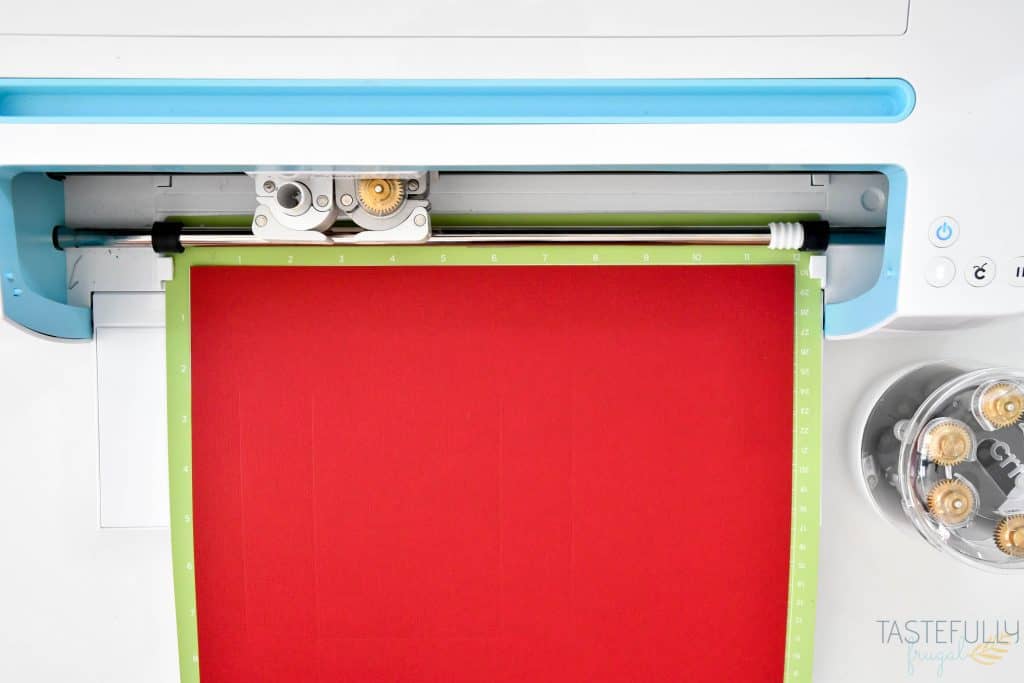
Make sure to move the star wheels over so they don’t ruin your design.
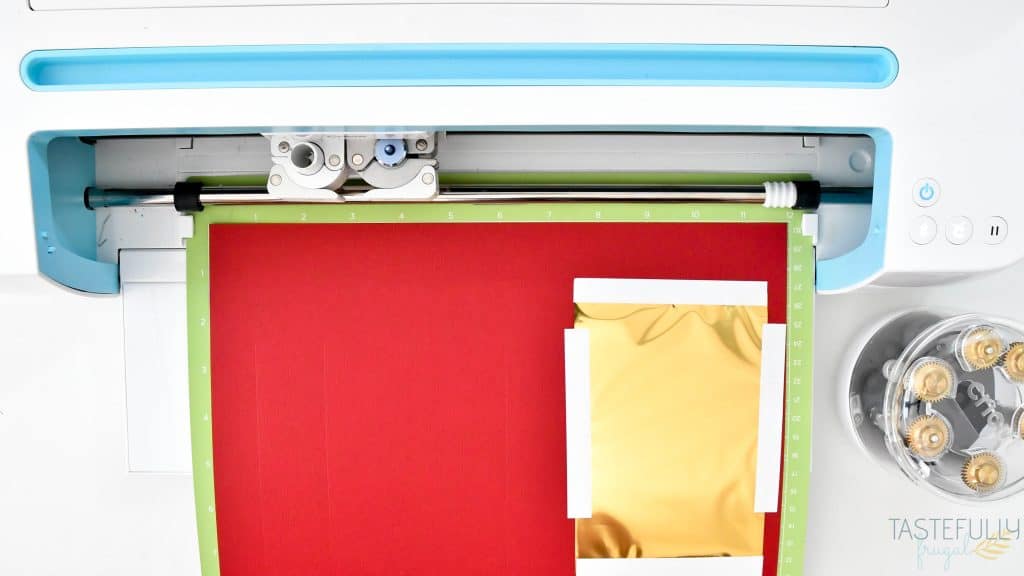
Once your foil design has been pressed in, remove the foil, replace the foil tip with the fine point blade and cut out the box. Use adhesive (I love Art Glitter Glue) to put together your box and fill with goodies.
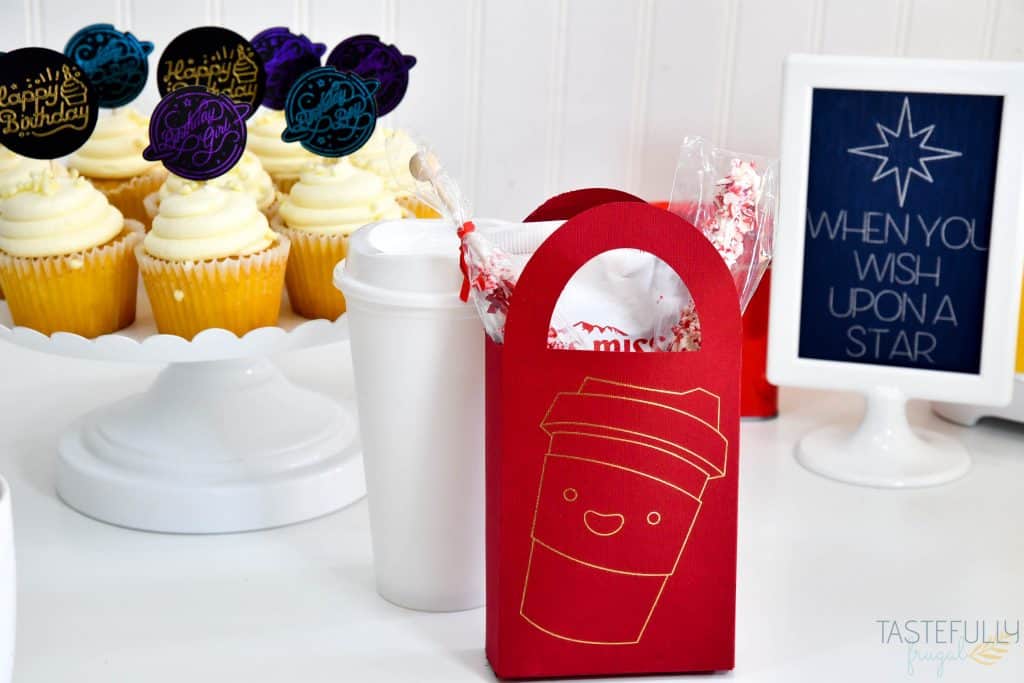
I am SO excited to use the foil transfer kit more, especially during the holidays, and can’t wait to share more projects with you! What questions do you have about the kit, or what projects would you like to see? If you’d like to order your foil transfer kit you can buy it here. Remember you can use code SAVE10 on $50+ orders on Cricut.com.
Make sure to subscribe to my YouTube channel to check out all the video tutorials. For more Cricut projects and tutorials, check out these posts. For tips, tricks and immediate help, be sure to join our FREE Cricut Support Group.



Leave a Reply