Cricut sent me an Easy Press for this post. All thoughts and opinions are mine alone.
Make this Thankful Pillow in just minutes with the Cricut Maker and EasyPress. 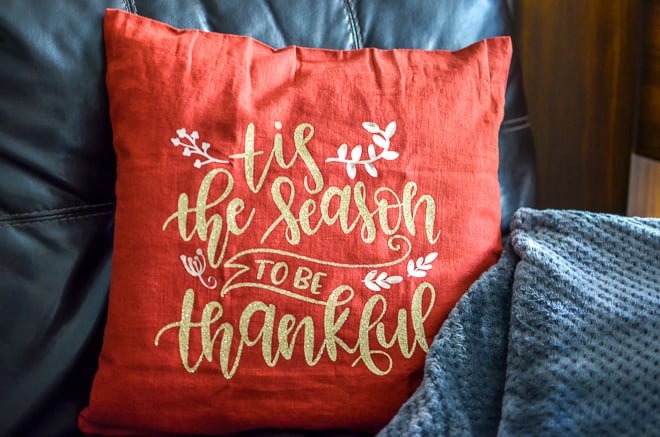
One of my favorite ways to decorate for holidays is fun throw pillows. Not only are they easy to change with the seasons but if I get tired and need to take a nap (which happens a lot more lately with 3 kids) it’s a soft place to rest my head. They are also pretty inexpensive to make too! I love getting my pillow covers and inserts at IKEA. I can walk out spending less than $10 and have supplies to make 2 pillows. Granted I usually spend an hour or so walking around and walk out with a few more things too but the supplies for the pillows are between $5-$7 depending on the pillow.
One thing I’ve had trouble in the past with pillows is they are so big they either don’t fit on my heat press and I have wrinkles in the vinyl from the pressure from the press OR it takes forever with an iron to cover the space of a 20×20 pillow. The EasyPress made making this pillow SO much easier. Just two simple rounds and it was done.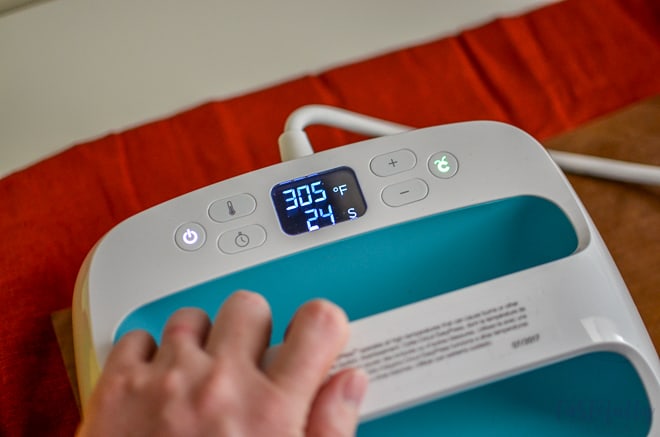
Supplies:
Cricut Light Gold Foil Iron-On **If you’re shopping on Cricut.com use code FREESHIP to score free shipping!
Barrier between iron-on and Easy Press (I use a teflon sheet but a hand towel works great too)
Essential Tool Kit – not mandatory but makes weeding SO much easier
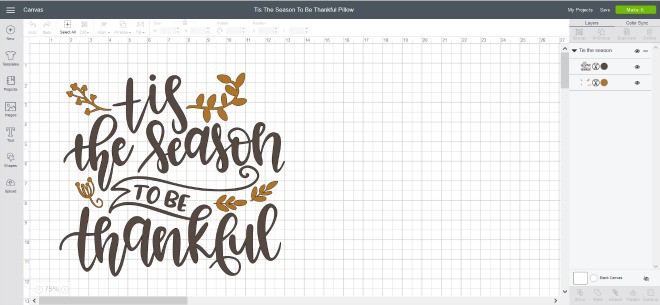
Open this design up in design space. Size it to your pillow. My pillow was 20″x20″ but I didn’t want it to take up the whole pillow so I opted for 11.5″x10.38″.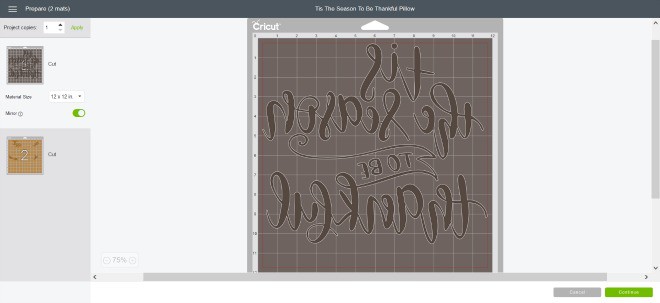
Click Make It and send to your Maker. **On the next screen make sure to “Mirror” slide bar on BOTH canvases.
Click continue and select your machine from the drop down menu. Select your material too. I did the letters in glitter gold and the leaves in the foil.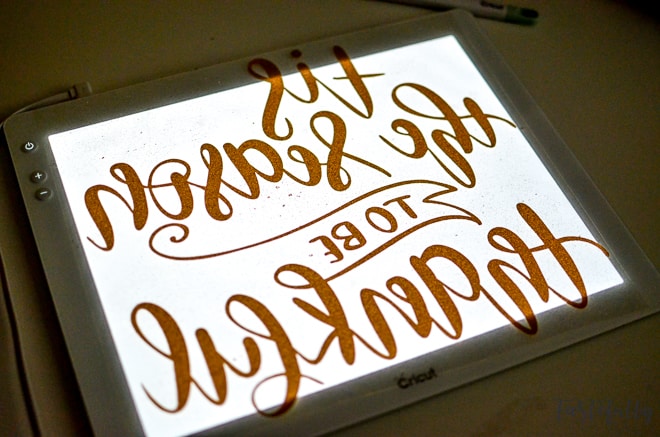
Once your designs are cut, turn on your Brightpad and weed your designs.
Turn on your EasyPress and set the temperature to 305°F and timer to 30 seconds. This sheet is a great reference for temperatures and times depending on your materials.
Place your pillow on a sturdy surface (like your counters) and preheat your pillow for 5-10 seconds.
Put the glitter gold letters down and center on pillow. Cover with teflon sheet or towel and place the EasyPress on the top half of the design. Press the green C button.
Apply medium firm pressure and release when the timer goes off. Move the EasyPress to the bottom half of the design and repeat previous step.
Turn your pillow cover over and heat again for 30 seconds. Flip pillow cover back over.
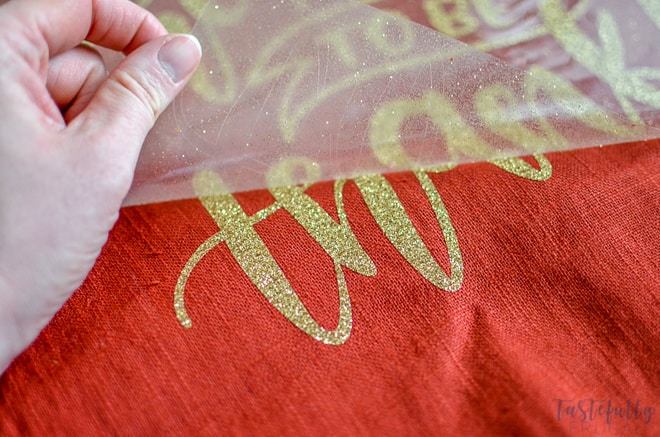 Slowly peel plastic backing off starting in one of the bottom corners and at an angle. If some of the letters are coming up (sometimes the thicker materials require a little more time to apply) put the plastic backing back down and press again.
Once you have the letters attached put the foil leaves down and arrange them like the design in Design Space.
Put the teflon sheet or towel over the plastic-backed foil and cover with EasyPress. Press the green C button.
Apply medium firm pressure and release when the timer goes off. Move the EasyPress to the bottom half of the design and repeat previous step.
Turn your pillow cover over and heat again for 30 seconds. Flip pillow cover back over.
Slowly peel plastic backing off starting in one of the bottom corners and at an angle.
Once everything is attached I like to put the teflon sheet over the design and run the EasyPress over everything one last time for 10-15 seconds.
 Put pillow insert in and enjoy your work!
I love the EasyPress and especially love how much easier it makes bigger projects. Check back next week when I share with you my thoughts on the EasyPress vs. my heat press and which one I use on a daily basis.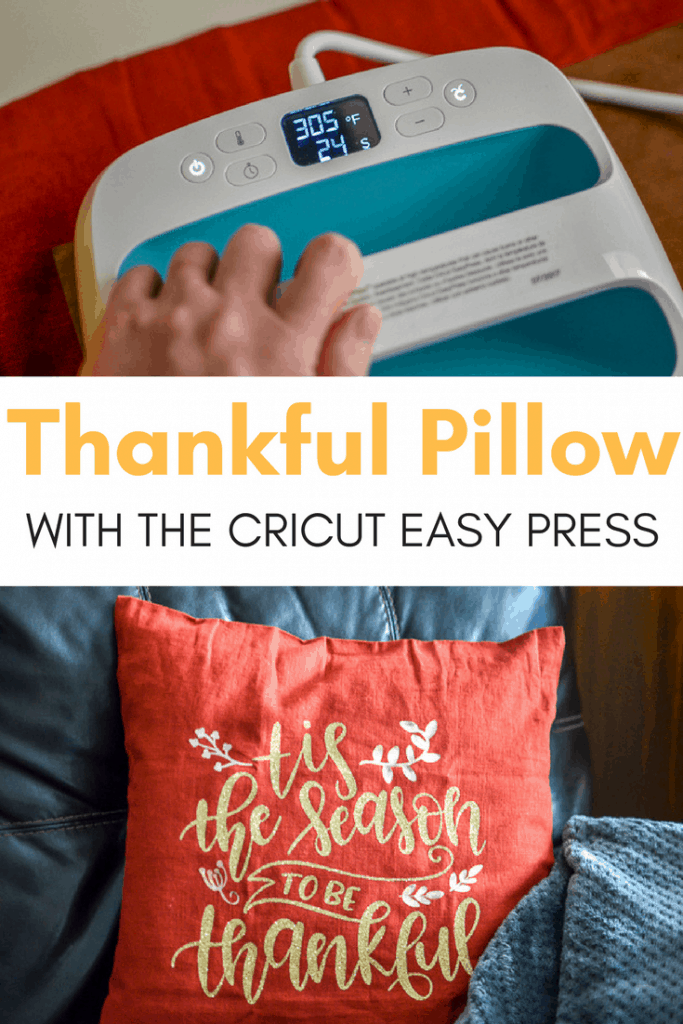
This is a sponsored conversation written by me on behalf of Cricut. The opinions and text are all mine.


Leave a Reply