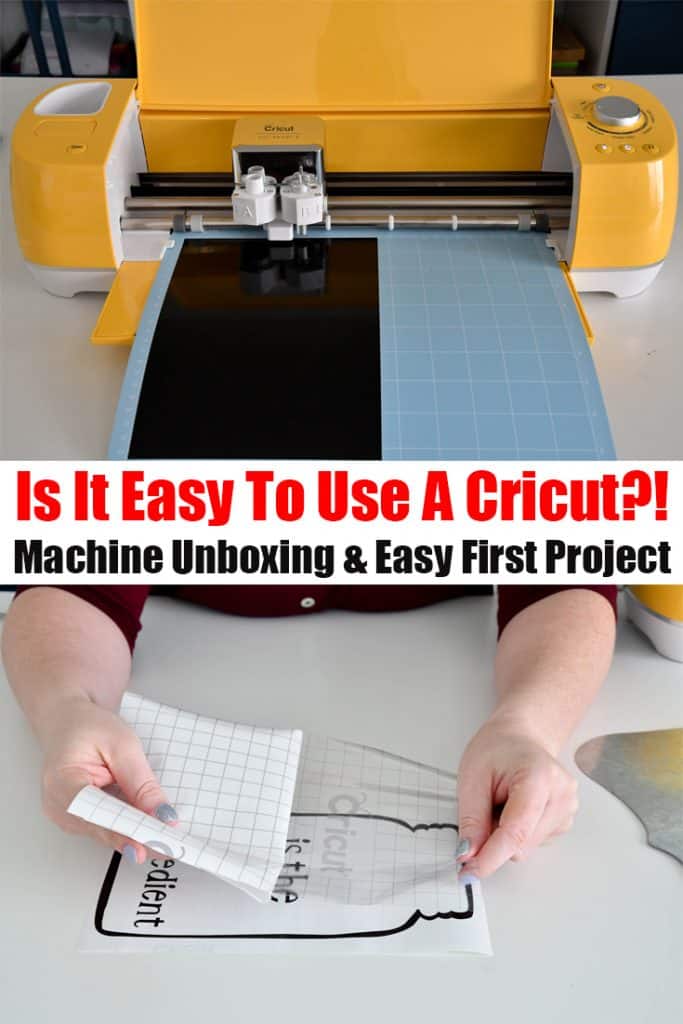
If you’ve ever asked Is it easy to use a Cricut this post is for you! I’ll share what comes in a Cricut Explore Air 2 box, how to get it setup and connected to your computer. Also included is Design Space basics and an easy beginner’s project!
This is a sponsored conversation written by me on behalf of Cricut. The opinions and text are all mine.
One of the most common questions I get asked by crafters looking into buying a cutting machine is “Is it easy to use a Cricut?” Having used both a Cricut Explore Air 2 (and Maker) and Silhoutte Cameo machine I can easily say yes! Not only is the machine itself super easy to use, but Cricut Design Space, the design program used to create with the Cricut machine, is very user friendly too! In my opinion, the Cricut is the easiest vinyl cutting machine to use! In this post we’ll go over:
- How To Setup Your Cricut Machine Out of the Box
- How To Connect Your Cricut To Your Computer
- Design Space Basics
- Cricut Accessories To Make Projects Easier
- Easy Beginner’s Project
Using the Cricut Out Of The Box
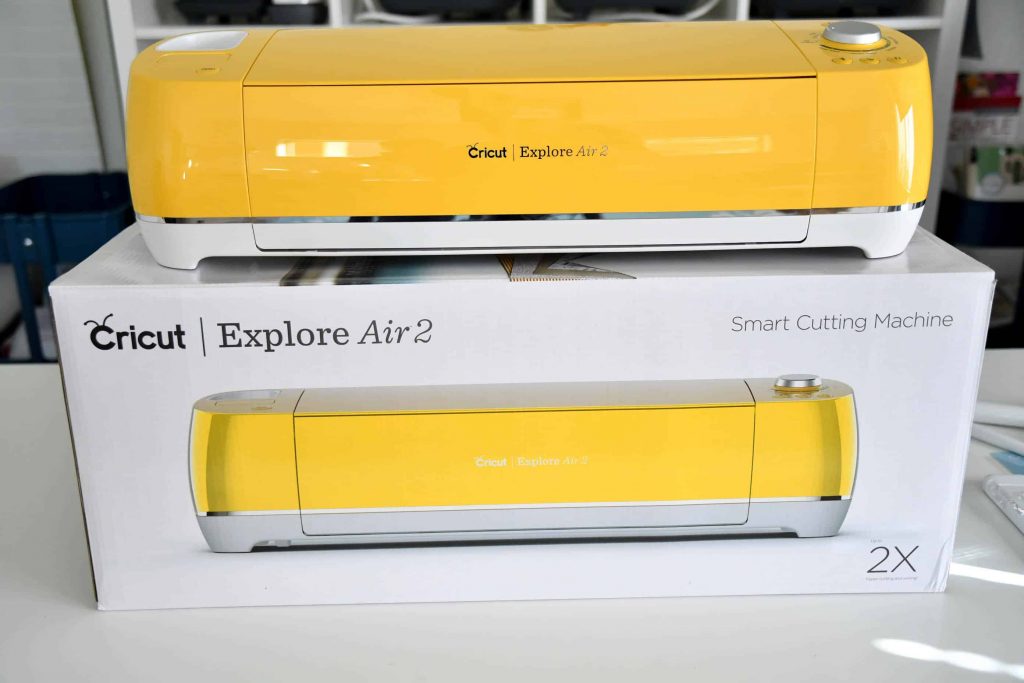
Let’s talk about what to expect when you first open your Cricut machine. Whether you order a bundle or not, your machine will come with the basics you need to start crafting including a LightGrip cutting mat, black pen and some sample material to do your first project. If you’d like to get started with more materials you can check out the Explore Air 2 machine bundles here or the Maker machine bundles here. Do love this Sunflower Explore Air 2 as much as I do?! You can get it exclusively at Michaels stores!
If you’re shopping on Cricut.com, use code WINTER10 to save 10% and get FREE shipping on all $50+ orders. That’s on top of the 10% discount Cricut Access members get automatically! Not sure what Cricut Access is? Check out this post!
The first thing you want to do when you get your Cricut machine out of the box is to connect the power cord. The power cord is the long white cord with the power supply. The connection for the power cord is in the back right corner of your Cricut machine.How To Connect Your Cricut To Your Computer
Next, you’ll want to connect your Cricut machine to your computer. To do this, make sure your Cricut machine is on (push the power button above the materials dial).
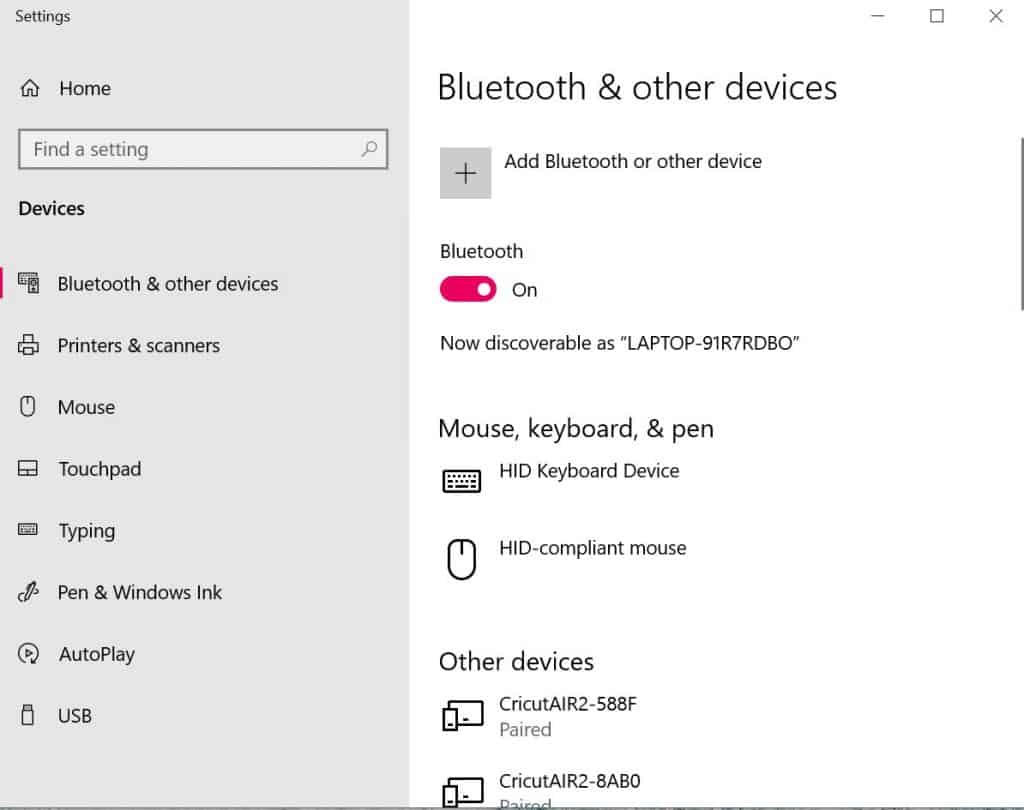
- Open up your Bluetooth & Other Device Settings Menu and make sure your computer’s Bluetooth is on.
- Click add Bluetooth or other device. Your computer will now search for nearby bluetooth devices.
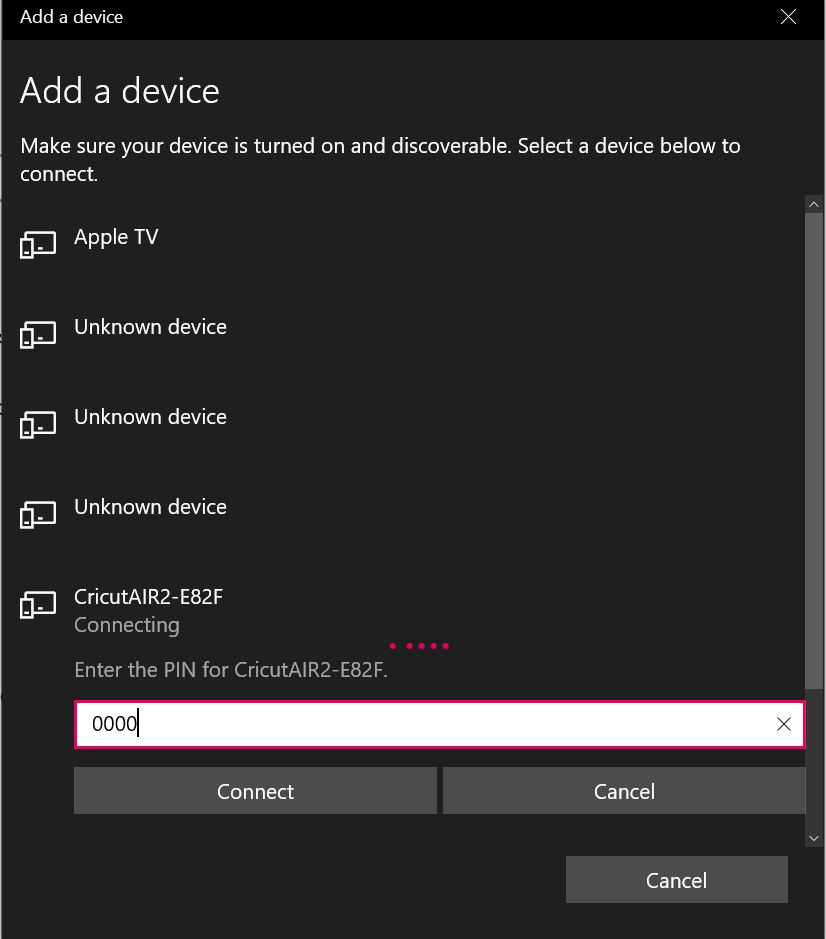
- When you see your machine pop up (it will say either CricutAir2- or CricutMaker-) click connect.
- Enter password. The bluetooth password for all Cricut machines is 0000.
If your computer doesn’t have bluetooth capabilities, just connect your computer to your Cricut machine with the provided USB cable. The connection port on your Cricut machine is in the back next to the power port.
Design Space Basics
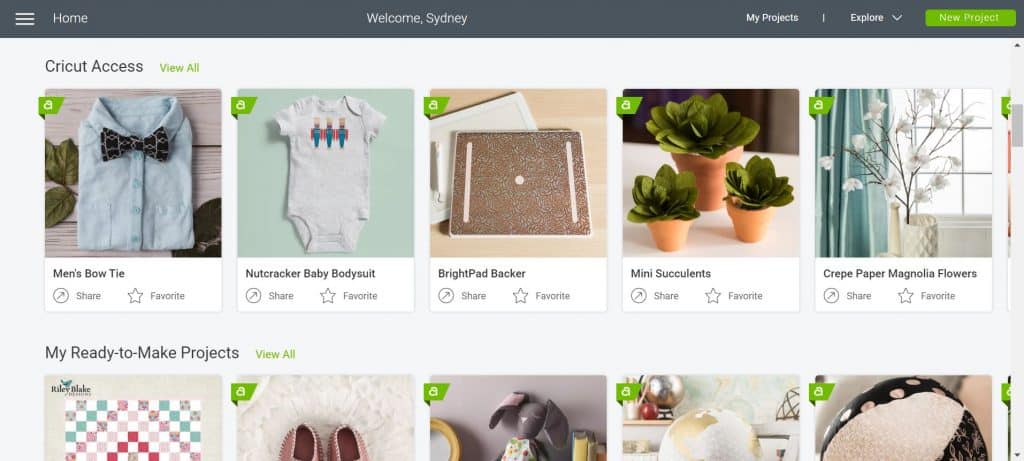
Once your machine is connected to your computer, you’ll want to install Cricut Design Space! Go to design.cricut.com and setup your account. All you need to do is enter your name, email and create a password!
If you want to check out a detailed overview of how Cricut Design Space works, check out this post or watch the video below.
PS if you want to check out more Cricut tutorials, tips, tricks and more, make sure to subscribe to the Tastefully Frugal YouTube channel!Cricut Accessories To Make Projects Easier

There are so many Cricut accessories I LOVE to use, but if you’re new to Cricut there is ONE tool kit that will give you everything you need to help make your first few projects. The essential tool kit has everything any beginner (or advanced) Cricut user needs to make weeding, cutting and applying transfer tape easy.
- Weeding Tool and Tweezers – use to weed excess vinyl or iron-on vinyl
- Paper cutter – use to cut paper, vinyl, iron-on or any material down to size
- Spatula – use to remove paper and cardstock from cutting mat without curling
- Scraper – use for applying transfer tape smoothly
- Scissors – use to open packages or cut materials down to size
- Scoring Stylus – use to make score lines for cards, boxes and more.
If you want to find out more about all the accessories Cricut offers, check out this post!
Easy Cricut Project for Beginners

So now you have your Cricut machine set up, connected to your computer and design space installed but how do you use it? What can you make? Really the possibilities with your Cricut machine are endless! If compiled a post with over 50 projects perfect for beginners that includes a ton of different materials so you can make projects with supplies you already have. Check out that post and all 50 projects here.
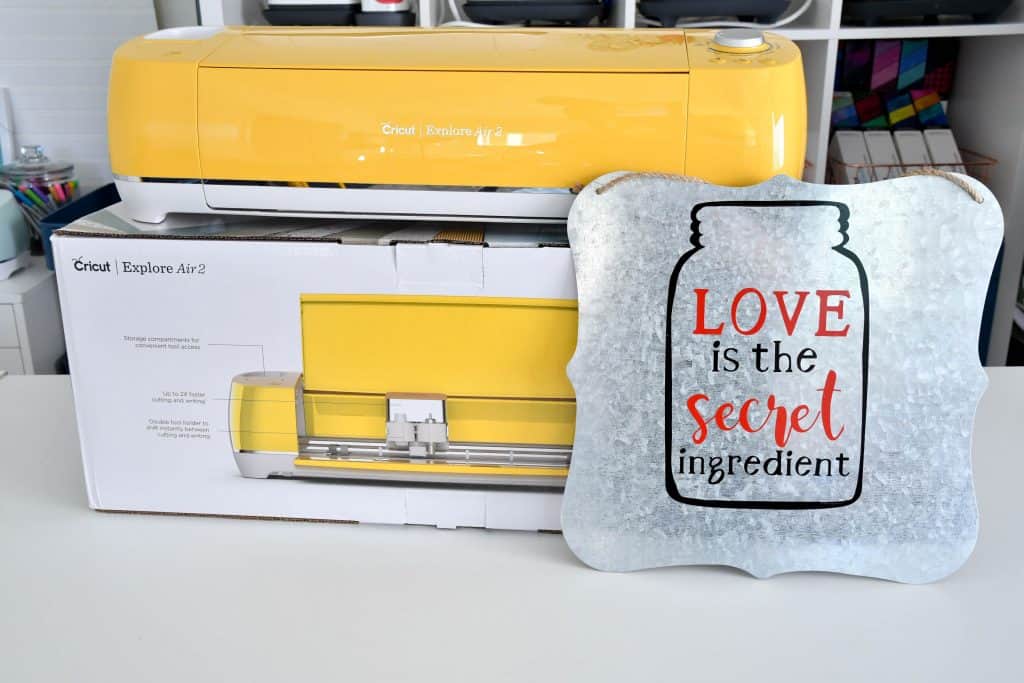
Today we’re going to make this fun kitchen sign out of vinyl. Personally, my favorite material to work with is Iron-On (or heat transfer vinyl), but to get the best results with an iron-on project, you’ll want to use a Cricut EasyPress, which I know a lot of beginner Cricut users don’t have. Vinyl projects are great first time projects for beginners because the materials are inexpensive and you can put vinyl on just about anything!
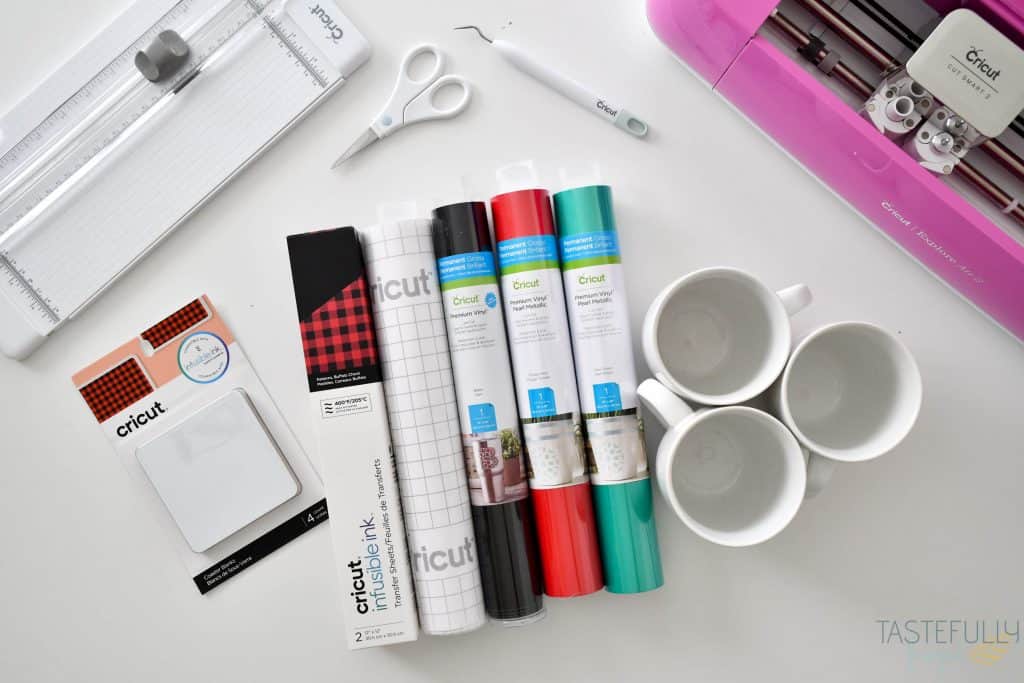
PRO TIP – Cricut’s Premium Vinyl is the BEST vinyl to work with! It lays flat, is easy to weed (remove the parts you don’t need) and is very forgiving. If you’re just starting out using vinyl, stick with the Cricut brand premium vinyl to save yourself some headaches. Both removable and permanent are great to work with! Use removable vinyl for projects you might want to change (perfect for walls, kitchen jars or seasonal decor you might want to change out). Use permanent vinyl for projects you want your vinyl to stick for permanent and/0r that have more wear and tear (car decal, water bottles, outdoor signs, etc)
SUPPLIES:
Premium Vinyl (I used red and black permanent)
Essential Tool Set (not a necessity but the weeder tool and scraper are super helpful with this project. I also use the other tools on nearly every project I make)
Cricut Machine (Explore Air 2 or Maker can make this project)
Galvanized Tin sign (I got this one from Walmart for $3).
DIRECTIONS:
Open up this design in Design Space. Click the Make It Button.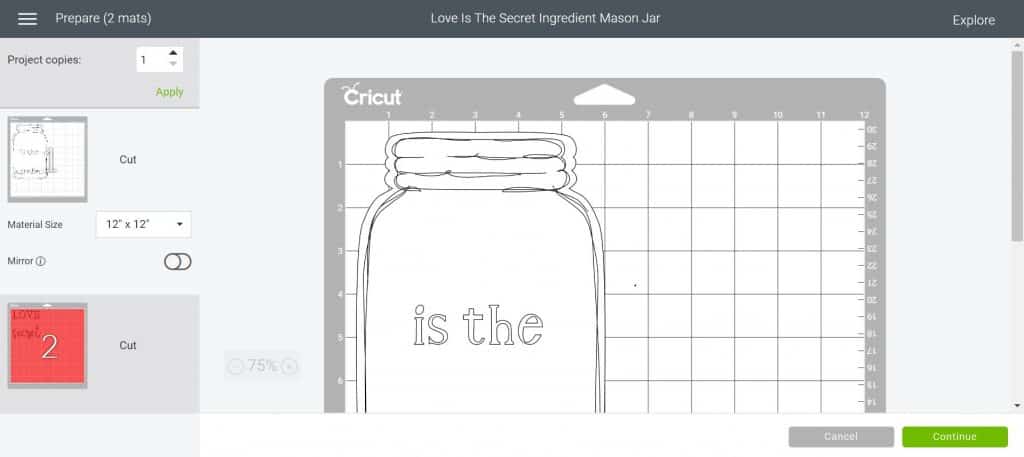
On the next screen you’ll see a preview of what will cut out on each mat. If you want to cut your vinyl down to size so not to waste extras, this is the screen to get your dimensions from. Click continue.
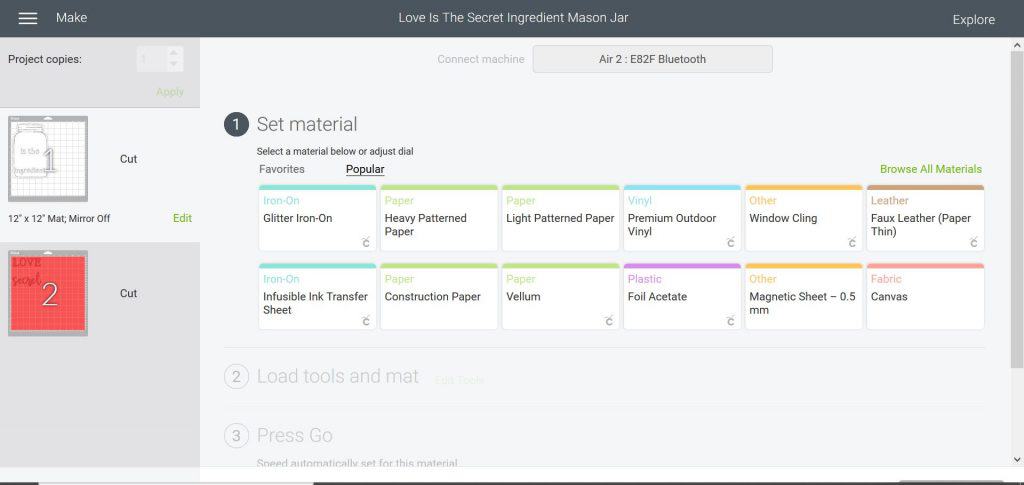
On the following screen you’ll select your machine from the Drop Down Menu. If you only have one machine, there will be just one option.
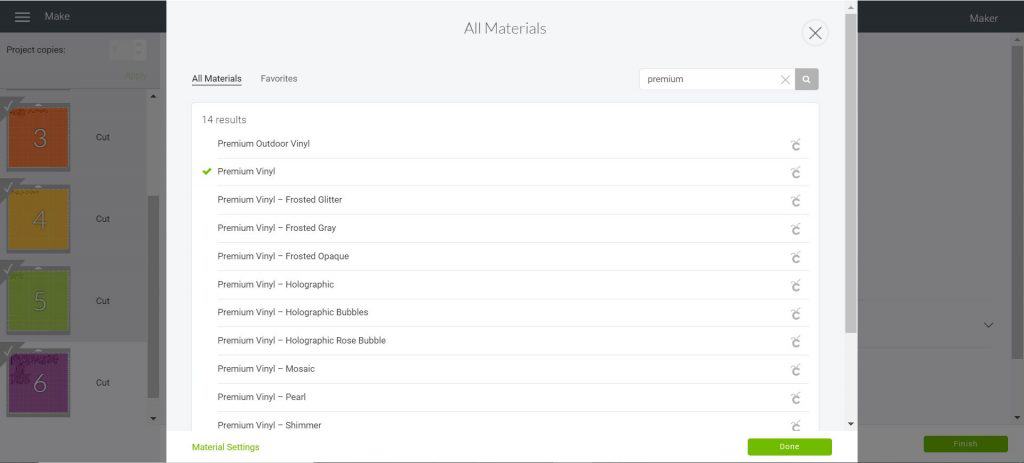
Next, you’ll select your material. You can select VINYL on the materials dial on the Explore Air 2 OR select PREMIUM VINYL from the custom materials menu on the Maker machine. Note you can access the custom materials menu with the Explore Air 2 by moving the dial to CUSTOM.
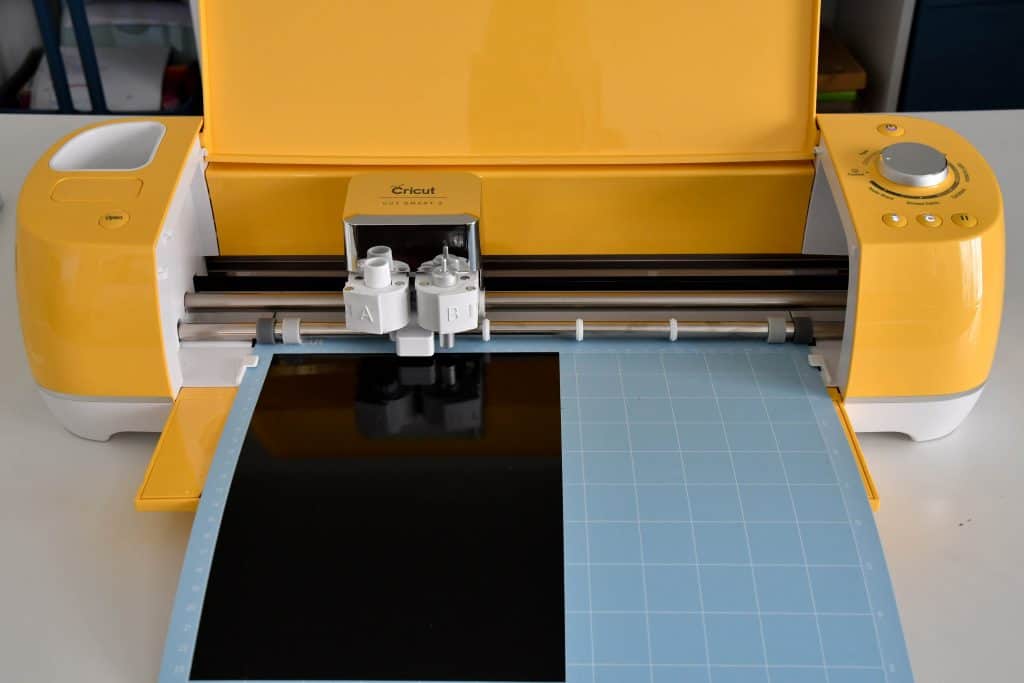
Load your first color vinyl on to your LightGrip mat, white side down, and load your mat into the machine by pushing the flashing arrow button.
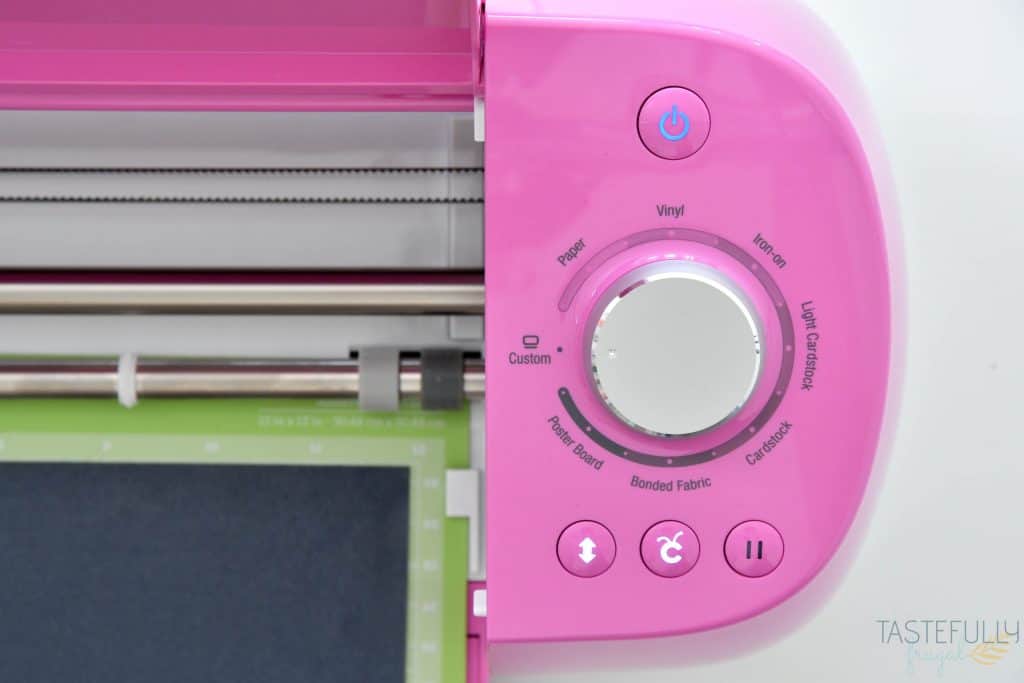
When the C button starts flashing, click it to begin the cut.
When your Cricut is done cutting, the arrow button will start flashing again and you click it to remove your mat.
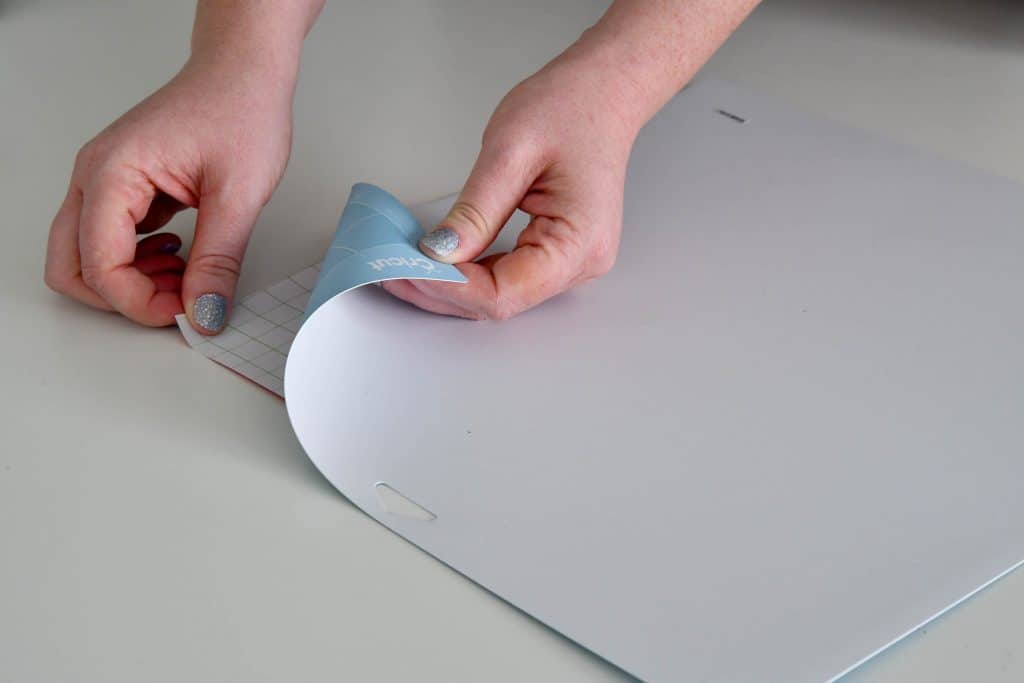
Remove your vinyl from the LightGrip mat by flipping your mat upside down and peeling your mat up to remove vinyl. This ensure your vinyl won’t wrinkle and it’s the easiest way to get your materials off the mat.
Load your second color vinyl on to your LightGrip mat, white side down, and load your mat into the machine by pushing the flashing arrow button.
Repeat previous 3 steps.
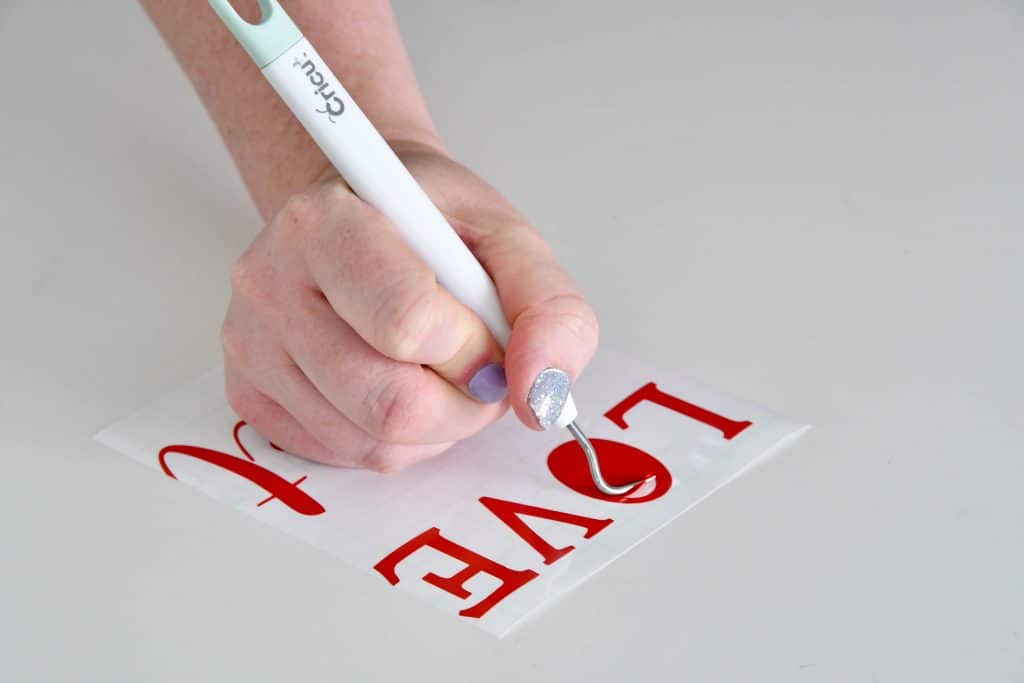
To weed vinyl (or remove excess vinyl), use the weeding tool and start in the top right corner. Peel down at a 90° angle. Use weeding tool to remove the centers of letters.
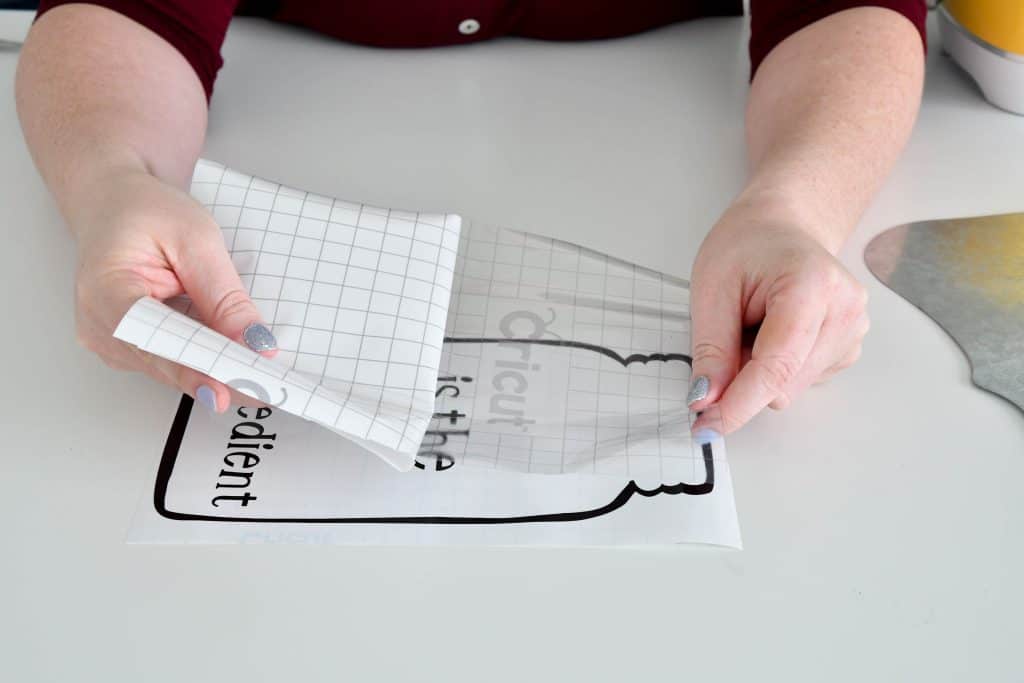
Apply transfer type by using the hinge method – remove the backing from the top half of the transfer tape and apply to the top half of the vinyl jar decal, then slowly smooth down the rest of the transfer tape away from the backing on to the rest of the jar. Use scraper to attach transfer tape to vinyl.
Flip over and slowly peel transfer tape off of backing.
Clean tin surface with rubbing alcohol and apply black vinyl using the hinge method mentioned above.
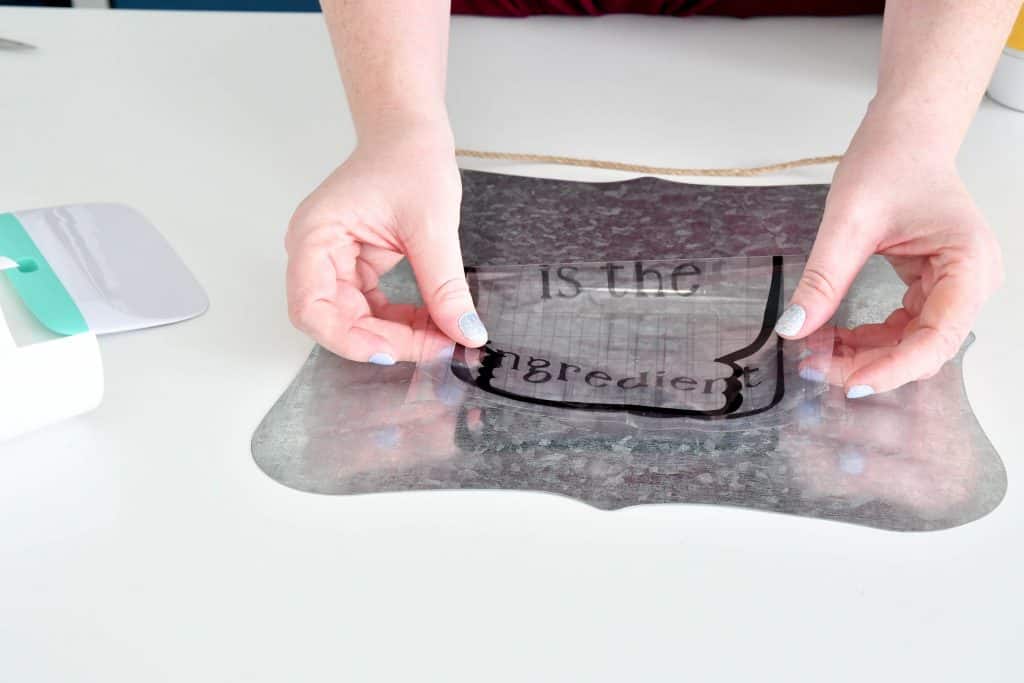
Use scraper tool to attach the vinyl to the tin.
Remove transfer tape by peeling away at a 90° angle.
Apply the red letters using hinge method. Use scraper tool to attach the vinyl to the tin. Remove transfer tape by peeling away at a 90° angle.

If you’ve made it this far you should now know everything you need to get your Cricut from box to project and all in less than an hour! If you’d like to check out more ways you can use your Cricut check out these posts! Need help with your Cricut? Join our Cricut Support Facebook Group!


Gemma says
I don’t have a Cricut machine myself yet, but I really would love one as it’s be so much fun being able to get creative and crafty! Thank you for explaining how they work so well xo
Terri Toland says
Just got brave enough to finally open the box….even struggled with that! Ready to throw it out in the yard, then remembered how much I paid for it and knew my husband would kill me, so I found your tutorial just in time! Thank you. I need someone that can teach me like I’m 4 yrs old, Im seriously that “challenged”.
Sydney says
Hi Terri! I’m sorry I’m just seeing your comment. I am always happy to help with any road blocks that come up. Feel free to email me at [email protected] for the quickest response. We also have a Cricut Support Group on Facebook that is really helpful too that you can join. https://www.facebook.com/groups/711777112325006