Let your child’s imagination run wild with this easy DIY Play Restaurant Kit customized with your Cricut!

This post was sponsored by Cricut. All thoughts and opinions are 100% mine.
My daughter is super into playing restaurant and having tea parties lately. I remember being 4 and wanting to do the same thing! She really likes taking paper from my office to make menus and using plates and bowls from the kitchen to set the table for her guests so I decided I would make her own little play restaurant kit with everything she needs to run her restaurant!
Easy DIY Play Restaurant Kit

Not only did this project turn out cuter than I had imagined but it was SO easy to make everything with the Cricut Joy! AND it was affordable too! I got all the pieces at Walmart and spent less than $20 on everything! We made her custom plates, bowls, coasters, napkins, clipboard to take orders, shirt and even custom menus!
The most time consuming part was coming up with the design, which I already did for you! You can open this Design Space Canvas and customize the Mahle’s Cafe logo with whatever name you like! I also included the different sizes we used for each of the different pieces.
How To Customize With Cricut

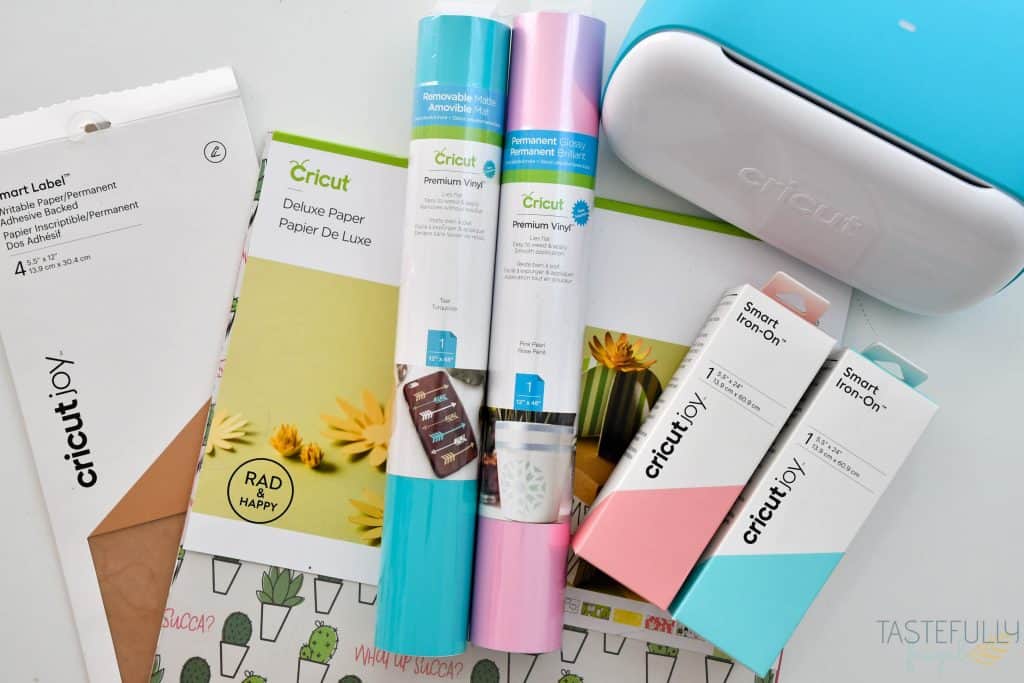
You can make this play restaurant kit with any Cricut machine but the Joy made it especially easy being able to cut without a mat for the Smart Iron-On and Smart Label for the menus. We used Cricut Premium Vinyl for the bowls, cups, clipboard and lid; I just loved how the Pearl Pink matched the dark blue on the cups and bowls (P.S. the cups and bowls were only $.50 and they are perfect for kids)!
I really love how Design Space takes all the guess work out of creating projects! It was really easy to select the different materials I was using and if they needed a mat or not.
I’ll show you step by step how to work with each of the different materials below (Smart Iron-On, Adhesive Vinyl, Infusible Ink and Smart Label) but you can also check out this YouTube video for the full tutorial too!
SUPPLIES:
- Box
- Cups & Bowls
- Clipboard
- Guest Checks
- Condiment Bottles
- Red and Yellow Tissue Paper
- Cloth Napkins
- Shirt
- Cricut Joy (or any Cricut machine)
- EasyPress 2 and EasyPress Mat
- Infusible Ink Coasters
- Deluxe Paper and Cardstock in Rose
- Smart Label – Writable Paper
- Smart Iron-On in Bright Teal and Blush
- Premium Vinyl in Teal and Pink Pearl
- Transfer Tape
- Heat Resistant Tape
- Infusible Ink Transfer Sheets in Watercolor Splash
- Cricut Joy Pen in Glitter Black
- Cricut Joy LightGrip Mat
- Tool Kit (not required but makes working with the iron-on and vinyl SO much easier)
If you need to get Cricut supplies and you’re shopping on Cricut.com, use code SAVE10 to save 10% and get FREE shipping on all $50+ orders. That’s on top of the 10% discount Cricut Access members get automatically! Learn more about Cricut Access here.
DIY Play Restaurant Kit Directions:
Design Space Tutorial:

Open up this Design Space Canvas and change the name on your logo. I have listed what font I used so you can get the same look. The different sizes for each part of the kit are:
- Box Lid – 4.5″
- Clipboard – 4″
- Coasters – 3.55″
- Napkins – 3.5″
- Shirt Logo – 2.5″
- Bowls and Cups – 2″
You’ll want to use Adhesive Vinyl for the Box Lid, Clipboard, Bowls and Cups. Use Iron-On Vinyl for the Napkins and Shirt Logo and Infusible Ink for the Coasters.

Once you have your Design customized click MAKE IT and on the next screen select MULTIPLE WAYS on the pop up that asks how you will load your project.

In this design, the pink and bright blue are Smart Iron-On so I selected WITHOUT MAT. Make sure to MIRROR your image also for Iron-On and Infusible Ink.
The orange and black are Infusible Ink so I selected WITH MAT and MIRROR on the design.
The purple and dark blue are premium vinyl so I selected WITH MAT.
Once all colors have been selected select CONTINUE and connect your Joy machine to Design Space. Make sure your machine is turned on and select JOY from the drop down menu.

Once your machine is selected you’ll want to select your material. **PAY ATTENTION TO THE MAT HIGHLIGHTED WHITE ON THE LEFT HAND SIDE. THIS IS THE MAT THAT WILL BE CUTTING AND YOU’LL WANT TO MAKE SURE YOU SELECT THE RIGHT MATERIAL.**
For the Pink and Light Blue use Smart Iron-On. The Orange and Black use Infusible Ink Transfer Sheets. For the Purple use Premium Vinyl – Pearl and for the Dark Blue use Premium Vinyl.
Cutting with the Cricut Joy

For the materials that are going on a mat, you’ll need to cut them down to size to fit the mat. I like using the preview screen as a reference on the size I need and then using the Cricut paper trimmer to cut down the pieces to just a little bit bigger than what I need. This makes it so I don’t waste material but it also makes it a lot easier to weed.
No matter what material you are using, whether it’s on a mat or not, make sure you don’t load your material until the button on top of the Joy is flashing and you’re prompted to in Design Space. If you try to load it early it won’t go in.
You’ll be prompted in between each mat to select a different material, if you don’t see the material you are using as an option click BROWSE ALL MATERIALS and select it from the drop down menu.
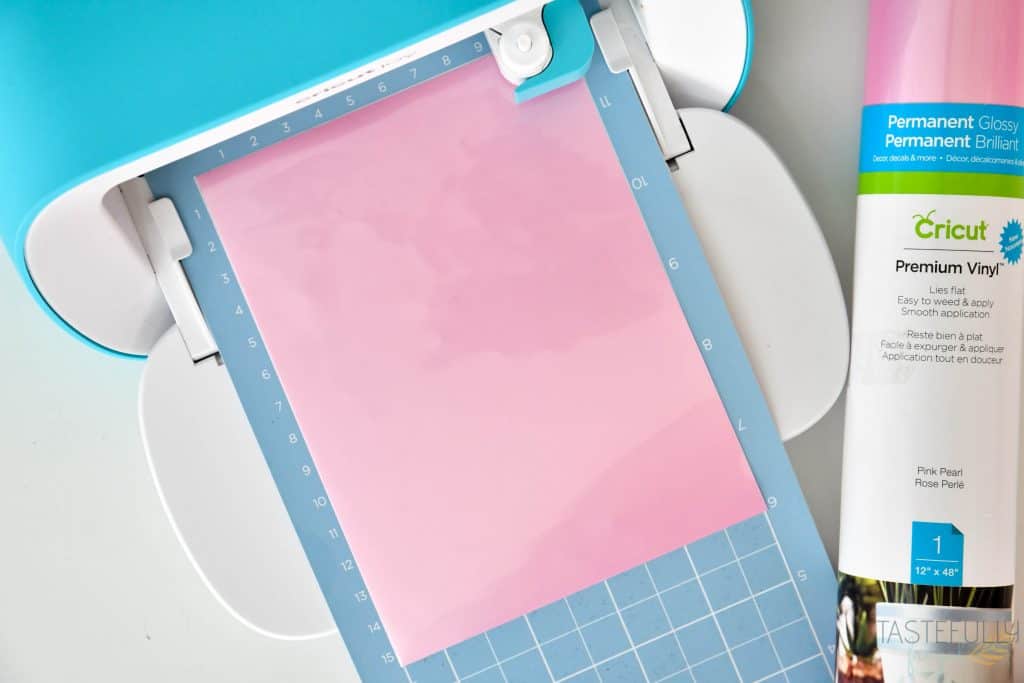
For the Pink and Light Blue, load your Smart Iron-On into the Joy shiny side DOWN. The Orange and Black, load the Infusible Ink Transfer Sheets patterned side up on the LightGrip Mat. For the Purple and Dark Blue load the Premium Vinyl on the LightGrip mat colored side up.
When your material is loaded click the green GO button in the right bottom corner in Design Space.
Once it’s done cutting, click UNLOAD in Design Space to unload the material and/or mat from the Joy.
Making the DIY Play Restaurant Kit Pieces

Weed all the excess vinyl, iron-on and infusible ink pieces from your designs. You’ll want to remove the letters inside the circle and the small circle inside and leave the larger circle intact.
How To Apply Vinyl

Cut your transfer tape down to size and place on top of your designs. Use the scraper tool to press the transfer tape onto the design AND press on the back of the vinyl sheet also.

Line your design up on the bowl, cup, clipboard or box cover. Remove the backer from the vinyl so that the design is on the the transfer tape and press it on the your material.

Use the scraper tool again to press the design on to the material. Slowly peel away the transfer tape as close to the surface as possible.
How To Apply Iron-On

Preheat your EasyPress to 315F and 30sec. Put your napkin or shirt on the EasyPress mat and preheat for 5 seconds.

Line up the pink circle and press with medium pressure for 25sec. Flip shirt/napkin over and press for an additional 15sec. Let plastic backer cool before removing.

Once the backer is removed, line up teapot design in center of circle. Put the plastic backer from the circle back on top to protect the circle while being pressed. Press with medium pressure for 30sec. Flip shirt/napkin over and press for an additional 15sec. Let plastic backer cool before removing.

How To Apply Infusible Ink
Preheat your EasyPress to 400F and 240sec.
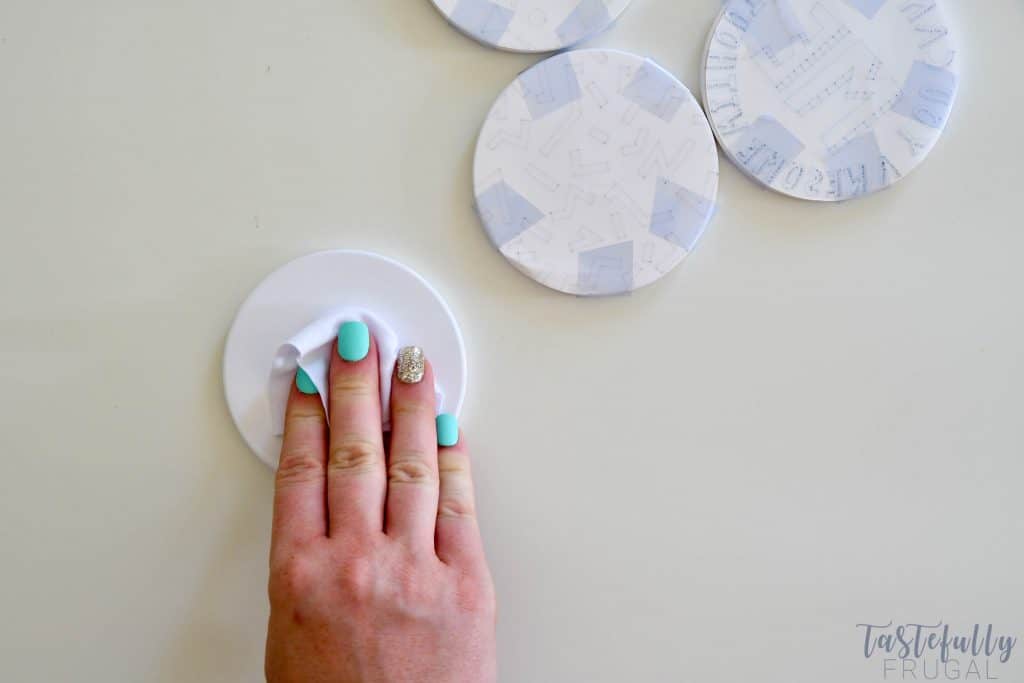
Clean your coasters with a lint free cloth (there is one that comes with the Infusible Ink transfer sheets).
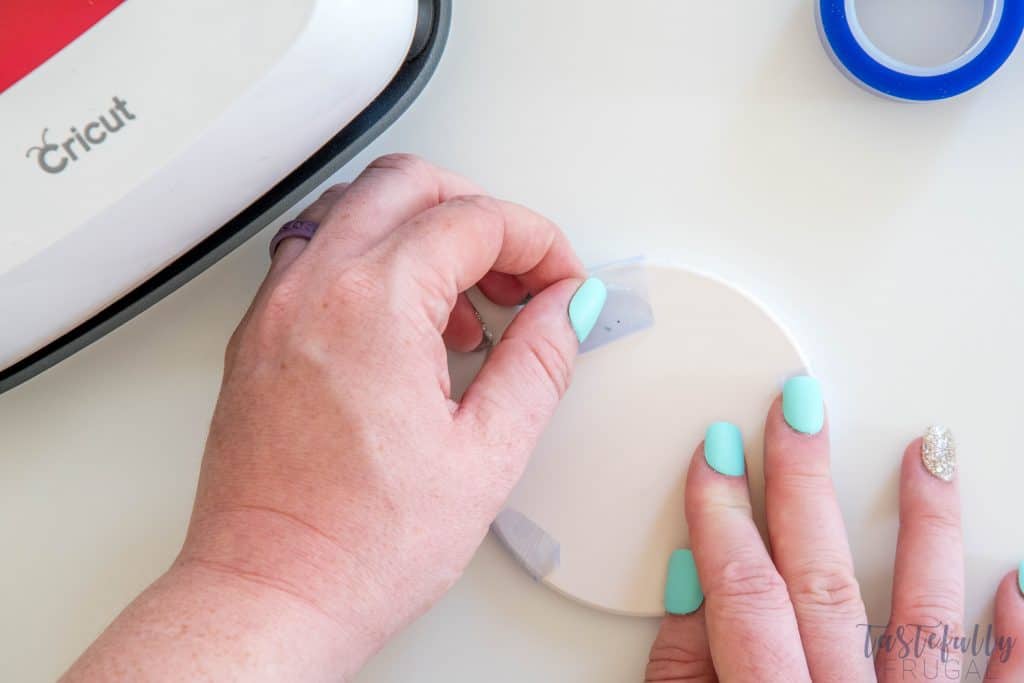
Line your design up on the coasters, colored side down and use heat resistant tape on to the coaster to prevent them from moving. **Make sure your heat resistant tape is NOT touching any of the design or it will be faded**
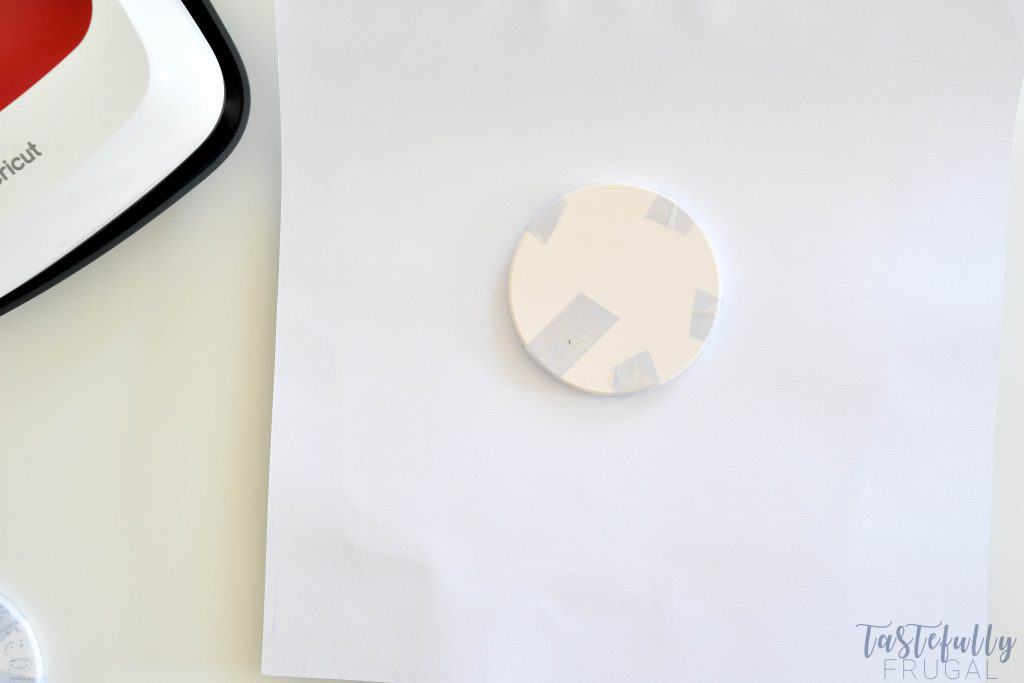
Put cardstock on top of the EasyPress mat, then put your coaster face down on the cardstock. Top the coaster with parchment paper.
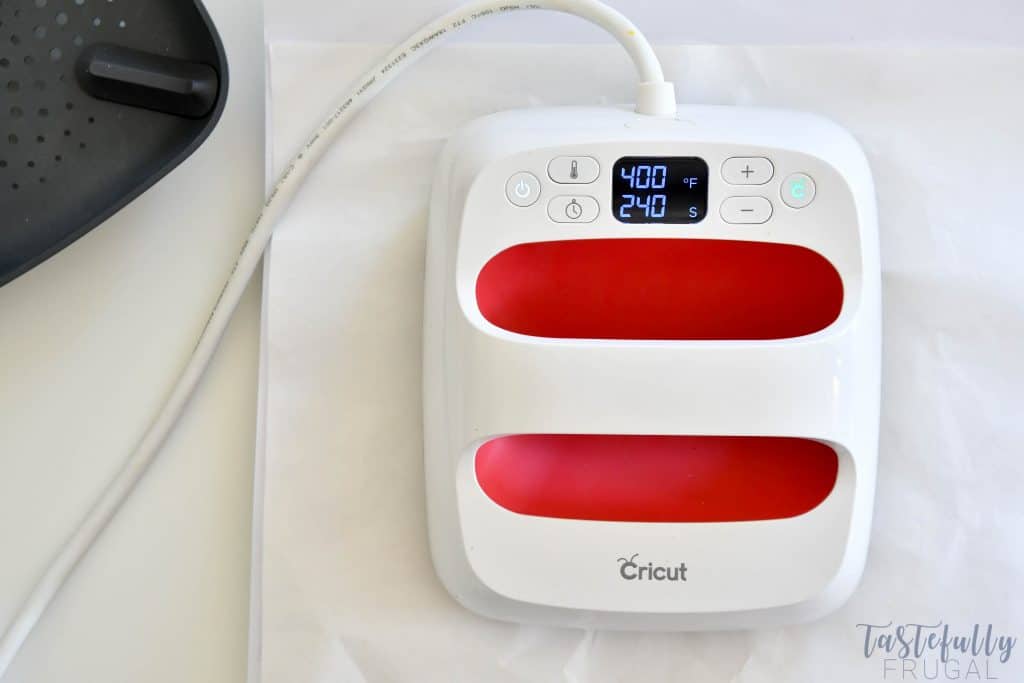
Put the EasyPress 2 on top of the parchment paper and press for 240sec.

Let coaster completely cool before removing backer (this may take 4-5 mintues). **BE CAREFUL IT WILL BE VERY HOT**
How To Make a DIY Menu

Open up this design in Design Space. You can customize items or leave it as is. When you’re ready to make it click MAKE IT.
On the next screen you’ll want to select WITHOUT MAT.

Because the Writable Paper is only 11″ long you’ll want to move the second part of the menu to a third mat. To do this, click the design and select the three circles. Click MOVE OBJECT and then click NEW.
You may need to move the design up to the top of the mat. To do this just click the design and drag it up to the top. Click CONTINUE.
On the next screen select JOY from the machine drop down menu.

Select SMART LABEL – WRITABLE PAPER from the materials menu.
Load your pen into the clamp.

Load your writable paper into the machine when prompted to do so in Design Space. Click GO.

When the Joy is done drawing, click UNLOAD in Design Space to unload your paper. Repeat with remaining pieces.

Cut your solid cardstock down to size. You’ll want to cut the pieces to 5.75″ wide and 12″ long (they should already be 12″ long so you’ll just have to cut down the width).

Line up the menu items on to the solid colored cardstock and remove backer.
Repeat with second piece of cardstock

Fold the patterned paper in half length wise and put the MENU sticker on the front of the menu.

Glue solid cardstock on to the inside of the patterned paper.
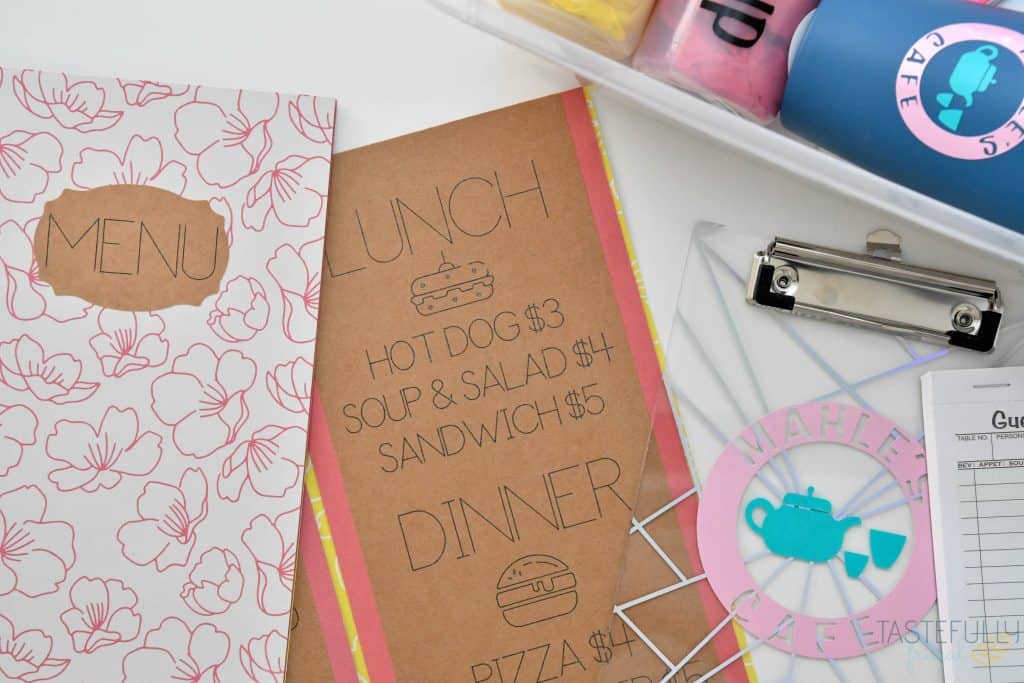
WOW! That was a lot of information. I know it seems like a lot but I promise these are all REALLY easy projects to make! And one your little one will love and cherish for years to come! Have you ever made an imagination kit for your kids (or grandkids)? I’d love to hear about them in the comments!
Make sure to subscribe to my YouTube channel to check out all the video tutorials. For more Cricut projects and tutorials, check out these posts. For tips, tricks and immediate help, be sure to join our FREE Cricut Support Group.




Leave a Reply