See how easy it is to make this cute Rustic Bunny Garland with your Cricut Maker. It’s the perfect way to add a pop of color and rustic style to your Easter decor.
Today is the day for our Create with Cricut Challenge! Every month I team up with a group of super talented bloggers and we all use the same material to make something with our Cricut machines. This month’s challenge was burlap and I’m not going to lie I was stumped on what to make at first.
That was until I realized we had absolutely no Easter decorations up yet. That’s when I knew I wanted to go with an Easter theme. When I was at Hobby Lobby picking up some fabric for another project (which I can’t wait to show you) I saw these colored burlap ribbons. They were 5.5″ x 15′ and I knew they would be perfect to cut Easter bunnies out of.
I also picked up this Yarnology Pom Pom Maker and you guys this thing is seriously awesome! I’ll do a video soon showing you how to use it but it makes making yarn pom poms SO easy! Thanks to my sweet friend Jenn from Housewives of Riverton for the recommendation!
As I cut these bunnies out with my Cricut Maker, which cuts through burlap like butter, it’s seriously awesome to watch, I learned a few things. First, it’s best to clean your mat of all leftover burlap in between cuts. I didn’t do this with the orange bunnies and some of their ears and feet got unraveled. Secondly, it’s best to not use the cheapest burlap you can find when cutting shapes like this. It tends to unravel easily. I bought two different types of burlap ribbon and the more expensive of the two (the blue color) definitely stayed together better.
With that being said these were still super easy to make and the only thing that took more than 5 minutes was making the bunny tail pom poms. It took about 3-4 minute per tail so it’s a great craft to do while catching up on your favorite Netflix show! Let me show you how to put this fun garland together!
SUPPLIES:
If you’re ordering supplies from Cricut.com, make sure to use promo code TFRUGAL to get 10% off and score FREE shipping!
Bunny SVG (I got this one off Etsy for $1)
Scissors
Hot Glue Gun (this is the one I have)
DIRECTIONS
Open up your Cricut Design Space and upload your bunny SVG.
If you are using burlap ribbon that’s 5.5″ wide, size your bunny to 5″ tall. Duplicate the bunny and move your second bunny right below the first bunny and attach.
Duplicate the two bunnies and move them to right past the 6″ mark on the horizontal axis. Attach all 4 bunnies. This makes it easy to put two strips of the burlap ribbon on your mat and cut them all at once.
Duplicate your set of 4 bunnies two more times and change the color so they cut on a new mat.
Send to your Cricut and cut. You’ll want to change the material to burlap and use the rotary blade to cut these bunnies.
Carefully remove the burlap from the mat with your spatula tool.
Use the Yarnology Pom Pom Maker to make the bunny tails.
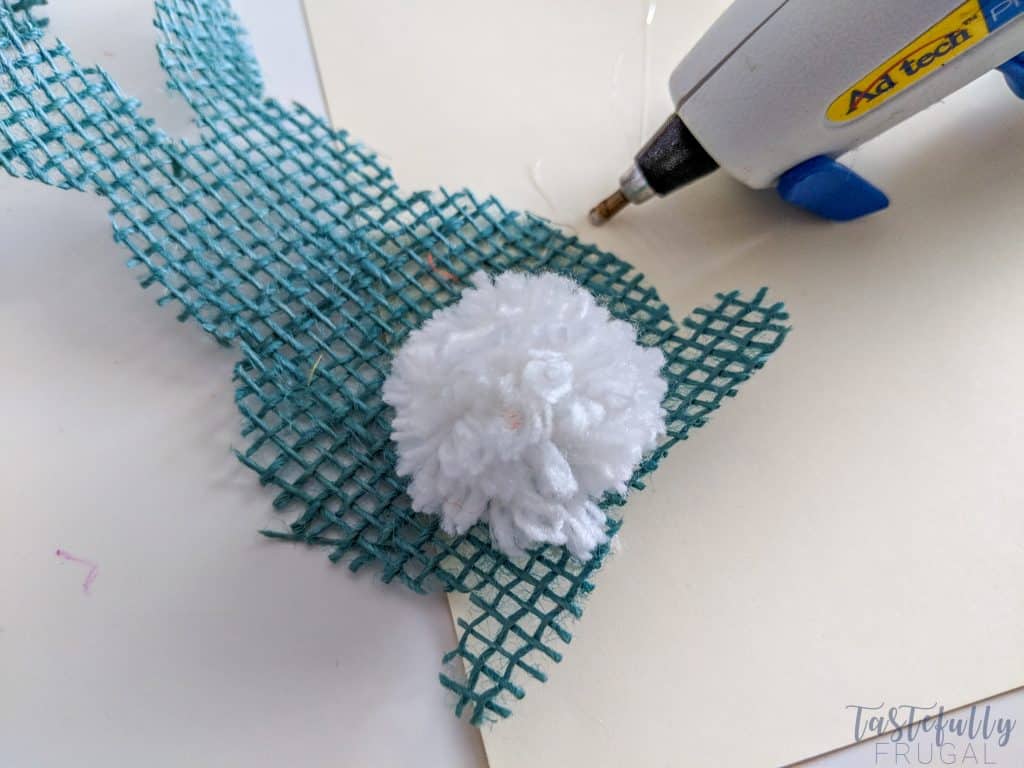
Attach bunny tails to your burlap bunny with a hot glue gun.
Attach your bunny to the garland with a hot glue gun.
And that’s it – easy peasy right?! I love how this garland turned out and my kids love it too!
If you’d like to check out more ways you can use your Cricut check out these posts! Need help with your Cricut? Join our Cricut Support Facebook Group!
Want to check out what other projects you can make out of a cereal box with your Cricut?! Check out what some of my super talented friends did with their Cricuts below.
[inlinkz_linkup id=771746 mode=1]


Stella says
There is no end to innovation and creativity when we have cricut maker. These designs have turned out so well. Loved it!